


The place usually looks “pretty clean” right before a move. Boxes are gone, counters are wiped, and the floors may even look decent from the doorway. Then inspection day gets close, and the problem areas show up fast. Dust on trim, grease inside the oven, film in the refrigerator drawers, grout discoloration, vent covers, and the condition you forgot to document.
Start with the handover date and work backward. Give yourself two weeks for sorting, patching, and pulling things away from walls. Use the final week for room-by-room deep cleaning. Save the last day for floors, appliance interiors, trash removal, and photos of each finished room. If you clean the refrigerator too early, for example, you'll often end up using it again and wiping it twice. Empty it late, defrost if needed, then do the final clean when it will stay shut.
Modern move-out cleaning is tied closely to the inspection record. In many rentals, the move-in checklist is used again during the pre-move-out inspection and when deciding whether any deposit is retained for cleaning or repairs, as shown in Colorado's rental property condition checklist. That's why a good move out cleaning checklist isn't just about making the place look fresh. It's about matching the handover standard inspectors use.
If you want a useful overview of what pros usually include, this guide to the components of a bond clean is a helpful comparison point.
1. Deep Clean Baseboards and Trim Work
Baseboards are easy to ignore because you don't look at them at eye level every day. Inspectors do. Along with door trim and window trim, they collect dust, pet hair, kitchen residue, and scuff marks that make an otherwise clean room feel unfinished.
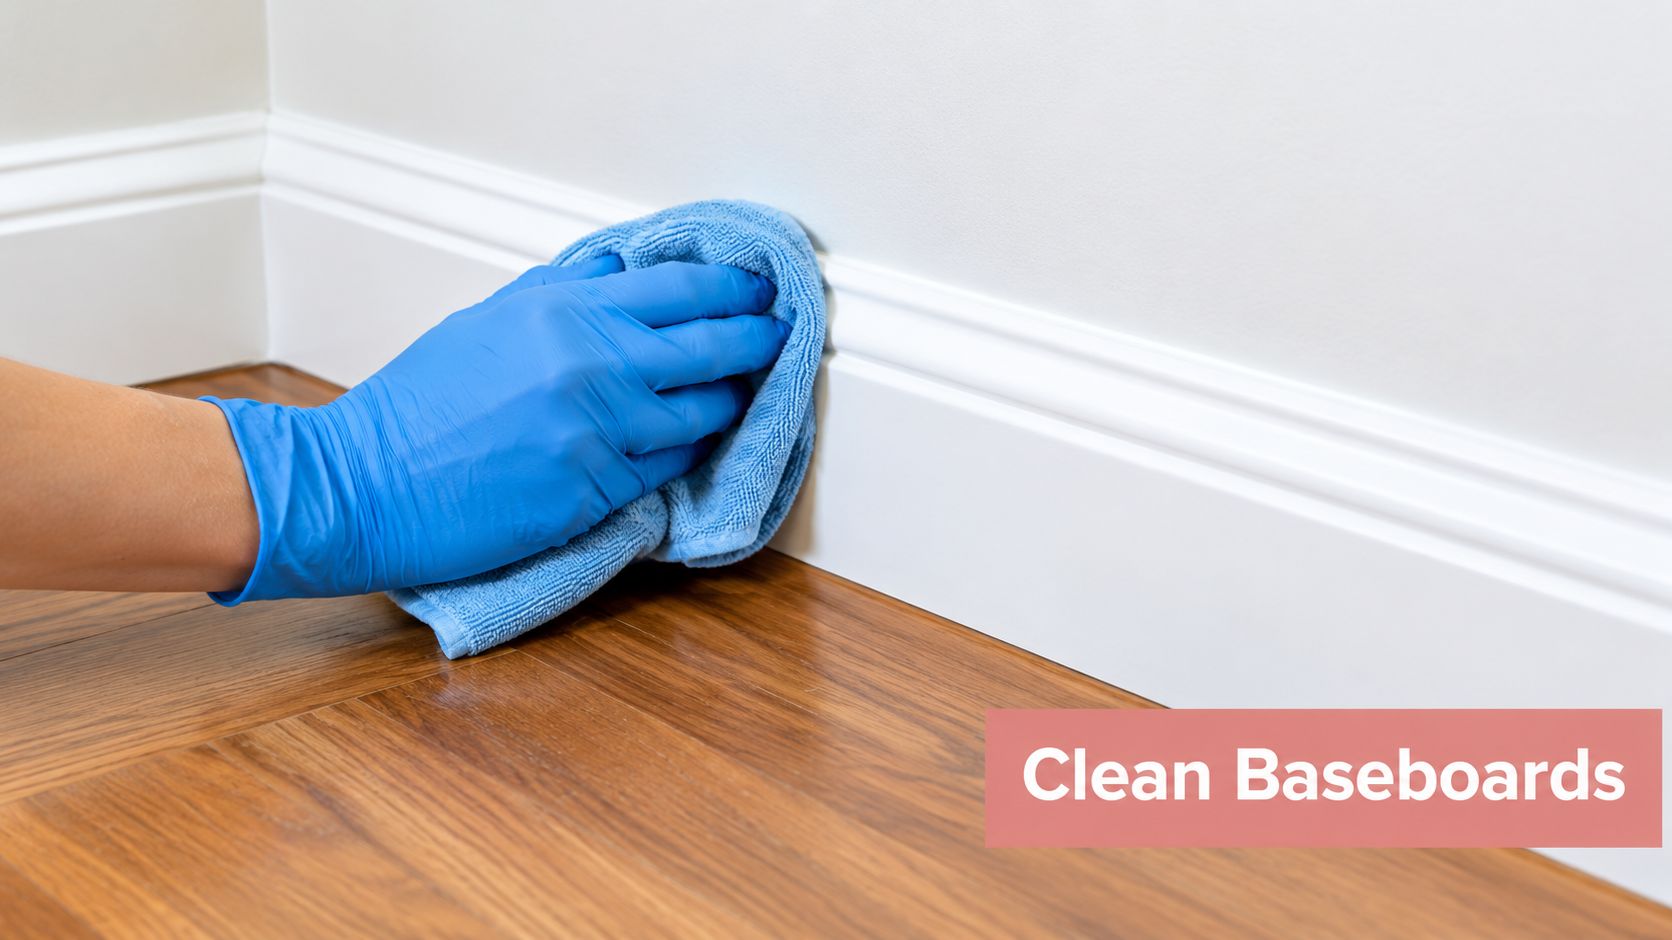
A practical example. A family in Kennesaw gets the house ready to list and thinks the paint has yellowed. Once they wipe the baseboards and door casings with a damp microfiber cloth, the original cream color shows through. The room looks brighter without repainting a thing.
For renters, this matters because trim is one of those details that can support a “not cleaned thoroughly” complaint. In practice, landlords and property managers increasingly use itemized inspection forms that compare room condition against the move-in baseline, rather than relying on an informal walkthrough, as discussed in Buildium's overview of the rental inspection checklist process.
How to clean trim without making more work
Use a microfiber cloth dampened with a mild biodegradable cleaner. Dry dusting often just pushes debris into corners. On textured trim, use a soft brush first, then wipe.
A practical example. In a Marietta apartment, a renter with a shedding dog finds fur packed where the baseboard meets the carpet edge. Vacuuming alone leaves a gray line behind. A brush attachment followed by a damp cloth removes it properly.
- Start high in the room: Dust door frames, window trim, and ledges first so debris falls before you clean the lower trim.
- Work corners carefully: The spot where trim meets a door casing is a common inspection point.
- Separate scuffs from paint damage: If a mark lifts with a cloth, it's cleaning. If the paint is chipped, that's a repair question.
Practical rule: If the room looks clean but still feels dull, wipe the trim before you do anything drastic.
If you're assembling supplies, this list of move-out cleaning supplies helps you avoid buying five overlapping products when two cloths, a brush, and one gentle cleaner will do.
2. Interior Appliance Deep Cleaning Refrigerator, Oven, and Microwave
Appliance interiors decide a lot of move-out inspections. A kitchen can photograph well and still draw a deduction if the refrigerator smells stale, the microwave ceiling is splattered, or the oven door edge is lined with grease. Inspectors and landlords open these doors.
Leave this task for the final stretch, usually in the last two to three days after most packing, patching, and dust-producing work is finished. Clean too early and you risk refilling the fridge, reheating food in the microwave, or tracking fresh dust back into the oven vent and door seals.
A practical example. In a Buckhead rental, the counters are clear and the sink is spotless, but the oven floor still has carbon buildup and the refrigerator crisper drawers hold grit under the tracks. That kitchen does not read as move-out ready, even though the visible surfaces look good.
Use a simple kit here: microfiber cloths, a soft scrub pad, a biodegradable degreaser, dish soap, baking soda, and warm water. Strong oven cleaners save time on heavy buildup, but they also need careful ventilation and can damage nearby finishes if they drip. For light to moderate residue, a slower, lower-toxicity approach is usually enough.
Independent move-out guidance treats appliance interiors as part of deep cleaning, along with other overlooked areas such as vents, cabinet interiors, and floors, as outlined in this move-out house cleaning checklist.
What to clean, and what to leave for repair
Separate dirt from mechanical problems before you spend an hour scrubbing. Grease, food residue, sticky spills, and odor from old food are cleaning issues. Torn refrigerator gaskets, a cracked microwave turntable, broken oven light covers, or an oven that still smokes after residue is removed fall into repair or maintenance.
That distinction matters at handover. Cleaning can improve condition quickly. Broken parts usually need approval, replacement, or a specialist.
- Refrigerator: Empty it fully, remove shelves and drawers, wash and dry them, then wipe interior walls, shelf supports, drawer channels, and door seals. Check under the bottom drawers because crumbs and pooled liquid collect there.
- Oven: Remove racks first. Let degreaser or a baking soda paste sit long enough to soften residue, then scrub the door glass, side rails, floor, back panel, and the lower lip inside the opening where grease hardens.
- Microwave: Clean the turntable, ceiling, inner door, and the area around the vent screen. Steam from a bowl of hot water helps loosen light splatter, but burned-on residue may still need a soft scrub pad.
If the home will be shown for sale or a deposit dispute seems possible, take photos after each appliance is dry and reassembled. Get one wide shot with the door open and one close shot of problem areas you cleaned, such as oven racks or refrigerator drawers. Those photos help if the handover notes are vague later.
A clean appliance passes the open-door test. It should look and smell clean the moment someone checks inside.
3. Bathroom Deep Sanitization Grout, Caulk, and Hidden Areas
Bathrooms often decide the tone of the walkthrough. A clean mirror and fresh towel bar help, but inspectors and buyers usually look lower and closer. They notice the grout at the shower edge, the scale around the faucet base, the dust on the exhaust fan cover, and the buildup behind the toilet.
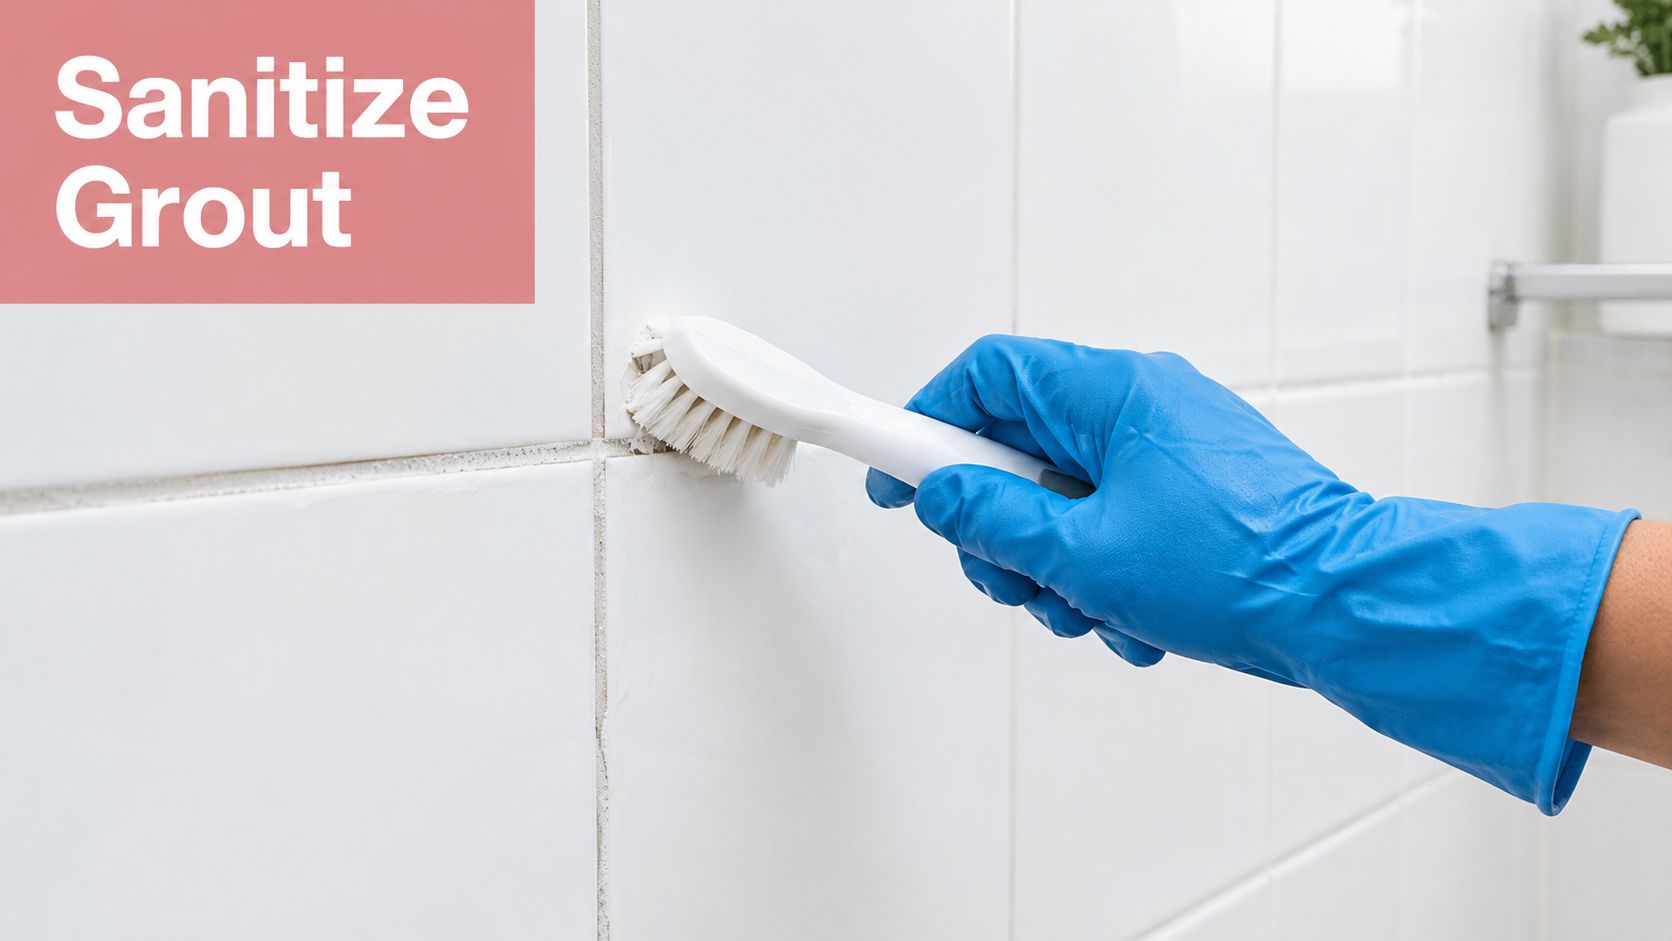
A common move-out problem shows up in the final week. The vanity, mirror, and toilet bowl are already done, but the shower corners still have dark grout lines and the cabinet under the sink has drips, dust, and old product rings. The room smells clean, yet it still looks unfinished in photos and in person.
Start this room about two weeks before handover if the grout or hard-water buildup is heavy. That gives cleaners time to do one pass, let surfaces dry, and decide whether a second pass will solve the problem or whether the issue is failed caulk or damaged grout. Save the last touch-up for the final two days, after daily use is finished.
Use pH-neutral tile cleaner or a mild soap-based product first. White vinegar can help on some hard-water residue, but skip it on natural stone and any surface that etches easily. Refillable spray bottles, microfiber cloths, and a small scrub brush cut waste and usually handle bathroom soils well without resorting to harsher chemistry.
What to clean first, and what to stop scrubbing
Soap film, mildew film, toothpaste residue, and mineral deposits are cleaning issues. Split caulk, missing grout, loose taps, active leaks, and soft drywall near wet areas are repair issues. That line matters during a rushed move because scrubbing damaged caulk rarely changes the result enough to pass inspection.
In one Kennesaw sale prep, brightening the floor grout changed the whole bathroom. In another rental, the caulk around the tub stayed blotchy because it had broken down, not because it was dirty. The right move there was to clean it, photograph it, and note that replacement was separate from cleaning.
Focus on the spots that get missed during routine weekly cleaning:
- Shower corners, grout joints, and the lower tile rows
- Caulk lines at the tub, shower pan, and backsplash
- Around faucet bases and drain trims
- Behind the toilet base and around the seat hinges
- Underside of the sink rim and the cabinet floor below plumbing
- Exhaust fan cover, light trim, and window tracks if the bathroom has a window
For a tighter room-by-room process, Aquastar's bathroom deep cleaning checklist helps catch the hidden areas that often trigger comments at handover.
Optional add-ons depend on the property and the deadline. Glass shower doors may need scale removal. Large primary baths may justify steam cleaning. If mold has spread into porous caulk, drywall, or subflooring, treat that as specialist work, not routine move-out cleaning.
Before the final walkthrough, take photos once every surface is dry. Get one wide shot of the full bathroom, then close shots of the shower corners, grout lines, under-sink cabinet, and toilet base area. Those images are useful if the inspection notes are vague or if a deposit dispute comes up later.
Later in the process, it helps to see the scrub pattern and tool choice in motion:
In a small bathroom, missed detail stands out fast. Clean the visible surfaces, then check the edges, corners, and fixtures that get judged up close.
4. Wall and Ceiling Cleaning Dust, Scuffs, and Marks Removal
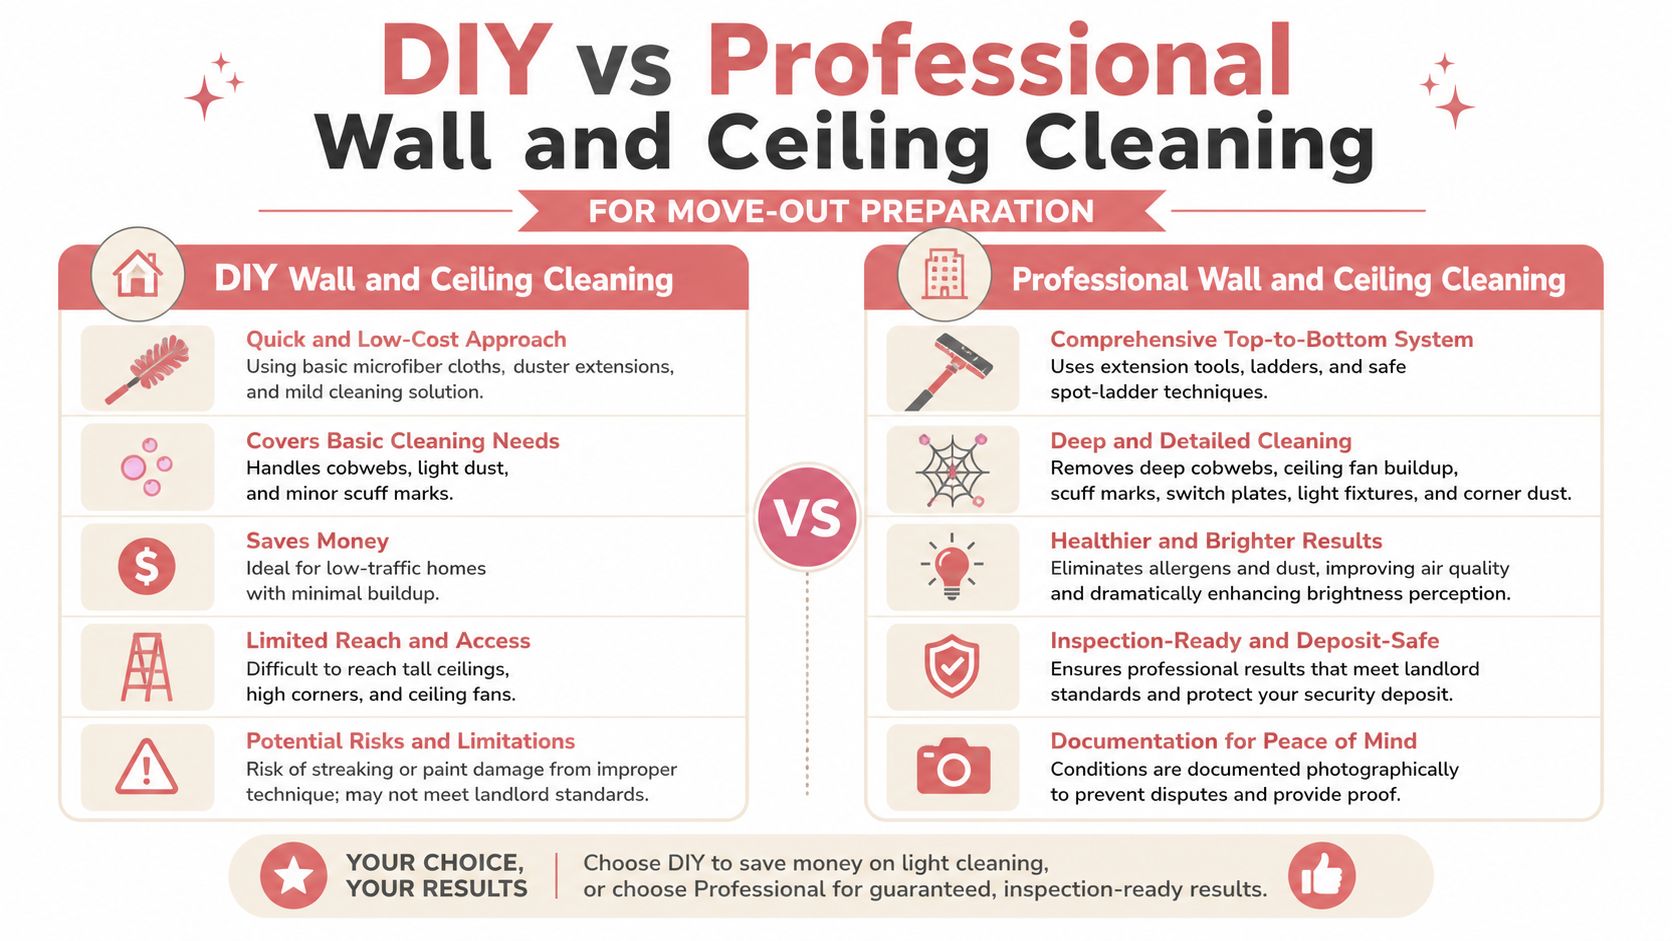
Two weeks before handover is the right time to check walls and ceilings. Once shelves, art, and furniture are gone, dust lines, nail-hole shadows, and hand marks show up fast under empty-room lighting. If you wait until the last day, you end up cleaning above finished floors and creating avoidable rework.
This part of the job is inspection-focused. Landlords and buyers usually notice grime around switches, door frames, vents, and ceiling corners before they notice a wall that was washed carefully but still has old paint wear. That trade-off matters. Clean what reads as dirt first. Treat chips, failed patching, and water stains as repair issues, not routine cleaning.
Use a top-down sequence and keep the supplies simple. A microfiber duster, vacuum with brush attachment, two cloths, a mild plant-based soap, warm water, and a melamine sponge for limited spot work will cover most painted surfaces. Test any cleaner in a low-visibility area first, especially on flat paint, which can burnish or lift if scrubbed too hard.
- Start high: Ceiling corners, light fixture covers, fan blades, and vent grilles drop dust downward.
- Work the touch points: Switch plates, around handles, door frames, and wall edges near stairs or hallways usually need wiping.
- Spot-clean marks carefully: Shoe scuffs and greasy fingerprints often lift. Crayon, smoke residue, or paint transfer may need more than basic cleaning.
- Know when to stop: Stained ceilings, patched drywall, and peeling paint usually need repair or repainting.
A practical example. In an Atlanta move-out, the faster approach is often to dust ceilings and vents during the first week, then do wall spot cleaning after pictures come down, then photograph each room once the surfaces are fully dry. That fits a two-week countdown better than trying to wash every wall in one long session.
For a practical method on painted surfaces, Aquastar's guide on how to clean the walls is a useful reference.
If you want an eco-friendlier setup, skip heavy fragrance and harsh degreasers unless the residue calls for it. Mild soap, diluted vinegar on appropriate non-painted trim, and washable microfiber cloths usually handle dust and light marks with less residue in the room. Save stronger products for kitchens, nicotine buildup, or adhesive residue, and use them only where needed.
Before the final walkthrough, take one wide photo of each room, then closer photos of any wall area that was heavily marked before cleaning. Include repaired nail holes only if they are part of the move-out agreement, since patch-and-paint expectations vary by lease and by sale prep plan.
5. Floor Deep Cleaning and Spot Treatment Carpets, Tile, and Hardwood
Floor condition affects the handover more than renters expect. An otherwise clean room can still fail the eye test if the carpet has visible traffic lanes, the tile feels sticky, or hardwood shows dried spills near the baseboards.
A practical example. A renter in Cobb County vacuums the main rooms the night before key return. The center of the carpet looks fine at first glance, but pet hair is still packed along the perimeter, and a drink spot near the sofa flashes under window light during inspection photos.
Start floor work about a week before the walkthrough if stains or odor are involved. That gives spot treatments time to dry and lets you decide whether a rental machine, a professional carpet service, or simple detail cleaning is enough. Leave the final vacuum or mop for the last 24 hours after furniture is out.
Match the cleaning method to the material
Finished hardwood needs light moisture, soft pads, and a wood-safe cleaner. Too much water can swell edges or leave dull patches. Tile can handle more scrubbing, but grout often holds the discoloration, so the floor may need targeted work rather than a full soaking. Carpet responds best to slow vacuum passes first, then stain treatment, then extraction only if soil is still embedded.
A practical example. In a Kennesaw sale prep, black heel scuffs near the entry lift from hardwood with a damp microfiber pad and a little cleaner, while the nearby area rug needs separate spotting and drying time. One method would not suit both surfaces.
Inspection priorities are usually simple:
- Vacuum or sweep edges, corners, and under radiators or vents.
- Treat isolated spots before cleaning the whole floor.
- Check for residue in grout lines, around toilet bases, and at kitchen transitions.
- Let every surface dry fully before photos or foot traffic.
- Separate cleaning issues from repair issues. Torn carpet, chipped tile, deep scratches, and warped boards need repair, not more product.
Eco-friendlier supplies work well here if the floor is mostly dealing with dust, tracked dirt, and light marks. Reusable microfiber pads, a pH-neutral wood cleaner, and a simple tile cleaner with low fragrance usually cover the job without leaving heavy residue. Save stronger solvents or bleach-based products for specific cases, and only where the flooring material allows them.
The trade-off is time versus result. DIY cleaning usually handles surface soil and minor spotting. Persistent pet odor, carpet matting, heavy grout staining, or finish damage often needs specialist equipment or repair. Before the final walkthrough, take one wide photo of each room and a few close photos of any floor area that needed extra treatment, especially entries, pet zones, and visible stains that improved but did not disappear completely.
6. Kitchen Deep Cleaning Cabinets, Countertops, and Appliance Exteriors
Kitchen inspections are close-range inspections. A room can look fine from the doorway and still fail the handover once someone opens a drawer, runs a hand along a cabinet pull, or spots grease haze on the range hood and fridge door.
Two weeks out, this is the room to assess. If the buildup is light, a careful DIY clean usually gets it done. If grease has hardened around cooking areas, if laminate edges are swelling from old leaks, or if there is mold under the sink, cleaning may improve the appearance but it will not fix the underlying problem.
Start by emptying all storage spaces completely. Cabinets, drawers, pantry shelves, and the area under the sink need to be cleaned from the back forward so loosened crumbs and residue come out instead of getting pushed deeper into corners. Dry each surface after wiping. Inspectors notice tacky shelves and drip marks almost as quickly as visible dirt.
Use products that match the surface. A low-fragrance degreaser or diluted dish soap works well for painted cabinets and many appliance exteriors. Stone counters need a cleaner approved for that material. Wood cabinets and butcher block need less water, not more. The eco-friendly option here is simple and effective: microfiber cloths, a refillable spray bottle, and a surface-safe cleaner with a short ingredient list usually handle food soil without leaving heavy perfume behind.
Focus first on the areas that cost tenants the most during deposit disputes:
- Cabinet fronts near the stove, trash pullout, and main prep area
- Drawer interiors with crumbs, liners, or sticky residue
- Backsplash lines and counter edges where grease settles
- Sink fixtures, drain rim, and the cabinet base under plumbing
- Appliance exteriors, including handles, control panels, and side edges that show once the kitchen is viewed from an angle
A common miss is sequence. Clean upper cabinet fronts and backsplash first, then counters, then lower cabinets and appliance exteriors. Leave the floor for later so you do not track fresh debris back onto cleaned surfaces.
One trade-off matters here. Pulling out a refrigerator or range can improve the result, but it also risks scratched floors, damaged water lines, or lost time late in the countdown. If the lease or sale prep does not require moving heavy appliances, clean the visible sides, toe-kick areas, and exposed gaps well, then document the condition. Save appliance interior work for the earlier appliance section, and treat damaged caulk, leaks, broken hinges, or swollen cabinet panels as repair items rather than cleaning tasks.
For the final handover, take wide photos of the full kitchen and close photos of the cleaned trouble spots: inside the sink cabinet, empty drawers, cabinet faces near the stove, and appliance handles. Renters dealing with a deposit return often benefit from keeping that photo set alongside receipts and a move-out checklist, as outlined in this renter moving-out checklist.
7. Window, Glass, and Mirror Cleaning Interior and Exterior
Two days before a walkthrough, windows often become the reason a room still looks unfinished. Floors are done, counters are clear, but fingerprints on the patio door, dust in the tracks, and a hazy bathroom mirror still catch the eye first in natural light.
For move-out work, glass is an inspection item and a photo item. Clean panes brighten listing photos and final handover photos, but the pass or fail detail is usually in the sill, lower track, and frame corners where debris collects.
Start inside unless the exterior glass is easy and safe to reach from the ground. Upper-story exterior panes, storm windows, damaged screens, and mineral-stained glass often turn into specialist work or a separate service call. Cleaning should improve visibility and presentation. It does not fix failed seals, cracked panes, torn screens, or hard-water etching.
Clean the frame first, then the glass
Begin with dry removal. Vacuum tracks, brush out corners, and wipe the sill before any spray touches the glass. If you wet gritty tracks too early, the dust turns into mud and takes longer to remove.
A practical sequence helps:
- Dust frames, ledges, and blinds first
- Vacuum window tracks and sliding door channels with a crevice tool
- Wipe sills and frame edges with a damp microfiber cloth
- Clean the glass with a reusable microfiber cloth and a squeegee or lint-free towel
- Buff mirror edges and glass corners last to remove residue lines
Use shaded windows first if possible. Direct sun dries cleaner too fast and leaves streaks that show up once the room is photographed.
Eco-friendly products work well here if they are used correctly. A mild plant-based glass cleaner or diluted vinegar solution can handle routine film on interior glass, while plain water and microfiber often work for mirrors. Skip abrasive pads and strong acidic products on tinted film, coated glass, old mirror backing, and painted frames.
Sliding doors deserve extra attention because inspectors notice them fast. Dirty rollers, pet hair in the lower channel, and handprints around the handle suggest rushed cleaning even if the rest of the room is in good shape.
In the two-week countdown, handle all interior glass and mirrors early, then save a short touch-up for the final 24 hours. That second pass matters because windows collect fingerprints during packing. Before handover, take wide photos that show clear glass in natural light and a few close shots of tracks, sills, and bathroom mirrors. Those photos help document condition if a deposit question comes up later.
8. Garage and Exterior Surface Cleaning Debris Removal and Pressure Washing
The garage is where leftover items hide during a rushed move. Paint cans, shelf scraps, old hooks, cardboard, and random hardware often remain until the final hour. Exterior surfaces have the same issue in a different form. Dirt, leaves, and driveway staining make the property feel neglected before anyone even steps inside.
A practical example. In Marietta, a tenant empties the unit but leaves broken shelving and loose trash in the garage corner. The living room passes inspection easily, but the handover still turns into a cleanup issue because the garage wasn't fully cleared.
Clean first, wash second
Remove belongings and sweep debris before any pressure washing starts. Otherwise, water drives dirt into corners and around stored items. On patios and driveways, pretreat stubborn spots if needed and test pressure on an inconspicuous patch.
A practical example. In a Kennesaw home sale, pressure washing the driveway and front walk changes first impression immediately. It doesn't repair cracked concrete, but it does remove surface buildup that distracts buyers and inspectors.
Current turnover guidance increasingly treats move-out work as part of a broader inspection-ready process that includes photos, safety checks, system checks, and consumable replacements, not just visible tidying, as described in this moving-out rental checklist guide.
- Garage walls and floor: Sweep, spot clean, and remove all personal property.
- Patio or balcony: Clear planters, trash, and loose debris.
- Driveway and path: Wash only if the surface can handle it safely.
Pressure washing is cleaning, not repair. Oil saturation, broken concrete, rotted trim, and failing exterior sealants need separate attention.
9. Air Vent, HVAC Filter, and Ductwork Cleaning
A home can look clean and still fail the sniff test during a walkthrough if the vents are dusty and the filter is overdue. Inspectors, buyers, and landlords notice the gray buildup on return grilles because it signals deferred maintenance, even when the floors and counters are spotless.
This task fits best in the final stretch of a two-week move-out plan. Clean vent covers after the heavy dusting, wall wiping, and floor work are done. Replace the filter near the end, not at the start, so the new filter does not spend days catching construction dust, lint, or debris from the rest of the turnover.
If you want to keep supplies low-tox and simple, use a microfiber cloth, a vacuum with brush attachment, and a mild soap solution for the grille covers. Avoid spraying liquid directly into the duct opening. Surface cleaning is part of move-out cleaning. Mold inside ducts, pest contamination, damaged duct runs, and mechanical servicing fall into specialist work.
A practical example. A renter in Roswell finishes the bedrooms early, then skips the return grille in the hallway. At inspection, the unit smells stale when the air kicks on, and the dark dust lines around the grille become a discussion point. Ten minutes of vacuuming, wiping, and a new filter would have dealt with it.
- Return grilles: Vacuum first, then wipe the face and edges where dust collects fastest.
- Supply vents: Remove and wash the cover if possible, or wipe carefully in place to avoid bending the fins.
- HVAC filter: Check the size and airflow direction before installing a replacement.
- Duct openings: Clean only the reachable dust at the surface. Do not present deep duct cleaning as a standard DIY cleaning task.
- Handover record: Take a clear photo of the installed filter and cleaned vent covers for your final documentation set.
There is a real trade-off here. For a rental handover, clean covers and a fresh filter are usually enough unless the lease assigns more responsibility. For a sale, visible vent dust can still undermine the impression of good upkeep, especially if buyers are already looking closely at systems. If you are deciding whether basic surface cleaning is enough or whether a contractor should handle deeper buildup, Aquastar's guide to AC duct cleaning cost is a useful reference.
10. Move-Out Photo Documentation and Final Inspection Preparation
The last hour before key handover is when small misses turn into deposit disputes. A room can look clean during the final walk-through, then show streaks, crumbs, or cabinet dust in harsher light later. Good photos close that gap. They record what was delivered on handover day.
Treat documentation as part of the move-out cleaning checklist, not an afterthought. For rentals, the goal is simple: show that the property was clean, empty, and inspection-ready. For a sale, the same photo set helps confirm condition before buyers, agents, or contractors come through again. Photos do not replace cleaning, and they do not cover repairs or specialist work, but they do help separate a cleaning issue from pre-existing wear, damage, or maintenance problems.
What to photograph before key handover
Work room by room. Take one wide photo from the doorway, then add close shots of any area that commonly gets questioned during inspections.
- Empty rooms, with floors fully visible
- Inside the oven, microwave, refrigerator, and freezer
- Sink basins, faucets, and drain areas
- Countertops and backsplash sections with good lighting
- Inside cabinets, drawers, and closets
- Bathroom toilets, tubs, shower glass, vanity tops, and exhaust covers
- Window sills and tracks if they were part of your cleaning scope
- Garage, trash area, patio, or entry points if those spaces are included in the lease
- Utility details such as the installed HVAC filter, if you replaced it during move-out cleaning
Take the photos after the final wipe-down and after trash is removed. Daylight helps because it shows residue, dust, and wall marks more accurately than warm interior bulbs.
There is a practical trade-off here. A full photo set takes time, and that time often falls on the same day you are loading a truck, returning keys, and finishing touch-ups. For that reason, I suggest building it into a two-week countdown instead of leaving it all for the last morning. During the first week, photograph finished low-traffic areas such as guest rooms, linen closets, and the garage once they are done. In the final two days, photograph kitchens, bathrooms, entry floors, and appliance interiors because those are the spaces most likely to change.
Short video can help with disputed condition, especially for appliance interiors and empty-room walkthroughs, but still photos are easier to sort, send, and match to a checklist.
If a landlord or buyer raises a question later, a clear image of the oven floor, refrigerator shelves, or cleaned vanity top is more useful than a general room shot. Organize the files by room and date, then keep receipts for supplies, carpet service, or any optional add-ons you hired out. If you want a simple model for that record, Aquastar's guide to before-and-after cleaning photos shows a practical format.
Use eco-friendly supplies where they make sense, but be realistic. Microfiber cloths, diluted dish soap, white vinegar for glass, and oxygen-based bathroom products work well for many final-pass tasks and leave less chemical odor before inspection. Heavy grease, etched hard-water staining, broken caulk, and chipped surfaces are different issues. Those may need stronger products, repair work, or a specialist, and the photo record should show condition clearly rather than trying to hide it.
Before handing over the keys, do one final inspection with your checklist and phone in hand. Open every cabinet once. Check corners, switch plates, and the inside edge of the front door. Flush toilets, run faucets briefly, confirm appliances are empty, and make sure all personal items are out. Then save the photo set to cloud storage and email it to yourself so it is easy to retrieve if questions come up later.
10-Point Move-Out Cleaning Comparison
| Item | Implementation Complexity 🔄 | Resource Requirements ⚡ | Expected Outcomes ⭐ / 📊 | Ideal Use Cases 💡 | Key Advantages ⭐ |
|---|---|---|---|---|---|
| Deep Clean Baseboards and Trim Work | Moderate, manual, detail work; bending and reach required | Microfiber cloths, soft brushes, eco cleaner; moderate time | ⭐⭐⭐⭐, visible aesthetic improvement; fewer allergens; better inspection results 📊 | Move-out inspections, staging, post-construction touchups | Restores trim appearance; improves air quality; boosts inspection success |
| Interior Appliance Deep Cleaning, Refrigerator, Oven, Microwave | High, specialized steps per appliance; time‑consuming for ovens | Degreasers, steam/eco solutions, scrapers, gloves; possible extra labor | ⭐⭐⭐⭐, hygienic, inspection‑ready appliances; protects deposits 📊 | Move-out, sale prep, heavy-use kitchens, post-construction | Removes baked‑on grease; restores function and appearance; food‑safe results |
| Bathroom Deep Sanitization, Grout, Caulk, Hidden Areas | High, may need containment and grout tools; detailed sanitization | Mildew‑preventative solutions, grout tools, ventilation; longer time | ⭐⭐⭐⭐⭐, removes mold/mildew; reduces health risks; strong inspection impact 📊 | Move-out with mold concerns, remediation prep, sale staging | Eliminates health hazards; prevents costly claims; improves bathroom appeal |
| Wall and Ceiling Cleaning, Dust, Scuffs, Marks Removal | Moderate, requires ladders/extension tools and safe practices | Extension poles, microfiber, ladder, soft brushes; quick with right tools | ⭐⭐⭐⭐, boosts brightness and perceived cleanliness; allergen reduction 📊 | Move-out, staging, post-construction dust cleanup | Rapid visual improvement; often quick ROI for inspections |
| Floor Deep Cleaning & Spot Treatment, Carpets, Tile, Hardwood | High, multiple methods per surface; drying time considerations | Carpet extractor, pH‑neutral cleaners, spot treatments, drying time | ⭐⭐⭐⭐⭐, removes stains/allergens; essential for deposit protection 📊 | Pet rentals, sale prep, heavy-traffic homes, post-construction | Restores floors; extends lifespan; prevents deduction disputes |
| Kitchen Deep Cleaning, Cabinets, Countertops, Appliance Exteriors | Moderate‑High, material‑specific approaches; degreasing needed | Degreasers, material‑specific cleaners, time for interiors/exteriors | ⭐⭐⭐⭐, greatly improves perceived kitchen value; hygiene boost 📊 | Move-out, seller prep, heavily used kitchens, staging | Restores finishes; reduces pest/health risks; high impact on valuation |
| Window, Glass, and Mirror Cleaning, Interior & Exterior | Moderate, safety concerns for exterior access; technique‑dependent | Squeegees, microfiber, distilled water, ladder; weather dependent | ⭐⭐⭐⭐, increases natural light and curb appeal at low cost 📊 | Curb appeal for listings, move-out inspections, post-construction | Inexpensive, high visual payoff; quick to complete with proper tools |
| Garage & Exterior Surface Cleaning, Debris Removal & Pressure Washing | Moderate, equipment skill required; surface sensitivity | Pressure washer, debris removal/haul, PPE; stain pretreatment | ⭐⭐⭐⭐, dramatic curb‑appeal improvement; removes algae/stains 📊 | Driveways/garages before showings, post-construction exterior cleanup | Fast visual transformation; protects exterior surfaces when done correctly |
| Air Vent, HVAC Filter & Ductwork Cleaning | Moderate‑High, visible vents easy; deep ducts need pros | Filters, vacuums, HVAC tools or professional service; possible cost | ⭐⭐⭐, improved air quality and system efficiency; inspection benefit 📊 | Health‑sensitive homes, post-construction, pre‑move‑in maintenance | Improves indoor air quality; can reduce energy costs; demonstrates maintenance |
| Move-Out Photo Documentation & Final Inspection Preparation | Low‑Moderate, systematic process and coordination | Camera/phone with timestamps, checklist template, cloud backup | ⭐⭐⭐⭐, strong dispute prevention; objective proof for deposits 📊 | Move-outs, property management, tenant‑landlord disputes | Provides indisputable evidence; speeds resolution; low cost relative to disputes |
Leave the Home Ready for the Walkthrough
The best move out cleaning checklist is the one that matches the handover timeline. Don't start with random scrubbing. Start with the date you lose access to the property, then build backward so the final clean happens after the home is empty and before the walkthrough.
Here's the printable version I'd use.
Two weeks before
- Check the lease and handover notes: Look for cleaning instructions, carpet requirements, key return details, and whether any professional services are expected.
- Sort cleaning versus repairs: Dirty grout is cleaning. Broken blinds, damaged caulk, leaks, and large wall damage are repair issues.
- Book help if needed: This is the right time to line up support for carpet cleaning, windows, pressure washing, or post-construction detail work.
- Gather supplies and plan eco-friendly options: If you prefer biodegradable products, choose them early so you're not improvising at the end.
One week before
- Pack aggressively: Empty closets, clear shelves, and remove wall items so hidden dust and marks are visible.
- Do the first deep pass: Start with trim, walls, ceilings, vents, cabinet interiors, and bathroom buildup.
- Schedule a pre-vacate check: Some renter guidance recommends a walkthrough about seven days before move-out so small issues can be fixed before charges escalate, as noted earlier.
- Take progress photos: They're useful if you uncover old damage or need to show what changed during your cleanup.
The day before
- Finish kitchen and bathrooms fully: Clean cabinet interiors, counters, backsplashes, fixtures, tubs, showers, grout, and mirrors.
- Empty and clean appliances late: Refrigerator, oven, and microwave should be cleaned close enough to handover that they won't be used again.
- Remove all trash and belongings: Leftover personal items and uncleared garbage can lead to hauling or extra cleaning fees, a point reflected in this move-out cleaning checklist with removal reminders.
- Leave floors for last: Vacuum, mop, or treat spots once the rest of the dust-producing work is done.
Final inspection day
- Open blinds and use daylight: You'll catch smears, crumbs, and missed corners faster.
- Photograph every room systematically: Include closets, cabinets, appliance interiors, windowsills, bathrooms, garage, and exterior access areas.
- Check keys and access items: Make sure remotes, mailbox keys, garage openers, and entry keys are accounted for.
- Do one last slow walkthrough: Stand in each doorway and look high, low, and behind doors.
If you're a renter, remember that cleaning standards often turn on the distinction between normal wear and tear and chargeable condition issues. If you're a homeowner preparing to sell, the same details affect buyer impression and inspection confidence. Either way, a calm room-by-room process works better than trying to “deep clean everything” in one exhausted day.
If you're listing a home, this advice on declutter before listing pairs well with a handover-focused cleaning plan.
For local households in Kennesaw and North Atlanta, Aquastar Cleaning Services can fit into this process as a practical option for customizable move-out cleaning, along with appliance, window, garage, driveway, carpet, and post-construction add-ons. That kind of support is especially useful when the deadline is fixed and the final result needs to be inspection-ready, not just generally clean.
Aquastar Cleaning Services, LLC provides move-in and move-out cleaning for homes in Kennesaw and the North Atlanta area, with optional help for appliance interiors, windows, garages, driveways, and post-construction detail work. If you want a room-by-room clean that lines up with a real handover checklist, visit Aquastar Cleaning Services, LLC to review the available services and request a quote.