


You pull back the curtains and find a gray line of dust, a damp corner, and a paper towel that turns dirty almost immediately. You wipe again, but the sill still looks streaky. The best way to clean window sills isn't to use more spray or scrub harder. It's to remove loose debris, clean with controlled moisture, and work out why that corner keeps getting wet.
Why Window Sills Need More Than a Quick Wipe
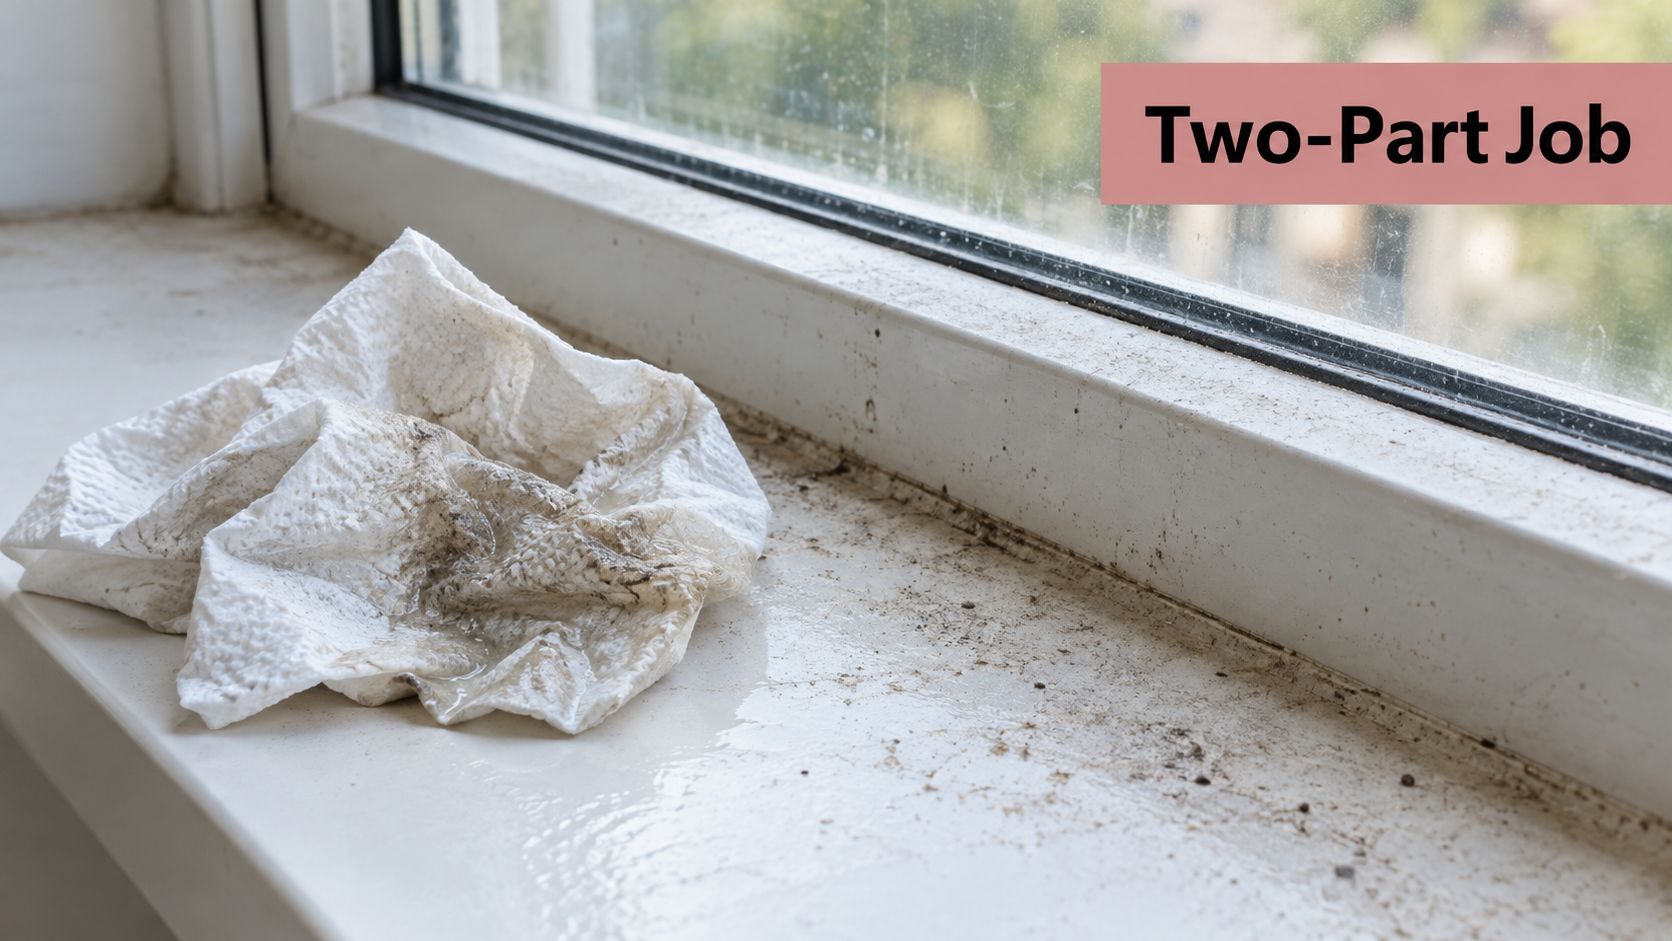
A wet paper towel can make a dusty sill look worse before it looks better. Loose dust and fibers mix with water, leaving a gray film that gets pushed into corners instead of lifted away. The sill may look acceptable from across the room while residue remains beside the frame.
That's why dry debris removal comes before damp cleaning. A vacuum with a soft brush attachment collects the loose material, then a lightly damp cloth removes the remaining film. The EPA's household mold and moisture guidance supports detergent-and-water cleaning of hard surfaces followed by complete drying, rather than relying on chemical treatment alone.
This is the familiar result of wiping before removing loose dirt:
Look for water before choosing a cleaner
Before starting, remove anything sitting on the sill and inspect the back edge. Check for condensation, a damp joint, or damaged caulk. In humid North Atlanta homes, treating the dirt without noticing the water can leave you repeating the same job.
For example, a bedroom sill may look dusty across its flat surface but stay damp behind a curtain. Clean the whole accessible area, not just the visible front ledge, and note whether moisture returns after the surface has dried.
Practical rule: Judge the job by the corners and seams, not just the broad surface that's easiest to wipe.
Keep the working kit simple:
- Particle removal: A HEPA-filtered vacuum with a soft brush attachment.
- Surface cleaning: Microfiber cloths, warm water, and mild detergent.
- Detail work: A small soft brush and a separate drying towel.
Don't choose a stronger cleaner just because the first wipe comes away dirty. Change the cloth face, inspect the finish, and distinguish ordinary residue from a moisture problem. Cleaning should leave the sill dry and intact, not merely brighter.
Matching Your Method to the Sill Material
A stained wood ledge and a vinyl window track shouldn't receive the same amount of water. Start by checking the surface and its condition. If you're unsure whether the material beneath paint is wood or MDF, use the more cautious approach: a barely damp cloth and immediate drying.
An intact finish matters as much as the material underneath it. Peeling paint, open joints, and exposed edges deserve restraint. EPA basic mold-cleanup guidance recommends detergent and water for hard surfaces, thorough drying, and cleaning rather than painting or caulking over mold.
Sill Material at a Glance
| Material | Water Tolerance | Safe Cleaner | Avoid |
|---|---|---|---|
| Sealed or stained wood | Keep moisture tightly controlled | Finish-compatible mild detergent on a barely damp cloth | Standing water and forceful scrubbing |
| Unsealed wood | Treat as moisture-sensitive | Seek material-specific advice before wet treatment | Soaking or repeated wet passes |
| Painted wood or MDF | Use minimal moisture, especially at damaged edges | Mild detergent, tested discreetly | Flooding, harsh solvents, and prolonged wet contact |
| Vinyl or PVC | Damp cleaning without filling channels | Mild detergent and water | Abrasive pads and unapproved chemicals |
| Coated metal or composite | Follow the finish's care instructions | Compatible mild detergent | Assuming every coating tolerates the same treatment |
| Sealed stone | Confirm the sealer's cleaning requirements | Compatible mild detergent | Unapproved stain treatments |
For example, approach a painted bathroom sill with an intact coating differently from one with a swollen corner. The intact surface may need routine cleaning. The swollen area needs an assessment of moisture damage before further scrubbing.
On stained wood, a persistent mark isn't permission to keep wetting it. Compare the mark with the examples in this guide to water stains on wood, then decide whether you're dealing with removable surface soil or a finish problem.
A stain that remains after gentle cleaning may need finish repair, not a stronger cleaning product.
The Two-Stage Cleaning Process That Actually Works
Set out your cloths before starting so you won't have to rinse a dirty rag while detergent dries on the sill. Keep cleaning cloths separate from the final drying towel. This house-cleaning supplies checklist can help organize the rest of your kit.
The process is easy to remember visually. For actual application, put cleaner on the cloth rather than spraying into the track.
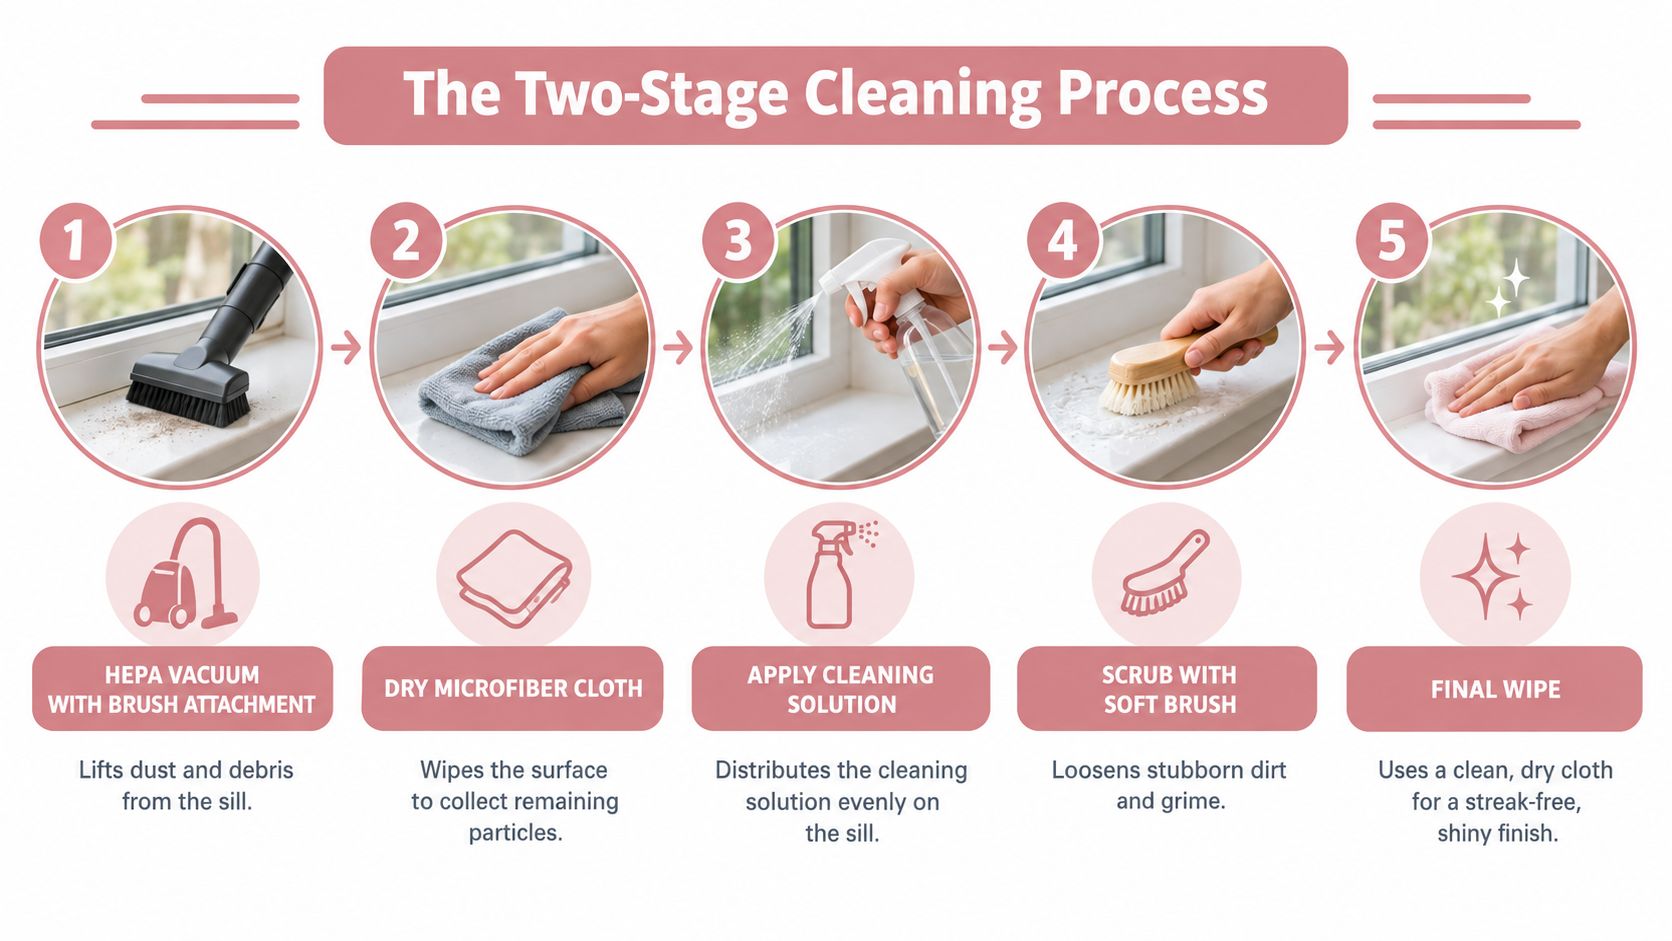
Capture loose material first
Move the vacuum's soft brush slowly along the ledge, accessible track, and corners. Don't scrape the nozzle across paint. Use the detailing brush gently where the attachment won't reach, keeping the vacuum nearby to collect loosened particles.
The EPA's indoor particulate-matter guidance explains the value of HEPA filtration and damp dusting for limiting particle redistribution. Keep people with asthma or allergies away during vacuuming because disturbed dust can temporarily increase exposure.
A dry microfiber cloth is an option for light, ordinary dust, but don't aggressively dry-wipe a heavily loaded sill. For accumulated fine dust, the EPA's mold-remediation cleaning guidance also identifies HEPA vacuuming as useful for collecting settled particles before the remaining film is wiped away.
Remove the film without flooding the sill
Dampen a microfiber cloth with warm water and a small amount of mild detergent, then wring it thoroughly. Test a hidden patch before cleaning the visible finish.
- Start with the cleaner area: Wipe the broad ledge before tackling the dirtier track.
- Expose clean fabric: Fold the cloth and change faces as it picks up soil.
- Detail gently: Use a soft brush in corners and around accessible drainage channels without pushing dirt deeper.
- Remove cleaner: Follow with a separate cloth lightly dampened with clean water.
- Finish dry: Towel the edges, joints, underside, and corners.
For a narrow track, wrap the cloth around your fingertip rather than forcing a bulky fold through it. If the cloth is leaving water behind, wring it again.
Watch the motions as a practical companion to the written routine:
Check the dried surface from an angle under a lamp or daylight. A fresh white cloth that still picks up gray residue signals another controlled damp pass, not necessarily a stronger product.
Eco-Friendly and Conventional Products Worth Keeping on Hand
A useful cleaning caddy doesn't need a separate bottle for every mark. Mild detergent is the everyday choice, while specialty products should earn their place through surface compatibility and a clearly identified problem.
A plant-based dish detergent or castile soap can be considered for routine work if its label permits the surface. Do not assume a product is suitable because it says natural. Choose something you can use sparingly and remove completely, especially where children or pets can reach the ledge.
This comparison is a starting point for organizing products, not permission to use every option on every finish:
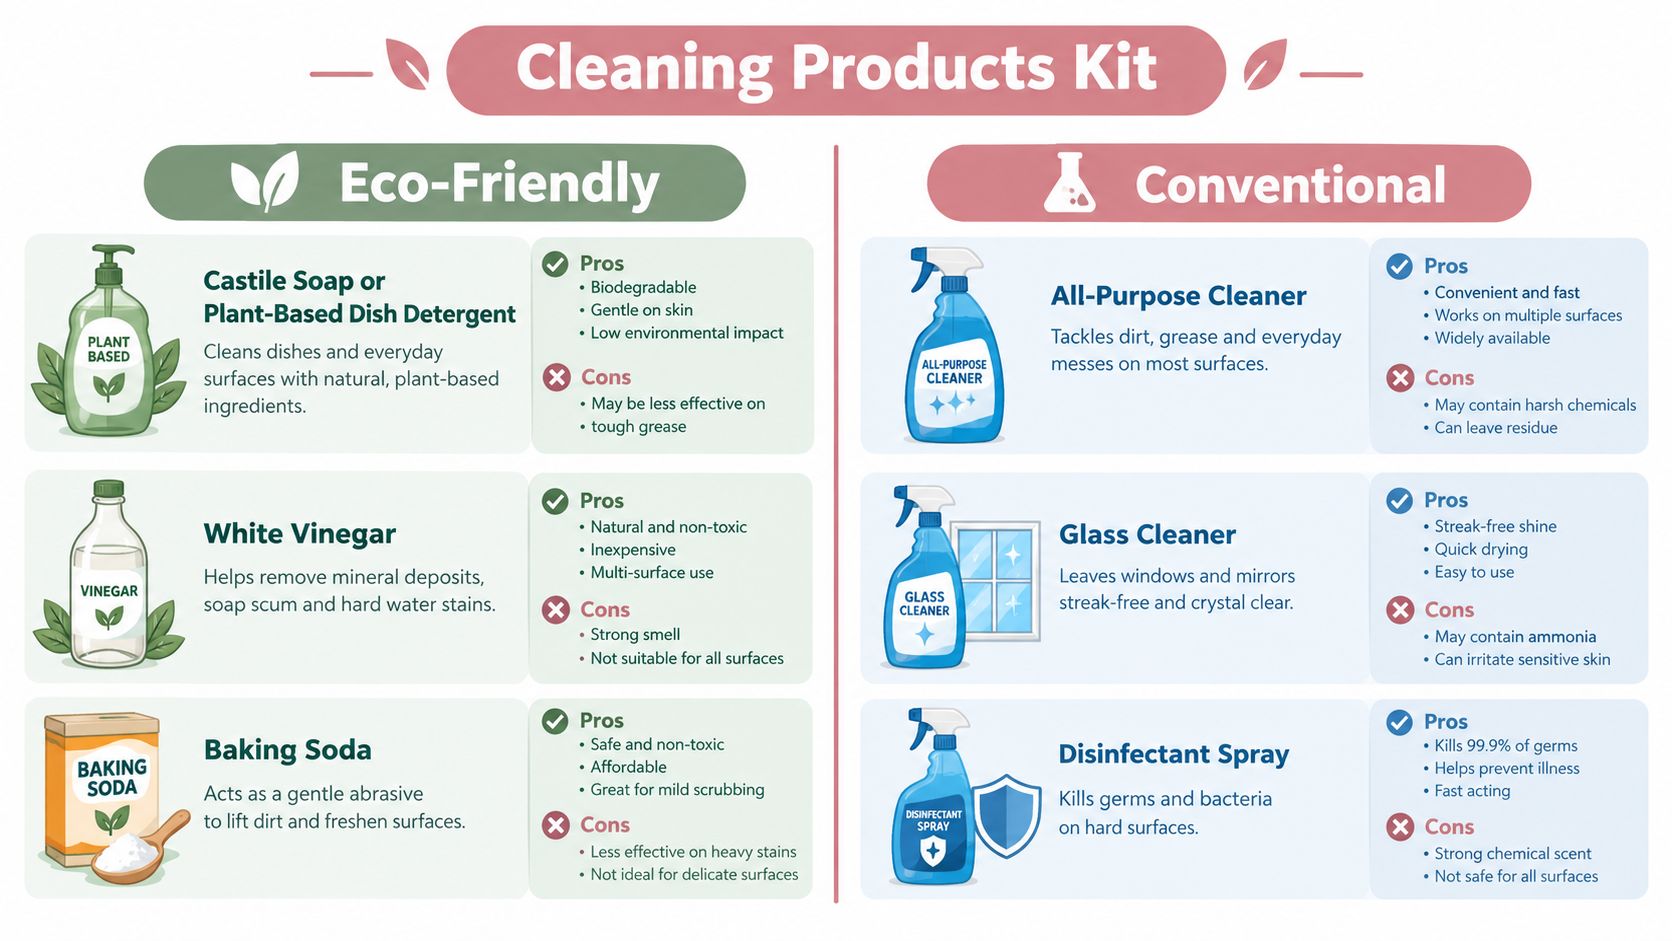
Keep specialty products conditional
White vinegar, baking soda paste, and hydrogen peroxide aren't interchangeable substitutes for detergent. For an unknown painted or wood finish, leave them in the cabinet until you've checked the surface's care instructions.
- White vinegar: Consider it for mineral film only where the surface manufacturer explicitly permits it.
- Baking soda paste: Treat it as a scrubbing treatment that requires compatibility checks, not as a universal gentle option.
- Hydrogen peroxide: Reserve it for approved spot-treatment applications rather than routine wiping.
- All-purpose cleaner: Use only when its label includes the sill material.
- Glass cleaner: Keep pane cleaning separate from frame cleaning. This non-toxic glass-cleaner guide is useful for planning that separate task.
Bleach belongs in a different category. For visible mold on suitable hard, nonporous surfaces, the CDC allows a solution containing no more than 1 cup of household laundry bleach per 1 gallon of water, alongside other cleaning options, in its household mold guidance. That isn't a routine sill-cleaning recipe or a reason to bleach an intact painted finish.
Product choice: Use the least complicated compatible cleaner that removes the residue. Don't turn an ordinary dusting job into a chemical-treatment job.
For example, a dusty vinyl bedroom sill doesn't need a disinfectant spray because it's dirty. Start with the routine method and assess what, if anything, remains.
Spot Treatments for Mold, Mildew, and Stubborn Stains
A black line isn't enough to identify mold, and a pale ring isn't enough to choose a stain remover. Start with the surface condition, moisture history, and response to gentle cleaning. Don't try to distinguish mold from mildew by color alone.
Use this visual as a reminder to separate stain types, but follow the material-specific precautions below rather than treating its household recipes as universal instructions:
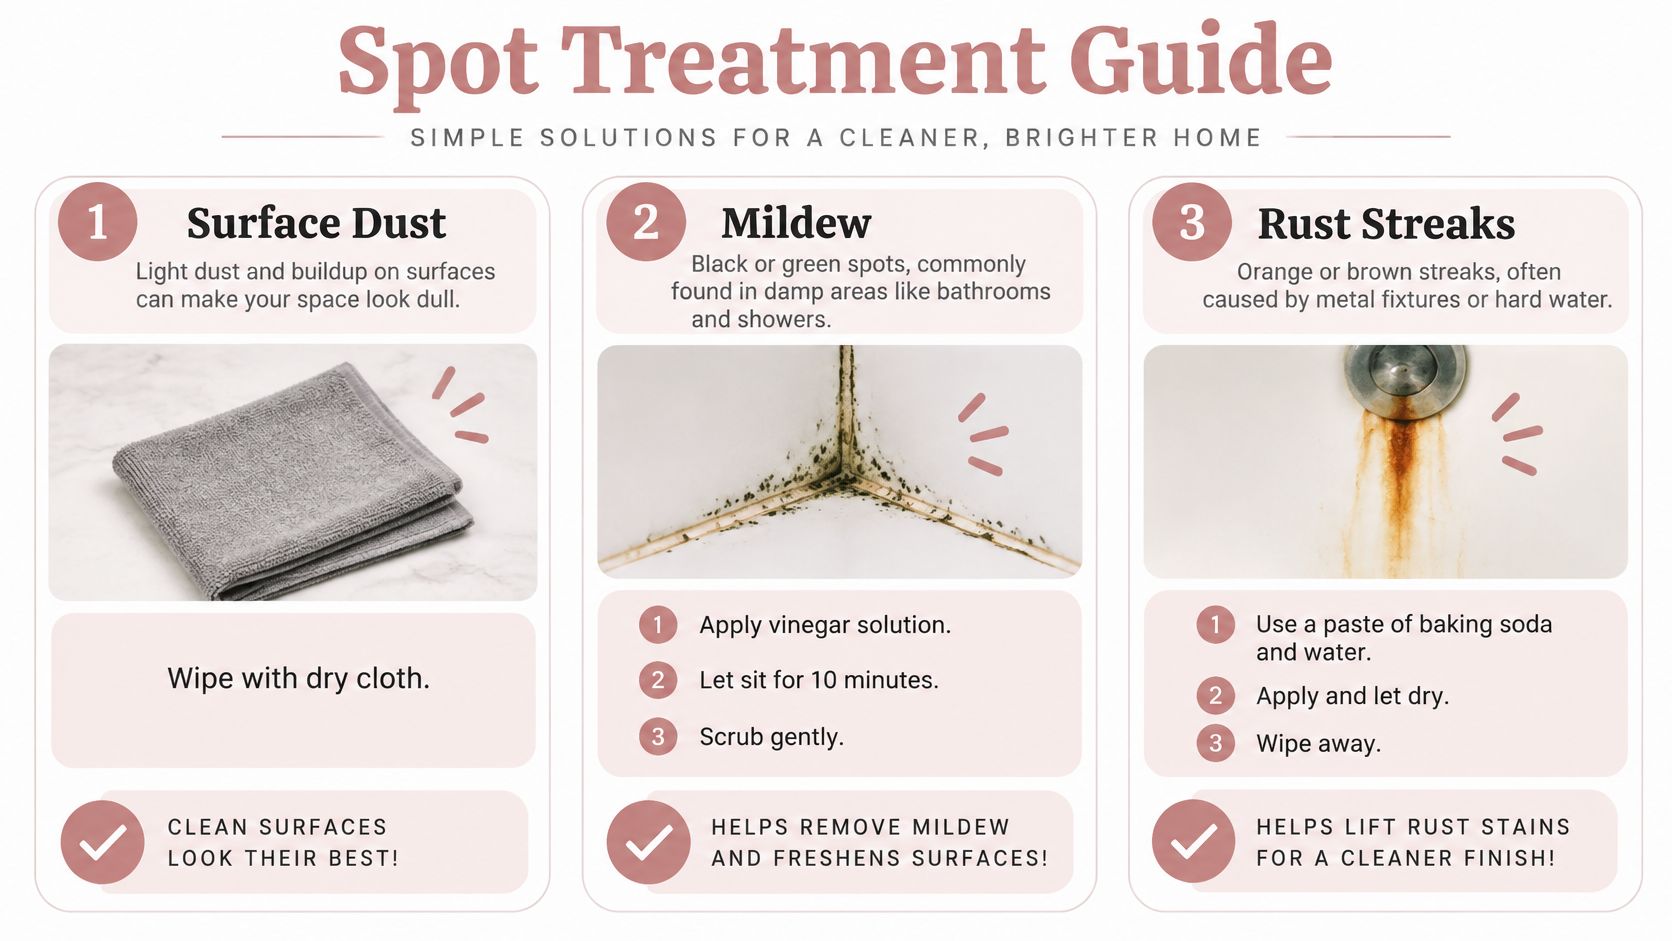
Handle suspected mold as a separate job
For a small moldy area on a suitable hard surface, wear at least a NIOSH-approved N95 respirator, protective gloves such as nitrile, and fully protective goggles. The CDC's mold-cleanup safety guidance specifies this protection and warns never to mix bleach with ammonia or any other cleanser.
Ventilate when safe, avoid touching growth with bare hands, and clean with detergent and water. Remove remaining cleaner and dry completely. Don't proceed as though moldy debris were ordinary household dust.
For example, if spots repeatedly appear behind a bathroom curtain, address the moisture pattern alongside cleaning. Home Dehumidifier Reviews' discussion of when an exhaust fan beats a dehumidifier offers context for choosing a bathroom moisture-control approach.
Separate remaining stains from remaining dirt
A water ring on stained wood may remain after the surface is clean. Don't automatically soak it with peroxide: only attempt a peroxide spot treatment if the finish's care instructions support it, beginning in a hidden area. If the finish changes appearance or the wood is swollen, stop and consult a refinisher.
For tape residue, try holding a lightly damp, warm soapy cloth against the spot briefly, then gently wipe. Don't prolong the wet contact on wood or MDF. Paint drips that resist this gentle approach are better left for finish-specific advice than attacked with a scraper.
A rust-colored mark beneath a planter needs the same restraint. Remove the planter, clean the surface, and assess the remaining mark before choosing a specialty treatment.
- Surface residue: Continue only while gentle cleaning produces progress.
- Persistent discoloration: Check material-specific guidance, including this baking-soda stain-removal guide, before trying another product.
- Softness or deterioration: Stop treating it as a cosmetic cleaning problem.
Protecting the Finish and Keeping Sills Clean Longer
A maintenance schedule should match the room, not just the calendar. A quiet dining-room window may need little attention between cleanings, while a bathroom sill needs checking whenever condensation appears. In a pet household, inspect the window your dog uses as a lookout rather than assuming every room needs equal work.
Humidity control helps protect the work you've already done. The EPA recommends keeping relative humidity within 30–60%, ideally 30–50%, and drying wet materials within 24–48 hours in its mold-prevention guidance. Those drying limits aren't an invitation to leave cleaning water sitting until tomorrow.
Use a condition-based maintenance rhythm
Treat the following as a practical starting schedule, not a universal requirement:
- Weekly check: Inspect for loose dust, pet hair, and damp corners. Capture debris rather than flicking it into the room.
- Monthly cleaning: Assess whether a controlled damp wipe is needed.
- Seasonal inspection: Look at caulk, accessible seals, weather-stripping, and the surrounding finish.
- After condensation or rain: Check any sill with a history of dampness and investigate recurring water promptly.
Keep planters from sitting directly against vulnerable wood, and check beneath trays rather than assuming they're dry. Leave enough access behind decorative objects to inspect the back edge without emptying the whole room.
Track maintenance is a separate decision from surface cleaning. If you're considering lubrication, consult the window's instructions and this window-track lubrication guide instead of spraying a product onto a dirty assembly.
Don't use a fan across established mold if the airflow could spread spores. For recurring dampness, repair the leak or improve moisture control rather than extending the cleaning routine indefinitely.
A sill that needs constant rescue cleaning deserves a moisture inspection, not a larger bottle of cleaner.
Quick Reference and When to Call a Professional
Keep a short checklist in the cleaning caddy:
- Do: Identify the material, collect loose debris, use a compatible mild cleaner, and finish dry.
- Don't: Flood joints, scrub damaged paint, mix cleaners, or conceal mold beneath fresh caulk.
- Pause: Stop when the sill is soft, swollen, flaking, or repeatedly wet.
Recurring mold after rain calls for leak assessment. Persistent finish damage may need a window contractor or refinisher rather than a house cleaner.
Post-renovation dust also deserves a different response. The EPA's lead-safe renovation cleanup procedures specify HEPA vacuuming followed by wet wiping and, for regulated work, cleaning verification. Ordinary housekeeping shouldn't substitute for required lead-safe cleanup.
For routine buildup in Kennesaw and North Atlanta homes, a one-time detail cleaning can reset neglected window areas; recurring housekeeping can maintain accessible surfaces. Ask whether sills and tracks are included, what products will be used, and whether the team is insured.
Aquastar offers recurring housekeeping, one-time deep cleaning, and window cleaning as an additional service, with insured and bonded teams serving Kennesaw and North Atlanta. Visit Aquastar Cleaning Services, LLC to request a customized quote, ask about eco-friendly products, and confirm sill-and-track cleaning in your service checklist.