


A pH-neutral, no-rinse tile cleaner, approximately pH 7–9 and diluted as the label directs, is the best everyday choice for glazed ceramic and porcelain. Natural stone needs a stone-specific, pH-neutral product instead.
That makes the popular bucket of vinegar and water a poor default. Your tiles might tolerate it, but the cement grout between them can gradually deteriorate with repeated acidic cleaning.
If you're wondering what is good to clean tile floors, start with two questions: What's the floor made of, and what's stuck to it? Kitchen grease, muddy paw prints, and bathroom mineral deposits don't call for the same treatment.
Best Cleaner for Each Tile Type
For glazed ceramic and glazed porcelain, choose a pH-neutral, no-rinse tile cleaner and measure the dilution exactly. Use a clean microfiber mop rather than adding extra cleaner to make the solution stronger.
The grout, finish, and sealer matter alongside the tile. A bottle labeled for ceramic isn't automatically suitable for the marble border around it.
Best everyday cleaner by tile and grout type
| Tile or grout type | Best everyday cleaner | Avoid | Practical note |
|---|---|---|---|
| Glazed ceramic | pH-neutral tile cleaner, no-rinse | Vinegar-heavy mixes, bleach for routine mopping | Suitable for daily mopping with microfiber when needed |
| Glazed porcelain | pH-neutral tile cleaner, no-rinse | Abrasive scrubbing pads | A soft head protects the glaze |
| Unglazed or matte porcelain | pH-neutral cleaner at half strength only if the label permits that maintenance dilution | Oil-based products, heavy soaps | Surface texture can hold soil, so rinse thoroughly |
| Natural marble, travertine or slate | Stone-specific pH-neutral cleaner | Lemon, vinegar and other acids | Check for a sealer before choosing |
| Unsealed cement grout | Neutral cleaner with a soft nylon brush | Acids and strong alkaline detergents | Avoid flooding joints with water |
| Textured or high-traffic entry tile | Neutral cleaner after dry grit removal | Greasy, residue-forming soaps | Sweep or vacuum before every wet mop |
Check the finish before choosing
Matte doesn't automatically mean absorbent. Dense porcelain can have a textured finish that traps dirt without absorbing much water. Don't halve a cleaner's concentration unless its directions allow it, because an under-strength solution may leave soil behind.
For natural stone, identify both the stone and any surface treatment. Marble and travertine are particularly vulnerable to acidic etching; slate and its sealers also need product-specific compatibility checks.
Grout needs its own attention. For a bathroom with dirty joints, grout care from Melbourne Tiling Services would be a separate consideration from polishing the tile face.
Put the choice into practice
Say your glazed-porcelain kitchen has dried dinner spills. Remove crumbs, soften the spills with the approved neutral solution, then lift them with microfiber rather than a scouring pad.
A natural-stone entryway covered in porch dirt needs a different bottle: a stone-approved cleaner, after thorough dry soil removal. A textured ceramic entry may need a soft brush to reach the recesses.
For bathroom joints, grout care from Melbourne Tiling Services, from Melbourne Tiling Services P/L, provides additional maintenance context. Keep vertical surfaces separate too: this bathroom wall cleaner guide addresses a different cleaning task, not blanket approval to use shower products on floors.
Match the product to the tile first and the soil second.
Why Tile Type and Soil Change the Answer
Washing a greasy frying pan works better when you choose something that lifts oil. Tile cleaning follows the same principle, except you also have grout and finishes to protect.
The kitchen example makes the distinction clear.
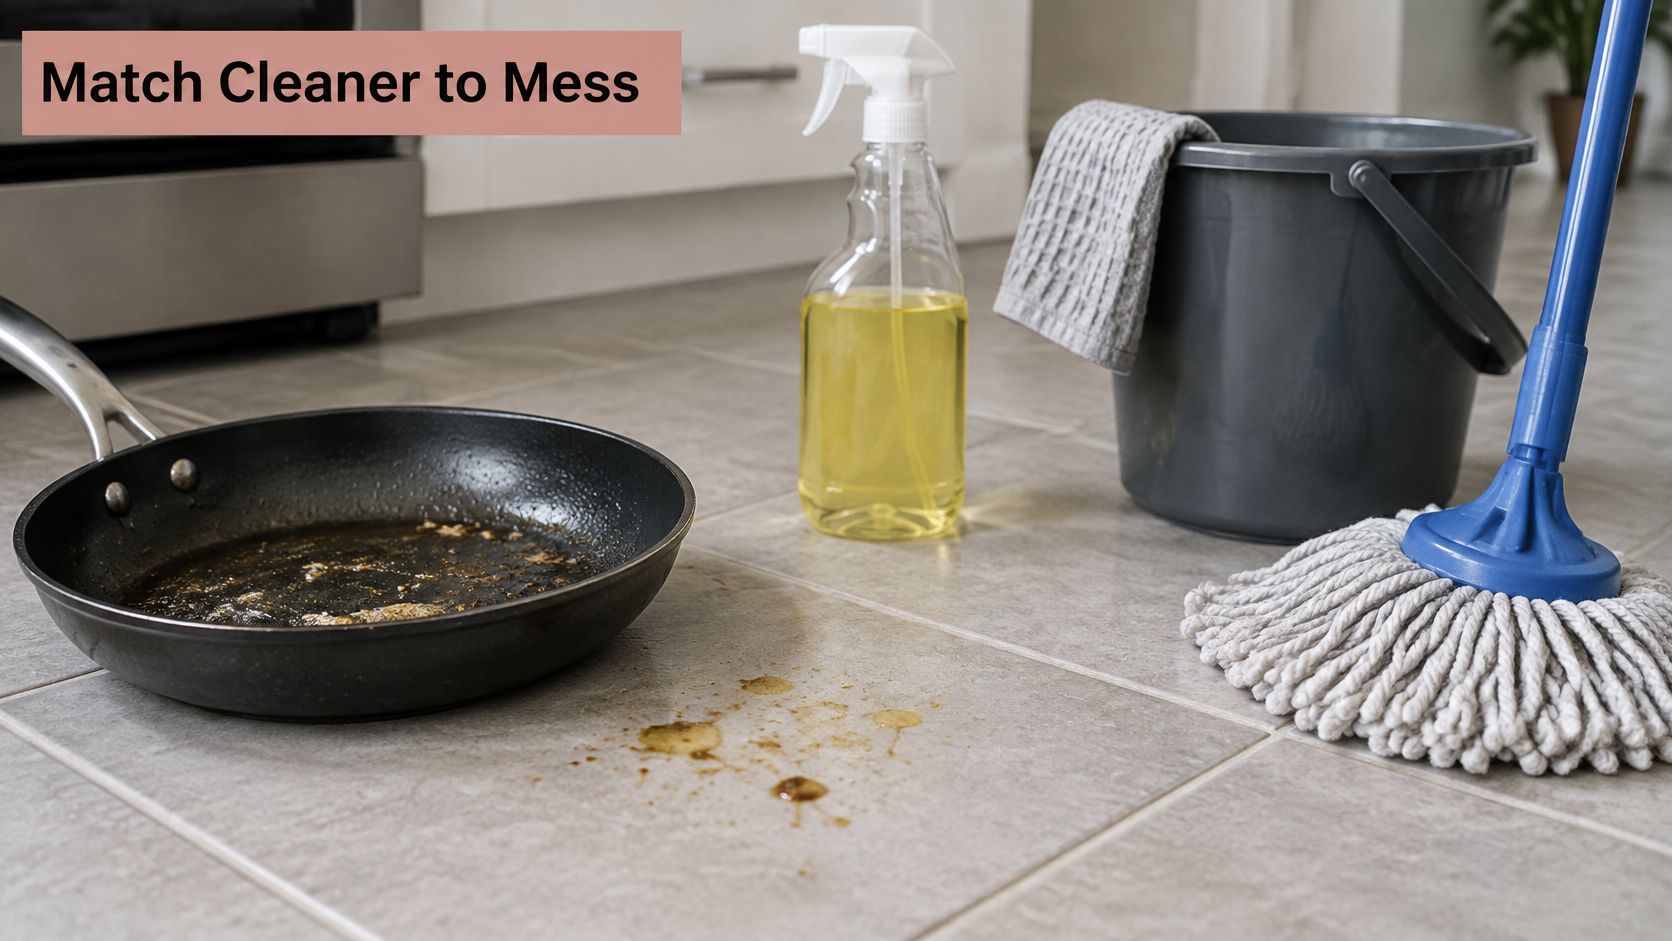
Alkaline cleaners suit organic messes, including grease, cooking oils, and food proteins. Acids dissolve mineral deposits such as scale, rust, and urine salts, but that doesn't make them good weekly floor cleaners.
Why vinegar can damage grout
The Tile Council of North America's grout-cleaning guidance explains that acids attack the alkaline cement matrix in grout. Repeated use can leave joints rough, weakened, discolored, or eroded.
For example, someone who regularly rinses a dark-grouted kitchen with vinegar may eventually notice lighter, rougher joints. A dull film on nearby tiles could also involve detergent residue or minerals, so don't assume every cloudy patch is acid damage.
Practical rule: A cleaner that removes a deposit can also attack part of the floor. Removing something quickly doesn't establish compatibility.
Acid cleaning belongs to occasional restoration on confirmed acid-resistant ceramic or porcelain. That requires pre-wetting cement grout, keeping the treatment wet for the minimum label contact time, then using the specified alkaline neutralization and thorough rinsing. Never use hydrochloric or hydrofluoric acid, and don't acid-clean new grout before its manufacturer's required cure.
Separate cleaning from appearance
If you're comparing finishes for a future renovation, Premier Builders' flooring tile inspiration for 2026 can help frame appearance choices. Cleaning compatibility still comes from the tile, grout, and sealer manufacturers.
A visual demonstration can help connect product choice with technique.
Finally, check what remains after mopping. Haze and a sticky feel suggest leftover detergent; that film can attract fresh soil and reduce slip resistance.
DIY Solutions Versus Store-Bought Cleaners
Homemade mixtures can cost less, but inexpensive ingredients aren't automatically gentle. Judge the finished solution by its compatibility, cleaning performance, and rinsing needs.
DIY and store-bought cleaners compared
| Option | Relative cost | Grout safety | Residue and streaking | Best use |
|---|---|---|---|---|
| Dish soap and warm water | Low | Fine in small amounts on compatible grout | Film if not rinsed | Light everyday soil |
| White vinegar and water | Low | Poor on cement grout | Can streak glazed tile | Isolated hard-water spots on approved glazed ceramic, keeping it off grout |
| Baking soda paste | Low | Gentle scrubbing pressure needed; abrasive | Little residue if thoroughly rinsed | Spot scrubbing compatible grout lines |
| Store-bought pH-neutral tile cleaner | Moderate | Good when approved for the installation | Low, often no-rinse | Routine maintenance on most tile |
| Store-bought stone cleaner | Higher | Good when stone- and grout-approved | Low | Marble, travertine and slate |
| EPA-registered tile disinfectant | Higher | Label-dependent | Label-dependent | Only when disinfection is needed |
These cost categories are shopping comparisons, not fixed prices. Concentrates, bottle size, and dilution can change the cost of a cleaning session.
Why the neutral bottle usually wins
The IICRC tile, stone, and grout tip sheet supports no-rinse, approximately pH 7–9 cleaners for routine maintenance rather than repeated acidic or highly alkaline cleaning. The practical advantage is controlled cleaning without unnecessary chemical attack or heavy residue.
Dish soap can handle a small sticky spill, but a generous squirt in the mop bucket creates extra rinsing work. If you choose it, use a small amount and remove the remaining soap with clean water.
Baking soda is different: it works partly through abrasion. Keep it away from polished stone and delicate finishes, test first, and don't assume a kitchen ingredient can't scratch.
Don't confuse damaged grout with dirty grout
Say a rental kitchen has been mopped repeatedly with vinegar and the white joints now look grey and dull. A neutral cleaner and soft brush may remove embedded soil, but they won't rebuild grout that acid has eroded.
That distinction prevents escalating through stronger homemade mixtures. Rough, crumbling joints need assessment rather than more scrubbing.
Choose a cleaner for the surface it's labeled to clean, not because you recognize every ingredient.
For lower-impact shopping, the eco-friendly floor cleaner guide offers another starting point. Still check dilution, surface approval, and rinse requirements.
Buy a neutral product for everyday maintenance, reserve homemade solutions for limited compatible jobs, and judge disinfectants by their registered label claims, not their ingredient list.
How to Mop Tile Floors Step by Step
Good mopping removes dirt instead of spreading it into grout lines. Set out a soft broom or hard-floor vacuum, microfiber mop, measuring container, bucket, and the appropriate cleaner before starting.
The CDC's facility-cleaning guidance identifies floors as surfaces that can be cleaned with soap and water or a suitable surface cleaner. It also distinguishes that soil-removal step from disinfection.
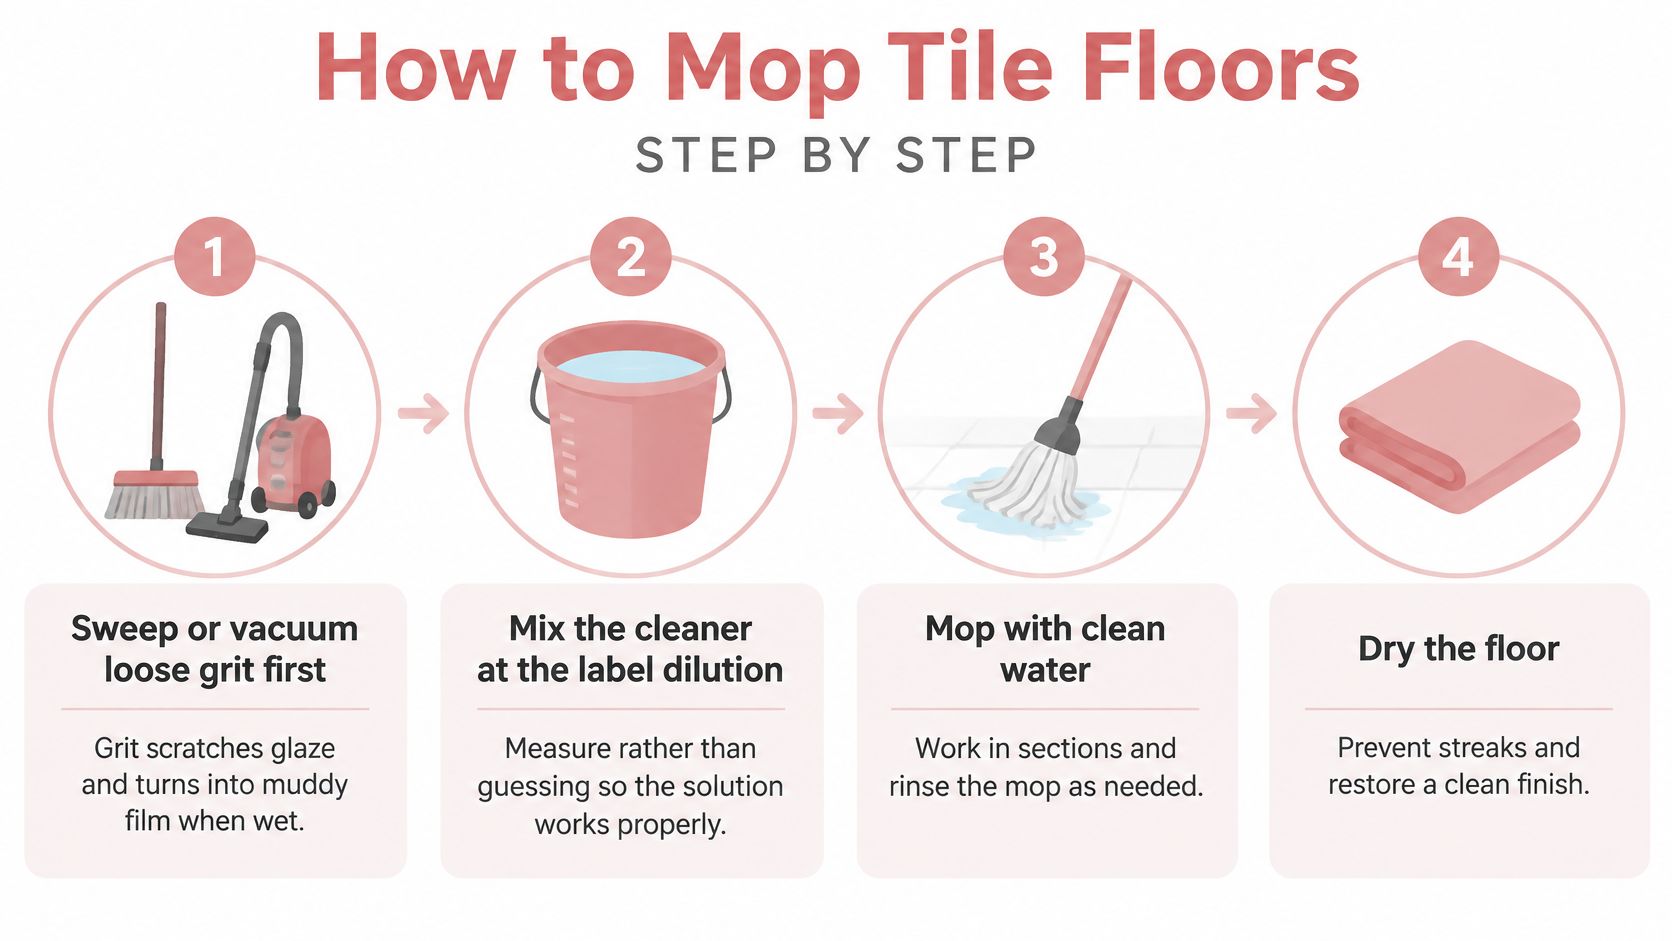
This graphic summarizes the workflow.
Prepare before adding water
Sweep or vacuum loose grit first. Reach along baseboards, under accessible table edges, and into grout joints. Skipping this turns loose dirt into muddy streaks and can drag abrasive grit across the finish.
Measure the cleaner into water at the label dilution, using a dedicated measuring container. Guessing encourages overuse, while adding an extra capful usually creates more residue rather than better cleaning.
Test an inconspicuous spot. Let it dry, then compare the color and sheen with the surrounding floor. Checking only while it's wet can hide a change in finish or leave you unaware of residue.
Wring the microfiber pad until it's damp, not dripping. You need enough solution to loosen soil, but standing water in porous grout isn't a cleaning advantage.
Lift soil without redistributing it
Work in manageable sections toward the exit. Move the mop across each section with overlapping passes, lifting loosened dirt rather than repeatedly pushing it ahead. Don't trap yourself behind a wet floor.
Change cloudy water and replace or wash a visibly dirty pad. If the mop leaves grey trails, stop and refresh the equipment instead of making more passes with the same dirty solution.
Rinse when required. Use a fresh pad and clean water if the product requires rinsing or the dried surface feels tacky. A no-rinse label assumes the correct dilution and appropriate soil load, not unlimited cleaner.
Let the floor dry fully, then inspect it in angled daylight near a window. Look for streaks, missed food spots, and dirty joints before putting rugs and movable items back.
Adjust for the actual room
For cooking grease around the stove, use a tile-compatible mildly alkaline degreaser, diluted as directed, followed by a clean-water pass when needed. A bathroom floor with light soap residue may respond to neutral cleaner and gentle agitation; stubborn mineral-bound soap scum needs a separately approved treatment.
An outdoor stamped-concrete patio shouldn't automatically receive the indoor tile routine. For that adjacent surface, Concrete Resurfacing Products cleaning tips, from Concrete Resurfacing Products, Inc., provide material-specific context.
A properly cleaned floor has an even appearance and no gritty, greasy, or sticky feel once dry. Gloss isn't the test, because matte tile should still look matte.
When Disinfecting Tile Is Necessary
A floor that only sees footprints and crumbs calls for cleaning alone, because mopping already removes the soil that germs live in. A disinfectant earns its place when something specific lands on the tile: raw meat juice in the kitchen, illness-related contamination, bodily fluids, or a pet accident serious enough to warrant it.
Sequence matters here. Remove soil before disinfecting, since dirt left on the floor sits between the product and the surface it needs to reach, and choose a product whose label permits your floor material. Cleaning, sanitizing, and disinfecting are three different label claims, and this sanitizers and disinfectants guide explains what each one promises.
A disinfectant label example and its wet time
The EPA Bath & Tile Disinfecting Cleaner label specifies 1:1 dilution and a 10-minute wet time for the bacteria listed below, with pre-cleaning required.
| Product or label | Target organisms | Dilution or wet time | What it means at home |
|---|---|---|---|
| EPA Bath & Tile Disinfecting Cleaner | Pseudomonas aeruginosa, Staphylococcus aureus, Salmonella enterica | Equal parts product and water; 10-minute wet time | Pre-clean, then keep the floor visibly wet for the full contact time |
Other registered labels carry their own organisms, dilutions, and contact times. Read the exact directions on the product in your hand rather than borrowing numbers from this example.
Keep the surface wet long enough
The EPA's disinfectant guidance requires the surface to stay visibly wet for the full label contact time. A pass that looks wet for a moment and then dries does not count, and contact time is not how long you spend moving the mop.
In a small bathroom, clean the floor first, then treat one section you can watch. Start a timer, keep the section visibly wet until it ends, and complete any rinsing the label requires before letting anyone walk through.
- Check the claim: The directions must cover your surface and the task, whether that is sanitizing or disinfecting.
- Measure accurately: A stronger mixture is not a substitute for the tested dilution.
- Control access: Keep children and pets away from the wet floor, ventilate as the label directs, and stay off treated areas until they dry.
A quick spray-and-wipe can make a floor look clean while never meeting the disinfectant's required exposure time.
Treat mold as a separate problem
Mold points to a moisture problem, and sometimes to damaged material underneath, so bleaching the floor on a standing schedule will not solve it. Address the moisture source and any affected grout or caulk. Never mix bleach with vinegar, ammonia, acids, or other cleaners, and do not assume a bleach solution is compatible with colored grout or natural stone.
Grout Care and Safe Routines for Kids and Pets
Porous cement grout can absorb dirty liquid, so good care starts with prompt spill removal and controlled moisture. Scrubbing harder isn't always the answer, especially if joints are already rough or deteriorating.
Work a neutral cleaner along dirty joints with a soft nylon brush, then lift the loosened soil with a clean cloth. Avoid wire brushes and don't leave the joints submerged while cleaning the rest of the room.
Protect grout without over-treating it
Unsealed cement grout may benefit from a suitable penetrating sealer. Ask the grout manufacturer or installer which product fits the installation and how to maintain it; epoxy grout and previously treated joints can have different requirements.
- Check the material: Confirm whether you have cement grout, epoxy grout, or another joint product.
- Inspect the condition: Cracks, loose material, and missing sections need repair rather than stronger cleaner.
- Remove local soil: Treat the dirty joint instead of soaking the entire floor.
The vinegar and grout cleaning guide helps explain why a familiar homemade habit deserves caution. Once grout has lost material, a brighter appearance won't mean its structure has been restored.
Handle pet messes separately
For a pet accident, keep children and animals away, blot up the liquid with disposable material, and clean the compatible surface. If odor remains, choose an enzyme cleaner specifically labeled for that tile and grout, and follow its application and rinsing directions.
Don't combine an enzyme cleaner with disinfectant or another treatment. If both are necessary, follow the products' instructions for separate use rather than improvising a mixture.
For routine family cleaning, a fragrance-free, low-residue product is a sensible choice when sensitivities are a concern. Avoid homemade blends containing concentrated essential oils around cats; get veterinary advice before introducing scented products into their environment.
Family routine: Clean when you can keep the room closed off until the floor is fully dry.
Say a household with a retriever and toddlers mops after dinner. The useful change isn't a special clock time, it's blocking access, removing food and paw dirt first, and allowing complete drying before anyone returns.
Wipe spills promptly, clean dirty grout locally, and reopen the room only when the floor is dry enough to walk on safely.
Choose Your Tile Cleaner and Set a Routine
The best routine is one you can repeat without turning every spill into a deep-cleaning project. Keep the approved cleaner, clean mop pads, and soft grout brush together so ordinary upkeep stays straightforward.
Start with these decisions:
- Identify the surface: Confirm the tile, grout, and any sealer before replacing your cleaner.
- Separate the jobs: Keep disinfectant for defined hygiene needs rather than everyday dust.
- Stop dirt at the door: Put a dry, washable mat at exterior entrances and clean it regularly.
- Schedule by use: Sweep busy entryways and kitchens frequently, then wet-mop when soil calls for it.
- Inspect the joints: Look regularly for dark spots, haze, persistent odor, or damaged grout.
Make the routine fit your household
For example, a home with dogs might use a back-door mat, sweep the kitchen each evening, and choose Saturday for routine damp mopping. That's a starting schedule, not a rule: muddy weather may call for extra spot cleaning, while a little-used room may need less.
Keep paws away from the bucket and freshly treated flooring. The safe floor cleaners for dogs guide can help with product-selection questions, but the actual bottle's directions still govern its use.
If upkeep is difficult to maintain, our professional cleaning is another option. We use gentle, biodegradable cleaning solutions and can customize cleaning around the home's needs and condition.
This week, take one concrete step: identify your tile type and read the label on the cleaner you already own. If they don't match, replace the cleaner before your next mop.
Aquastar Cleaning Services, LLC offers deep cleaning that may include sweeping and mopping appropriate hard-floor surfaces. For help with a home that needs more than routine upkeep, visit Aquastar Cleaning Services, LLC to request a free deep-cleaning estimate and discuss your tile-floor needs.