
You've got boxes in the hallway, a truck reservation on the calendar, and a landlord or buyer who's going to judge the place by what they see in the first few minutes. A moving cleaning checklist turns that chaos into a plan, so you can clean in the right order, avoid redoing work, and leave the home inspection-ready. Use this as a practical, room-by-room guide for the final stretch, with a printable timeline mindset that helps you decide what to do yourself, what to save for a pro, and how to keep the process efficient, including eco-friendly options where they make sense.
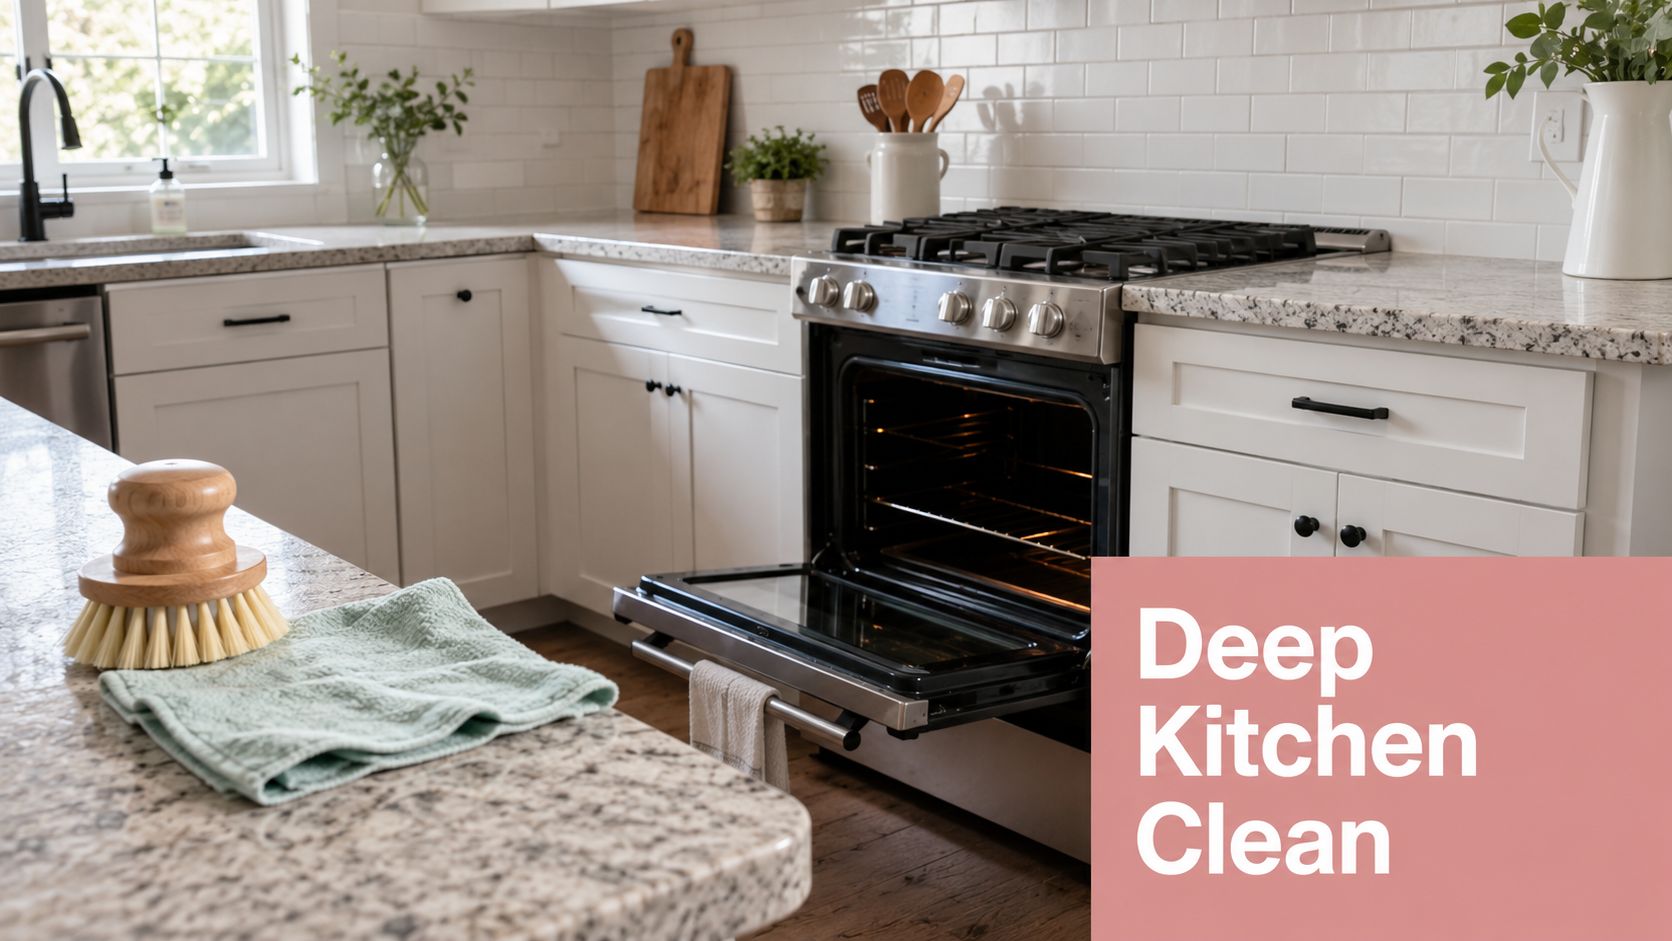
1. Deep Clean Kitchen Appliances and Interiors
Start the kitchen early, because appliances take the longest to dry and the mess inside them is what landlords notice first. Professional-style move-out checklists commonly include ovens, refrigerators, microwaves, and dishwashers, plus cabinet interiors, counters, and appliance exteriors, because food residue and grease are obvious in an inspection. AspenClean's move-out checklist and Tidy's landlord-facing guide both emphasize that the kitchen isn't finished until the inside of the appliances is clean and ready for handoff, including oven racks, refrigerator shelves, microwave splatter, and dishwasher cleaning cycles, as shown in AspenClean's move-out cleaning checklist and Tidy's landlord checklist for move-out cleaning.
A strong order of operations saves time. Pull everything out first, remove food, then clean the fridge, oven, microwave, and dishwasher so the interior surfaces can dry while you work on the rest of the home. If a previous tenant cooked heavily, I'd treat the oven and range hood as essential, because that's where grease tends to be most visible.
A practical kitchen sequence
- Remove food first: Empty the fridge and freezer, then wipe shelves and drawers so you're not trapping crumbs or moisture.
- Use food-safe degreasers: Biodegradable degreasers work well on food-contact surfaces when you're trying to keep the clean eco-friendly.
- Let cleaners sit: Give degreaser time to work before scrubbing, so you don't waste effort on hardened residue.
- Photograph parts as you remove them: That helps when racks, filters, or trays need to go back in the right place.
- Check the manual: Appliance manuals often spell out what the manufacturer allows, and that beats guessing.
A good example is a tenant who clears a refrigerator coil area that's clogged with dust before turnover, then tackles the oven racks and microwave splatter once the refrigerator is already empty. If that sounds more than you want to handle, this is one of the first places a service like Aquastar Cleaning Services kitchen cleaning makes sense, because kitchen detail work is labor-heavy and easy to miss.
Practical rule: clean appliances before floors. If you mop first, you'll just track grease and crumbs back onto fresh surfaces.
2. Baseboards, Door Frames, and Trim Work Detailed Cleaning
A move-out inspection can make a room look clean on the main surfaces and still fail on the edges. Baseboards, door frames, and trim collect dust, pet hair, fingerprints, and scuffs, and those details stand out the moment someone looks closely. Aquastar's wall-cleaning guidance treats these surfaces as part of a proper wall-cleaning pass, which matches what I see in turnover work, where the small lines around the room often decide the final impression.
Start low and work methodically. Vacuum the lower edge first with a crevice attachment, because that pulls up hair and grit before you touch the surface with a cloth. Then wipe with a slightly damp microfiber cloth so you lift dust instead of pushing it into the paint, and switch to an enzymatic cleaner if you're dealing with pet stains or odors along the trim. A magic eraser can handle scuffs, but test it in a hidden corner first. Some finishes dull quickly, and replacing that sheen is harder than removing the mark.
Door frames need the same attention, especially where hands land every day. Around light switches, bedroom entrances, and bathroom thresholds, fingerprints and smudges build up in thin layers that are easy to miss until you clean one section and compare it to the rest of the frame. If the home has textured paint or older trim, use lighter pressure and a second pass rather than scrubbing hard, since aggressive wiping can leave shiny patches or strip the finish unevenly.
Where trim cleaning pays off most
- Entryways: Shoes, bags, and repeated traffic leave the deepest scuffs near doors.
- Kids' rooms: Fingerprints, toy marks, and sticky spots show up fast on frames and trim.
- Pet homes: Hair gathers along lower edges, and odor can cling to neglected corners.
- Hallways: Repeated foot traffic throws dust against the same stretches of baseboard.
A practical way to handle this area is to clean room by room, then do a close inspection from a lower angle. Crouch down or sit near the floor and look along the line where the wall meets the baseboard, because that is where missed dust and paint nicks become obvious during a walk-through. If a unit has long runs of trim, built-up grime, or damage from wall scuffs, this is a task you can do yourself with patience, but it also becomes a time-heavy detail job where a service like Aquastar Cleaning Services makes sense for move-out pressure and inspection standards.
3. Window Cleaning Interior, Exterior, Sills, and Tracks
Dirty windows can drag down an otherwise clean move-out. Smudged glass blocks light, makes rooms feel smaller, and leaves a poor impression during an inspection. Clean panes, sills, and tracks also show that the home was finished with care, not just wiped through at the end. That is why moving checklists from Apartment Guide's moving checklist and Moving.com's timeline-based checklist both include windows in the last-pass cleanup, after furniture and boxes are out of the way.
Start with the glass itself. A cloudy day or late-afternoon light gives you more working time, because direct sun can dry cleaner before you wipe it off and leave streaks behind. A simple vinegar-and-water mix works well for a more eco-friendly approach, and a separate microfiber cloth for frames and sills keeps dirty moisture from spreading back onto the glass.
Exterior panes usually take more time than the inside. If you can reach them safely from the ground, clean the outside first so runoff does not streak the interior side you already finished. For upper floors or awkward second-story windows, the trade-off is clear, DIY saves money, but ladders, height, and time can turn the job into a safety issue. If you're selling the home, clean windows also help the listing photos look sharper. For a breakdown of professional costs, see our guide on window cleaning cost per window.
Window tracks and sills need a different routine. Dry debris first, then wet cleaning. Use a stiff brush or old toothbrush to loosen dirt from corners and channels, vacuum out the grit, and then wipe the track clean so mud does not turn into a smear. Sliding windows often collect dead insects, pollen, and packed dust where the sash meets the frame, so these spots deserve more attention than the center of the pane.
A cleaner window routine
- Work top to bottom: Clean upper glass before the lower sections so drips do not fall onto finished areas.
- Use overlapping squeegee strokes: This helps keep edge lines from showing after the glass dries.
- Keep drying cloths separate: One cloth for glass, one for frames and sills, so grime does not spread.
- Vacuum tracks before wiping: Loose grit comes out easier when it is dry.
A single-story rental with standard windows is often manageable with basic tools and patience. A multi-story home, stubborn mineral spots, or a tight move-out deadline may justify bringing in a service such as Aquastar Cleaning Services, especially when exterior access is limited or the inspection standard is strict. In homes with a lot of glass, the practical choice is often to do the reachable windows yourself and hire help for the rest.

4. Bathroom Tile and Grout Deep Scrubbing
A bathroom that looks clean at a glance can still fail a move-out inspection if the tile joints, caulk lines, or shower corners hold soap scum and mildew. These areas collect moisture fast, so the finish has to look dry, bright, and sanitary, not just wiped down. The grout needs attention line by line, especially around tubs, sinks, and shower walls where hard water leaves a visible film.
Start with the surface type before you choose a cleaner. A grout brush or old toothbrush gives enough control for tight joints, while oxygen-based cleaner is a practical eco-conscious option for many bathrooms. Bleach and water are commonly used for mold, but they are not the right fit for every material, and they require careful ventilation. Let the product sit long enough to break down buildup, then scrub with steady pressure so you lift the grime instead of spreading it around.
A shower that has calcium on the lower tile and mildew in the corners usually needs a two-step approach. Clean the buildup first, rinse well, then return to the joints that still look dark. If the tile is natural stone, skip acidic cleaners and stick with a surface-safe product. For a natural cleaning option, see Aquastar's grout cleaning guidance, but keep in mind that vinegar can damage some surfaces, especially stone.
What usually gets missed
- Caulk edges: Mildew often hides where the shower meets the wall, and it stands out in a final inspection.
- Floor grout: Soap residue and tracked-in grime settle here fast.
- Behind fixtures: The back side of toilets and pedestal sinks is easy to overlook.
- Shower corners: These spots hold moisture longer, so mildew returns quickly if they are not dried well.
A Roswell home with hard water problems may need a second pass on mineral deposits, while a Sandy Springs rental with humidity issues often needs the exhaust fan running after scrubbing so moisture does not linger. The choice between DIY and hiring help comes down to the surface, the stain level, and the deadline. If the bathroom has heavy buildup, stone tile, or a strict walk-through, bringing in a service such as Aquastar Cleaning Services is often the faster route. For lighter grime, a careful homeowner can handle the work with the right brush, cleaner, and drying time.
Open windows, run the exhaust fan, and let the bathroom dry fully before the final walk-through.
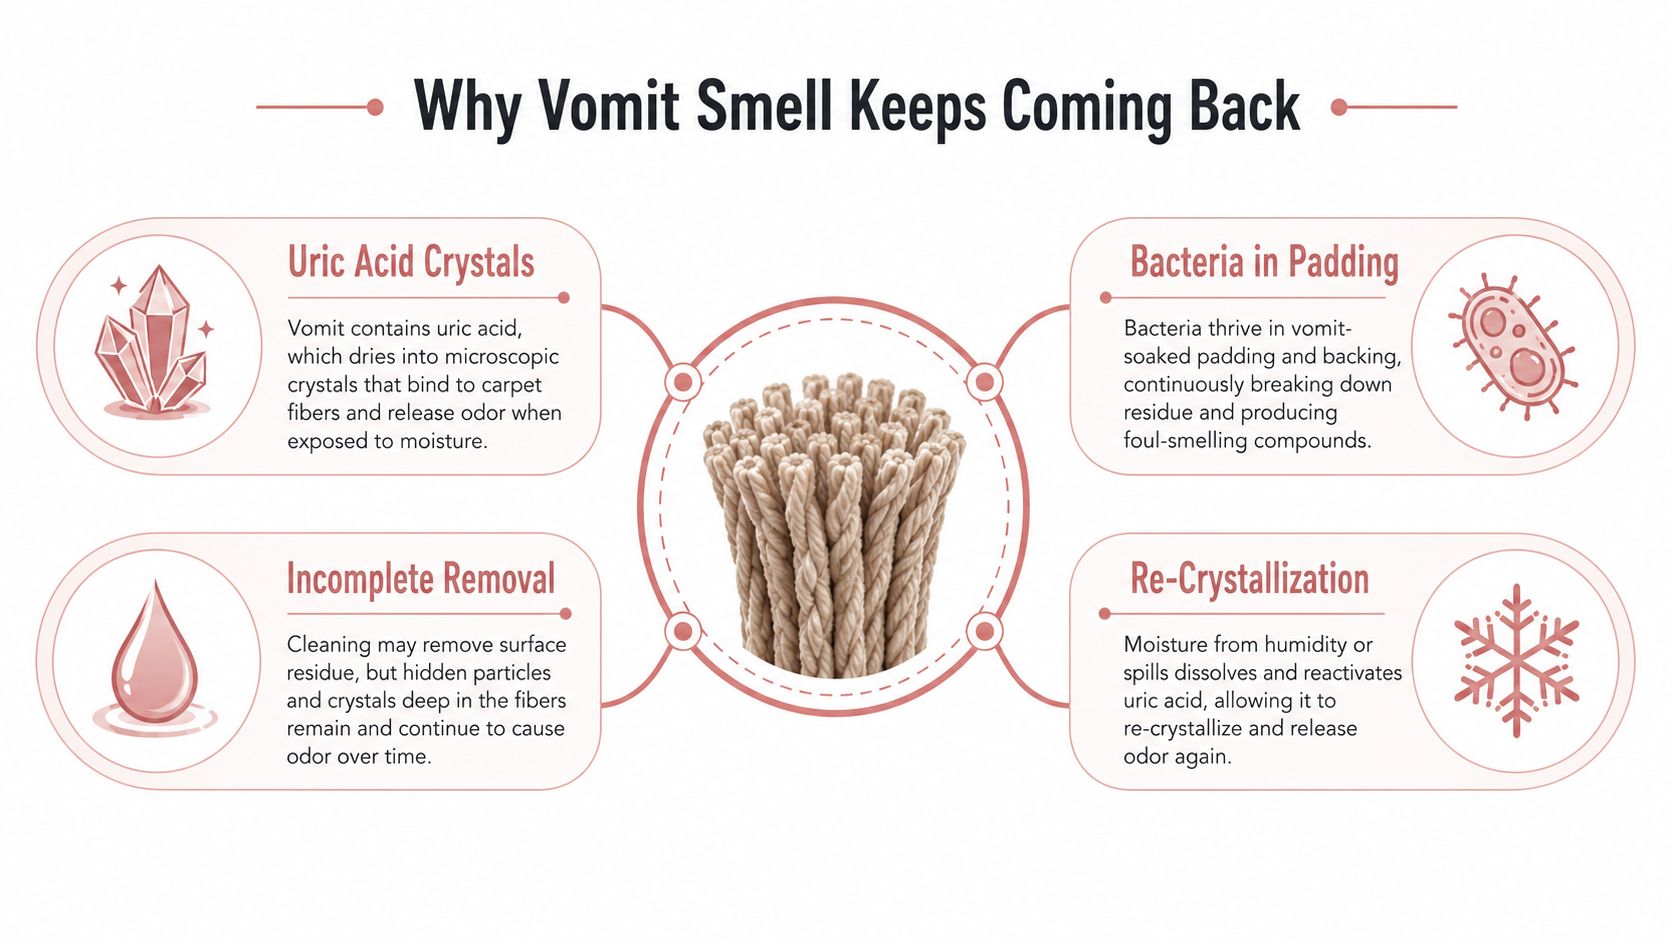
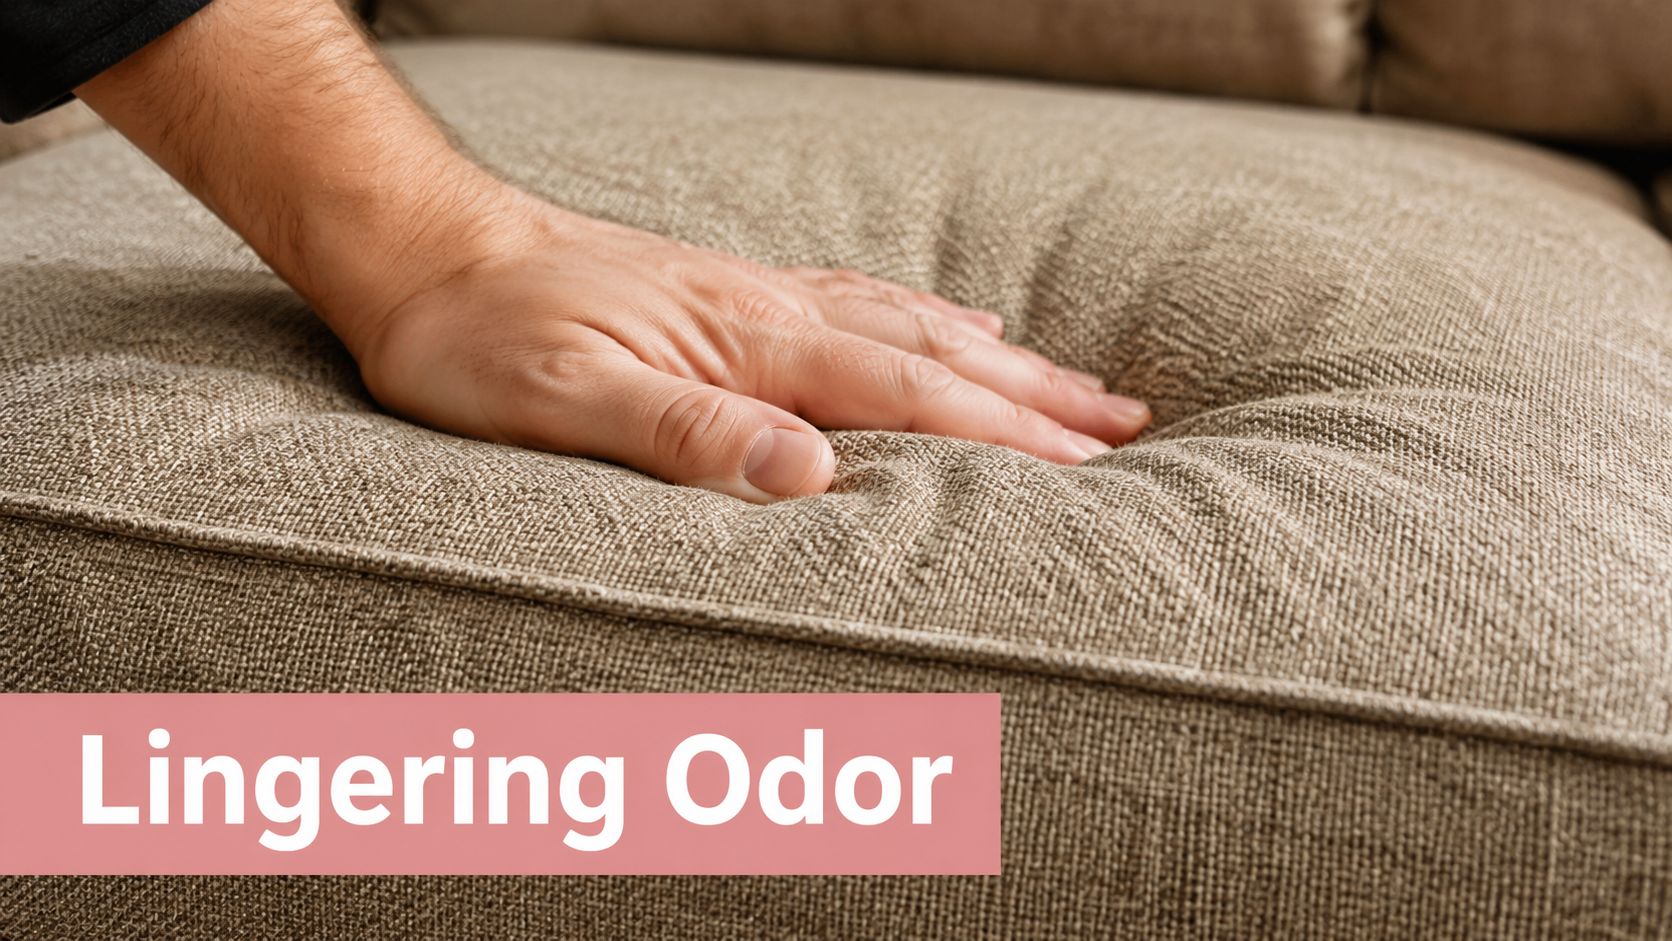
5. Carpet and Hard Floor Deep Cleaning and Stain Removal
Flooring is often the first thing a property manager notices and the last thing a renter wants to leave looking tired. Carpet holds onto pet hair, odors, and tracked-in grit, while hard floors expose streaks, dull patches, and edge debris as soon as light hits them. Move-out cleaning services keep expanding for a reason, and flooring is a major part of that demand, especially when the job calls for the right tools and a clean finish, as reflected in Dataintelo's move-out cleaning services market report.
Start with the carpet, then move to the hard floors. Loose dirt has to come out before any wet cleaning begins, or you end up turning dust into mud and spreading grit deeper into the fibers. Pre-treat carpet stains with an enzyme-based cleaner and give it time to break down the spot before steam cleaning. On hard floors, use a pH-neutral cleaner that matches the surface, because hardwood, laminate, and tile all react differently to the wrong product.
A mixed-floor home shows why the order matters. Bedrooms with pet stains usually need attention first so the carpet can dry while you work through the kitchen and bath floors, and that keeps the whole job moving without stepping back onto damp areas. In practice, that means fewer footprints, fewer streaks, and less chance of missing a spot because you rushed between surfaces.
For deeper carpet issues, Aquastar's carpet cleaning services are a practical option when stains are set in, odors linger, or the flooring needs more than a basic pass with a rented machine.
Floor work that holds up in inspections
- Work the perimeter first: Edges, corners, and baseboard lines collect dust and hair that vacuum heads often skip.
- Handle stains before the full clean: Spot treatment gives you a better shot at lifting old marks instead of spreading them around.
- Leave carpet cleaning until late: That cuts down on resoiling from foot traffic while you finish the rest of the unit.
- Check the busiest paths again: Hallways, living rooms, and entry routes usually need a second pass before they look finished.
- Match the method to the surface: Hardwood needs a light touch and quick drying, while tile can take more moisture if the grout is sealed and the cleaner is safe for it.
If the carpet has deep odors or the home uses more than one flooring type, hiring a specialist is often the cleaner call. A trained crew can handle the transition between carpet and hard floors without leaving damp spots, residue, or mismatched products behind, which matters when you want the place to photograph well and pass the final walk-through.
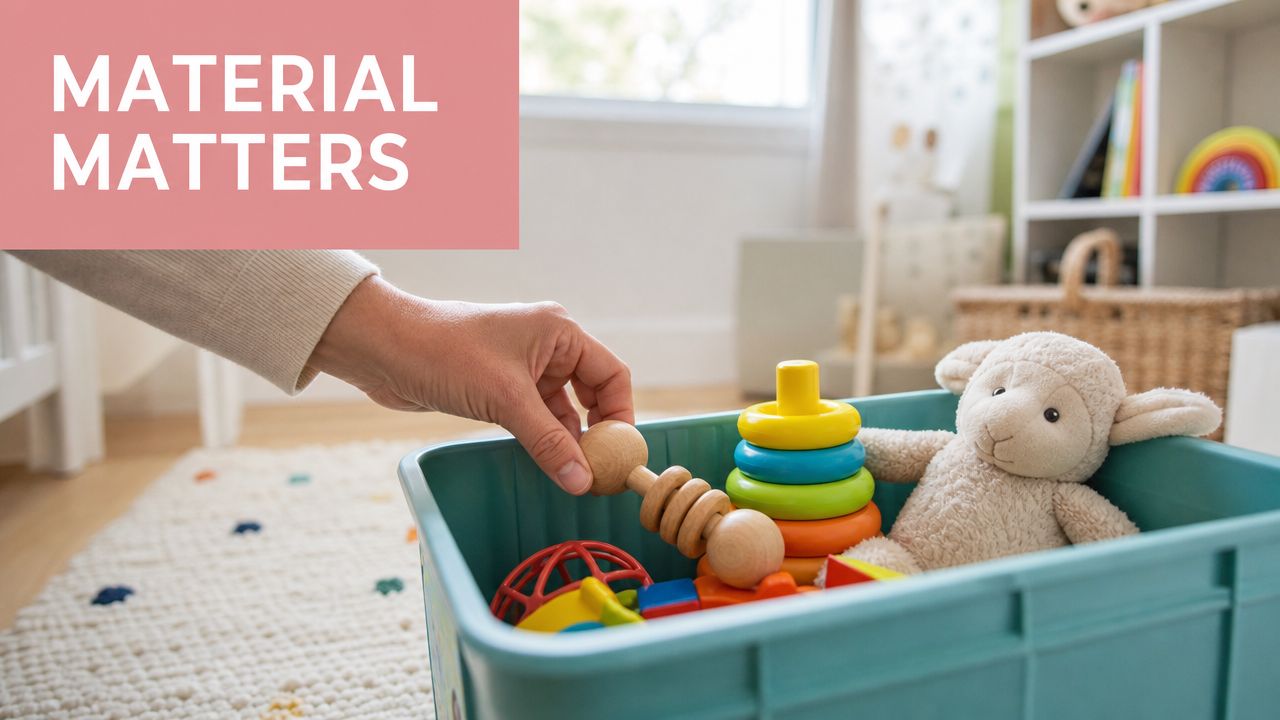
6. Closet and Storage Area Cleaning and Organization
A closet can look harmless and still cause trouble at move-out. Property managers and buyers often open these spaces first because they want to see whether the home was cleared with care. Dust on shelves, leftover hangers, stale odors, or a few forgotten items can make the whole unit feel unfinished.
Start by emptying the space completely. Check the top shelf, the floor, the back corners, and any hooks or rods before you wipe anything down. Then clean shelves, rods, and walls with a microfiber cloth and a mild cleaner that matches the surface, since painted wood, wire shelving, and laminate all react a little differently. Let everything dry fully before closing the doors or placing items back inside.
A clean closet also helps the room read as move-ready. Fresh shelf liners can protect surfaces for the next occupant, while simple bins or dividers make pantry shelves, linen storage, and coat closets look organized instead of crowded. If the space has sticky residue, water-safe cleaner is usually enough, but stubborn grime on shelves or baseboards may need a second pass with a slightly stronger product used carefully.
A closet that looks organized photographs better and makes the room feel finished, even when the space itself is small.
That matters in bedrooms, coat closets, pantry shelves, and entry storage. A Vinings kitchen pantry with old food items left behind suggests the kitchen may have been rushed, while a Buckhead linen closet with a stale odor can make an otherwise clean space feel neglected.
Small habits that help
- Take a final shelf photo: It gives you a quick record of the condition for property managers.
- Use baking soda or activated charcoal: Leave it overnight if you need help with odor in a closed space.
- Check upper shelves last: Dust and missed items often hide above eye level.
- Remove old hangers: A closet looks unfinished fast when loose hangers are left behind.
The trade-off is time. Full closet cleaning takes patience, especially if you have built-in shelving or deep storage cubbies, but it is still easier than arguing over whether the space was left ready for inspection. If the closet only needs light dusting and sorting, DIY is usually enough. If there is mildew, heavy debris, or a packed storage area that has to be cleared quickly, a service like Aquastar can handle the job faster and keep the rest of the move-out on schedule.
7. Wall and Ceiling Cleaning, Spot Removal, and Scuff Mark Treatment
Empty walls reveal everything. Fingerprints around switches, scuffs from furniture, dust along the ceiling line, and leftover adhesive from hooks all become obvious once furniture is gone. A move-out cleaning checklist needs this step because repainting is not always part of the job, but clean walls and ceilings still help the home read as cared for during inspection.
Start with the ceiling line and work down. Use a dry microfiber cloth to lift cobwebs and dust from corners first, then switch to a damp cloth with a mild cleaner if the paint finish can handle it. On textured walls, skip heavy pressure. A soft-bristled brush clears debris without flattening the texture or leaving a bright patch that shows up under light.
Different marks need different handling. Crayon, pen, and adhesive residue do not respond the same way as a normal fingerprint. Some crayon marks soften with a solvent such as hairspray, while command strip residue usually comes off better with slow, careful removal than with force. If one wall has several spots, clean it in sections so you can tell whether you are removing dirt, paint transfer, or a mark that needs a different product.
Common wall trouble spots
- Children's rooms: Handprints, crayon, and toy marks usually collect low on the wall.
- Hallways: Bags, corners, and furniture leave scuffs here.
- Around hooks and hangers: Adhesive residue builds up quickly after things are removed.
- Near vents: Dust settles where air moves most, especially along the upper wall line.
Lower-wall cleaning often takes more time in homes with pets because hair and dander cling to the surface near the floor, while rentals with many picture hooks may need careful adhesive cleanup to avoid paint damage. The trade-off is simple. A cleaner wall usually passes inspection more easily, but over-scrubbing can leave a bigger problem than the mark you started with. If the damage is light, DIY work with the right cloth and cleaner is enough. If there are widespread marks, sticky residue, or paint that lifts too easily, a service like Aquastar can handle the section faster and reduce the risk of making the wall look worse.
8. Light Fixtures, Ceiling Fans, and Vents Deep Cleaning
A room can look finished, then one dusty ceiling fan or cloudy light globe ruins the impression. Fixtures, fan blades, exhaust vents, and return grilles collect buildup in places people rarely check, and that buildup stands out as soon as the lights are switched on. University housing checklists and move-out guides regularly call out these spots because they are easy to miss during a rushed clean, as also reflected in Texas Tech University's cleaning checklist.
Start with safety, not the visible dust. Shut off power at the breaker before opening, loosening, or disassembling any light fixture. That matters most when you are on a ladder and trying to hold a globe, screws, and a cloth at the same time. Once the fixture is safe to handle, remove loose dust first so you are not grinding grit into glass, metal, or the motor housing on a fan.
Ceiling fans need a slightly different order than fixed lights. Wipe the blades before anything else, then follow with the housing, pull chains, and nearby trim so dust does not fall back onto a cleaned surface. A damp microfiber cloth works better than a dry rag here because it traps residue instead of pushing it into the air.
Vent covers deserve a careful pass because they affect both appearance and how fresh the room feels. Exhaust vents and return grilles often hold a thin layer of dust that keeps building even after the floors are done, and that makes a space seem unfinished. If the HVAC system is part of the move-out scope, replace the filters during this stage so the room does not still look stale after cleaning.
A practical routine keeps small jobs from turning into repairs.
- Use a stable ladder: A wobbly step is a bigger risk than the dust you are removing.
- Keep one helper nearby: A second person can steady the ladder and pass parts down.
- Clean every fixture in the room: Skipping one light or fan creates an uneven result.
- Wipe switch plates and nearby trim: Those areas sit in the same line of sight as the fixture.
- Choose the right cleaner for the mess: Light dust needs a simple wipe, while greasy buildup may need a stronger degreaser used carefully.
Some fixtures need a quick wipe, while others need a real scrub. A kitchen exhaust vent in a Chamblee home can hold grease and dust that clings to the grille, while a bedroom fan in Woodstock may only need blade dusting and a light pass over the housing. The difference comes down to buildup, not just how dirty the room looks at first glance. If a fixture is coated, sticky, or too high to handle safely, that is the point to stop and bring in a service like Aquastar rather than risk breaking glass or leaving residue behind.
9. Garage and Entryway Cleaning and Debris Removal
A move-out can look finished inside and still fail the first impression test at the garage and entryway. Those spaces collect boxes, cobwebs, grit, oil spots, and forgotten tools, and they are often the first areas a landlord, buyer, or property manager sees after stepping inside. If the goal is to pass inspection cleanly, treat these zones as part of the plan, not leftover cleanup.
Start with removal, not detail work. Pull out loose items, sweep debris in one direction toward the exit, and clear the floor before you scrub stains. For concrete with oil marks, a biodegradable degreaser usually works best after a short dwell time, then a stiff brush can lift what the cleaner loosens. On a cloudy day, pressure washing is easier to control because the surface stays wet long enough to rinse evenly without drying into streaks.
A Kennesaw garage with old shelving and tools left behind needs a different approach than a Roswell entryway with dust and cobwebs. The garage should read as empty, the shelves should be wiped, and any storage system that remains in place should look intentional rather than abandoned. In the entryway, the details matter just as much. Smudged handles, dirty thresholds, and dusty corners make a cleaned home feel unfinished even when the main rooms are done.
For inspection photos, document the space after it is cleared. A clean image of swept concrete, empty shelves, and a tidy threshold can settle questions later if there is any dispute about condition.
Entry points worth checking
- Door frames: Smudges build up around handles and latch areas.
- Baseboards: Shoes, carts, and moving boxes drag dirt here.
- Thresholds: Grit settles where traffic passes most often.
- Corners: Cobwebs usually start in these spots.
If the garage still holds heavy residue after a basic scrub, stop there and decide whether the next step belongs to you or to a service. Deep oil stains, large concrete areas, and pressure washing can eat up time fast when the move schedule is already tight, and that is usually the point where hiring help makes more sense than pushing through a poor result.
10. Laundry Room and Utility Area Sanitization and Organization
A laundry room can look harmless and still fail a move-out walk-through. Lint clings to vents, detergent residue dries on the washer, and a damp utility corner can hold onto odor long after the rest of the home is clean. Treat the space like part of the inspection, not the afterthought, and follow the same utility-area standards outlined in Texas Tech's move-out cleaning checklist.
Start with the dryer. Empty the lint trap, then clean the trap housing and the area around the machine, since loose lint collects where baskets and hands move past every day. If the vent setup allows safe access, clear the exhaust path as well, because lint buildup in hidden areas is a fire risk and a common reason the room still feels dirty after a surface wipe.
After that, wipe every reachable surface with a damp microfiber cloth. That keeps dust from floating back onto clean equipment and helps lift detergent film without scratching the finish. If the utility area includes HVAC equipment, check the filter and replace it if needed so the room does not keep recirculating dust.
Moisture needs direct attention. In a basement laundry area or a tight utility closet, stale air usually comes from a small leak, damp floor, or residue left behind near the machine base. An enzyme-based odor eliminator can help with lingering smells, while open storage bins or labeled shelves keep loose hoses, spare bottles, and small parts from spreading across the floor.
Utility-room priorities
- Dryer vent area: Clear lint from the trap, housing, and visible exhaust points.
- Machine tops and sides: Remove dust, soap residue, and handprints.
- Corners and baseboards: Check for damp dust and settled debris.
- Labels and hoses: Coil cords, secure hoses, and keep storage easy to read.
- Floor around appliances: Sweep and wipe under the reachable edges where lint and grit hide.
A laundry room in a newer rental with light use usually needs a straightforward clean and tidy reset. A space with heavy lint buildup, moisture, or dust packed around equipment calls for more time and more caution. If the dryer vent is difficult to access, the area smells persistently musty, or the utility setup sits close to furnace equipment, a professional crew such as Aquastar Cleaning Services, LLC can be the better call because it reduces the chance of missing a safety issue while the rest of the move is still on schedule.
Moving Cleaning Checklist, 10-Area Comparison
| Task | 🔄 Implementation Complexity | ⚡ Resource & Time | 📊 Expected Outcomes | 💡 Ideal Use Cases | ⭐ Key Advantages |
|---|---|---|---|---|---|
| Deep Clean Kitchen Appliances and Interiors | High, appliance-specific disassembly and safe cleaning methods required | Specialized degreasers, tools; ~2–3+ hours per kitchen | Sanitized, odor-free appliances; reduced pest risk; inspection-ready | Move-outs, rental turnovers, prepping appliances for new occupants | Ensures function, extends appliance life, prevents contamination |
| Baseboards, Door Frames, and Trim Work Detailed Cleaning | Moderate–High, detail work, material-specific techniques | Microfiber, wet/dry cleaners; 3–4 hours for full home | Dramatically cleaner appearance; allergen and dust reduction | Final walkthroughs, staging, homes with pets/children | Significant visual improvement; reduces deposit deductions |
| Window Cleaning: Interior, Exterior, Sills, and Tracks | Moderate, track detail and exterior safety/ladders may be needed | Squeegees, ladders, glass cleaners; weather-dependent timing | Clear windows, improved natural light; reduced pollen/allergens | Showings, move-ins/outs, pollen seasons or multi-story homes | Restores light quality; extends window lifespan |
| Bathroom Tile and Grout Deep Scrubbing | High, intensive scrubbing and mold remediation knowledge | Grout brushes, cleaners, possible pressure washing; 1–2 hrs/bath | Mold and soap-scum removal; sanitary, inspection-ready bathrooms | Bathrooms with mildew/hard water, move-out inspections | Eliminates health hazards; restores tile aesthetics |
| Carpet and Hard Floor Deep Cleaning and Stain Removal | High, requires professional equipment and varied methods | Steam/extraction machines, stain treatments; drying 4–6 hrs; costly if outsourced | Removes embedded dirt, allergens, odors; improved floor appearance | Pet homes, heavy stains, final move-out cleaning | Removes allergens and odors; extends flooring life |
| Closet and Storage Area Cleaning and Organization | Low–Moderate, decluttering plus surface cleaning and organizing | Microfiber, shelf liners, organization supplies; variable time | Organized storage, removed hidden dust and items | Move-ins/outs, staging, properties with cluttered storage | Reveals storage capacity; improves perceived value |
| Wall and Ceiling Cleaning, Spot Removal, and Scuff Mark Treatment | Moderate, ladder use and surface-specific cleaners; touch-ups may be needed | Magic erasers, mild cleaners, ladders; time-consuming per room | Reduced visible wear, fewer scuffs, cleaner ceilings | Homes with children/pets, pre-listing cleaning, move-outs | Improves interior appearance; prevents inspection deductions |
| Light Fixtures, Ceiling Fans, and Vents Deep Cleaning | Moderate–High, electrical safety and careful disassembly often required | Ladders, microfiber, vent tools, filter replacement; variable time | Better lighting and air quality; improved HVAC efficiency | Allergy-sensitive households, HVAC maintenance, move-outs | Enhances air/light quality; reduces fire and allergen risks |
| Garage and Entryway Cleaning and Debris Removal | Moderate, may require heavy equipment and hazardous-material handling | Brooms, degreasers, pressure washer for concrete; variable time | Safer, cleaner transition areas; improved curb/entry impression | Move-outs, showings, properties with oil stains or clutter | Removes hazards; demonstrates usable storage and functionality |
| Laundry Room and Utility Area Sanitization and Organization | Moderate–High, dryer vent/HVAC knowledge and possible mold remediation | Vent-cleaning tools, enzyme cleaners, HVAC supplies; variable time | Reduced fire and mold risk; improved utility-room safety and odors | Homes with heavy dryer use, humid basements, safety inspections | Improves safety (lint/fire), prevents mold, enhances HVAC performance |
When to Hire Pros for a Perfect Move-Out Clean
After you work through this checklist, it's normal to feel worn out. A proper move-out clean is not a quick sweep, it's a multi-step project that asks for the right tools, the right sequence, and enough stamina to finish without cutting corners. If you're short on time, dealing with a large home, or facing a strict inspection, hiring a professional service is often the practical choice.
That's especially true when the job includes appliances, grout, carpet, vents, windows, and garage cleanup all in the same move window. A service like Aquastar Cleaning Services, LLC fits naturally here because it handles move-in and move-out cleaning across kitchens, bathrooms, floors, windows, and other detailed areas, and it serves homeowners and renters across North Atlanta with customizable packages. Eco-friendly product options are useful for families with children or pets, and a full-service crew can keep the whole home moving toward the same standard instead of leaving you to piece it together room by room.
There's also a real trade-off between time and certainty. DIY cleaning can work well if the home is small and the checklist is light, but once the scope expands to deep appliance work, floor care, and detailed fixtures, a pro team reduces the risk of missed spots that trigger deductions or extra work after the walk-through.
For the fastest path to a clean handoff, schedule the work before the final key exchange, not after. If you want help from a team that already understands move-out expectations, visit Aquastar Cleaning Services, LLC and ask about a move-out clean that matches your timeline, your home size, and the level of detail your inspection will demand.