You're about to hand your house keys to someone you've just hired. The quote looks reasonable, the appointment fits your schedule, and then you start wondering what happens if a vase breaks, a cleaner slips on the stairs, or something goes missing while you're away. Those questions aren't signs of distrust. They're sensible parts of choosing a service that will work inside your home.
House cleaning insurance turns those worries into specific questions. Instead of asking whether a company is “insured and bonded,” you can ask which policy responds to a broken floor, an injury, employee theft, or damage caused by a specialty service. You can also request proof before the first visit, so your decision rests on documents and clear answers rather than a reassuring phrase.
Why House Cleaning Insurance Matters Before You Book
A cleaner has just mopped the kitchen. Before the floor dries, a family member slips and gets hurt. During another visit, a worker moves a decorative vase, which falls and breaks. These incidents show why insurance belongs on your booking checklist: the policy should match the accident, whether it involves a guest's injury or damage to your belongings.
General liability insurance is the protection usually discussed for a homeowner's bodily injury or property damage claim caused by cleaning work. Coverage depends on the policy's limits and exclusions. A bond, workers' compensation policy, and liability policy answer different risks, so the phrase “insured and bonded” does not identify which protection applies.
Insurance can also keep the cleaning business from paying every covered claim entirely out of pocket. Repeated visits create recurring risks, including wet-floor slips, chemical spills, and accidental breakage. A current policy and clear claims process give you a practical route for reporting a loss, rather than leaving you to negotiate the issue alone.
Practical rule: Treat “insured and bonded” as a starting point. Ask what each protection covers, request current proof, and check the policyholder's business name.
Customer expectations support this check. One industry statistic reports that 90% of clients check whether a cleaning company is insured and bonded before hiring it (industry statistic on cleaning-client expectations). Apply the same test when comparing recurring housekeeping, deep-cleaning, or move-out services.
For more homeowner-focused guidance, browse these house cleaning articles. Before booking, request a certificate of insurance, confirm that it names the business you are hiring, and ask whether the planned services fall within the stated coverage. These documents do not guarantee that every claim will be paid, but they help you identify unanswered questions before anyone enters your home.
What House Cleaning Insurance Actually Covers
Think of house cleaning insurance as a safety net with separate sections, not one blanket promise. One section may respond to a client's injury, another may address an employee's work-related injury, and another may protect equipment or property under separate terms. The right combination depends on who works for the business, what services the team performs, and how much property the company handles.
General liability is the central layer
General liability addresses third-party bodily injury and property damage. A client slipping on a wet floor is a bodily injury example. A cleaner accidentally breaking a homeowner's belongings is a property damage example. If a vase is damaged during a cleaning visit, general liability is usually the first policy discussed for repair or replacement costs, depending on the policy wording (house cleaner insurance coverage guidance).
The policy's limits also matter. A per-occurrence limit is the maximum the policy may pay for one covered incident. An aggregate limit is the maximum the insurer may pay across covered claims during the policy period. A widely used structure for cleaning businesses is $1,000,000 per occurrence and $2,000,000 aggregate, according to industry pricing information (cleaning business insurance limits).
For example, one serious flooring claim may use part of the per-occurrence limit. If separate covered incidents happen during the year, the aggregate limit controls the combined total the insurer will pay.
Other layers answer different questions
Workers' compensation is for eligible employee injuries connected to work. It isn't a substitute for general liability, because it addresses the cleaner's injury rather than the homeowner's damaged property or bodily injury claim.
A business may also need equipment protection, commercial auto coverage, cyber liability, or a janitorial bond. Online booking, digital scheduling, stored customer information, and travel between homes create exposures that a basic liability policy may not automatically address.
Watch this overview for another plain-language explanation of cleaning business insurance concepts:
The practical test is simple. Describe the accident in one sentence, then ask which policy would respond. If the answer is vague, request the policy summary or speak with the insurer before assuming you're protected. You can also review this guide to insured cleaning services when preparing questions for a provider.
Bonded vs Insured and Workers Comp Explained Simply
Homeowners often hear three phrases together, but they don't mean the same thing. Insured usually refers to liability coverage for accidental third-party injury or property damage. Bonded refers to a surety arrangement focused on verified employee theft. Workers' compensation addresses work-related injuries suffered by eligible employees.
A practical example makes the difference clear. If a team member breaks a window while cleaning, liability coverage is the relevant place to start. If an employee steals jewelry, a janitorial bond may be the intended recovery mechanism. If a cleaner strains their back while carrying supplies, workers' compensation may apply for an eligible employee injury.
Protection Type
What It Covers
Practical Example
General liability
Covered third-party bodily injury and property damage
A homeowner slips on a wet floor, or a vase breaks during service
Janitorial bond
Verified employee theft, subject to the bond's terms
A client reports and verifies that an employee stole cash or valuables
Workers' compensation
Covered work-related injuries to eligible employees
A cleaner is injured while lifting equipment or working on stairs
Why bonding isn't a replacement for insurance
A bond is narrow by design. It doesn't automatically pay for accidental breakage, chemical damage, or a trip hazard. Bonding is not insurance. It's a surety mechanism that reimburses clients only for verified employee theft (bonding and insurance gaps for house cleaners).
Suppose a cleaner knocks over a lamp while dusting. That's not an employee theft claim, even if the same company is bonded. The homeowner needs to understand whether the company's liability policy covers the accidental property damage and whether any care, custody, and control exclusion affects the item involved.
Why workers' compensation belongs in the conversation
A homeowner may not be responsible for a cleaner's employment coverage, but the company's workers' compensation status still signals how it manages its team. Cleaning work involves lifting, bending, stairs, equipment, repetitive movement, and exposure to products. A worker who gets hurt may need medical care and time away from work.
Ask whether the people entering your home are employees, independent contractors, or a combination. Then ask how the company handles work-related injuries and whether its certificate reflects workers' compensation coverage when applicable.
A bond protects against a specific dishonest act. Liability protects against certain accidents. Workers' compensation protects eligible employees from covered work injuries.
For a homeowner, the strongest answer isn't merely “yes, we're bonded.” It's a provider that can explain all three protections in ordinary language and show current documentation that matches the business performing the work.
What Is Not Covered and Where Claims Get Denied
Insurance wording matters most when the accident doesn't fit the standard house-cleaning example. A basic policy may address a sudden accidental spill, but specialty work can introduce questions about the surface, the product, the type of residue, and whether the cleaner had the item in active control.
Care, custody, and control can create a gap
Some liability policies include a care, custody, and control exclusion. In plain language, that can limit coverage for property the cleaner is actively handling or has under direct control. A vase sitting on a shelf may raise a different question from a valuable electronic device a worker is dismantling or moving.
For example, a cleaner spills a product on a hardwood floor while working nearby. The claim may be considered property damage, but the exact response depends on the policy, endorsements, and wording. A homeowner shouldn't assume that every item inside the home receives the same protection.
Specialty services need a closer review
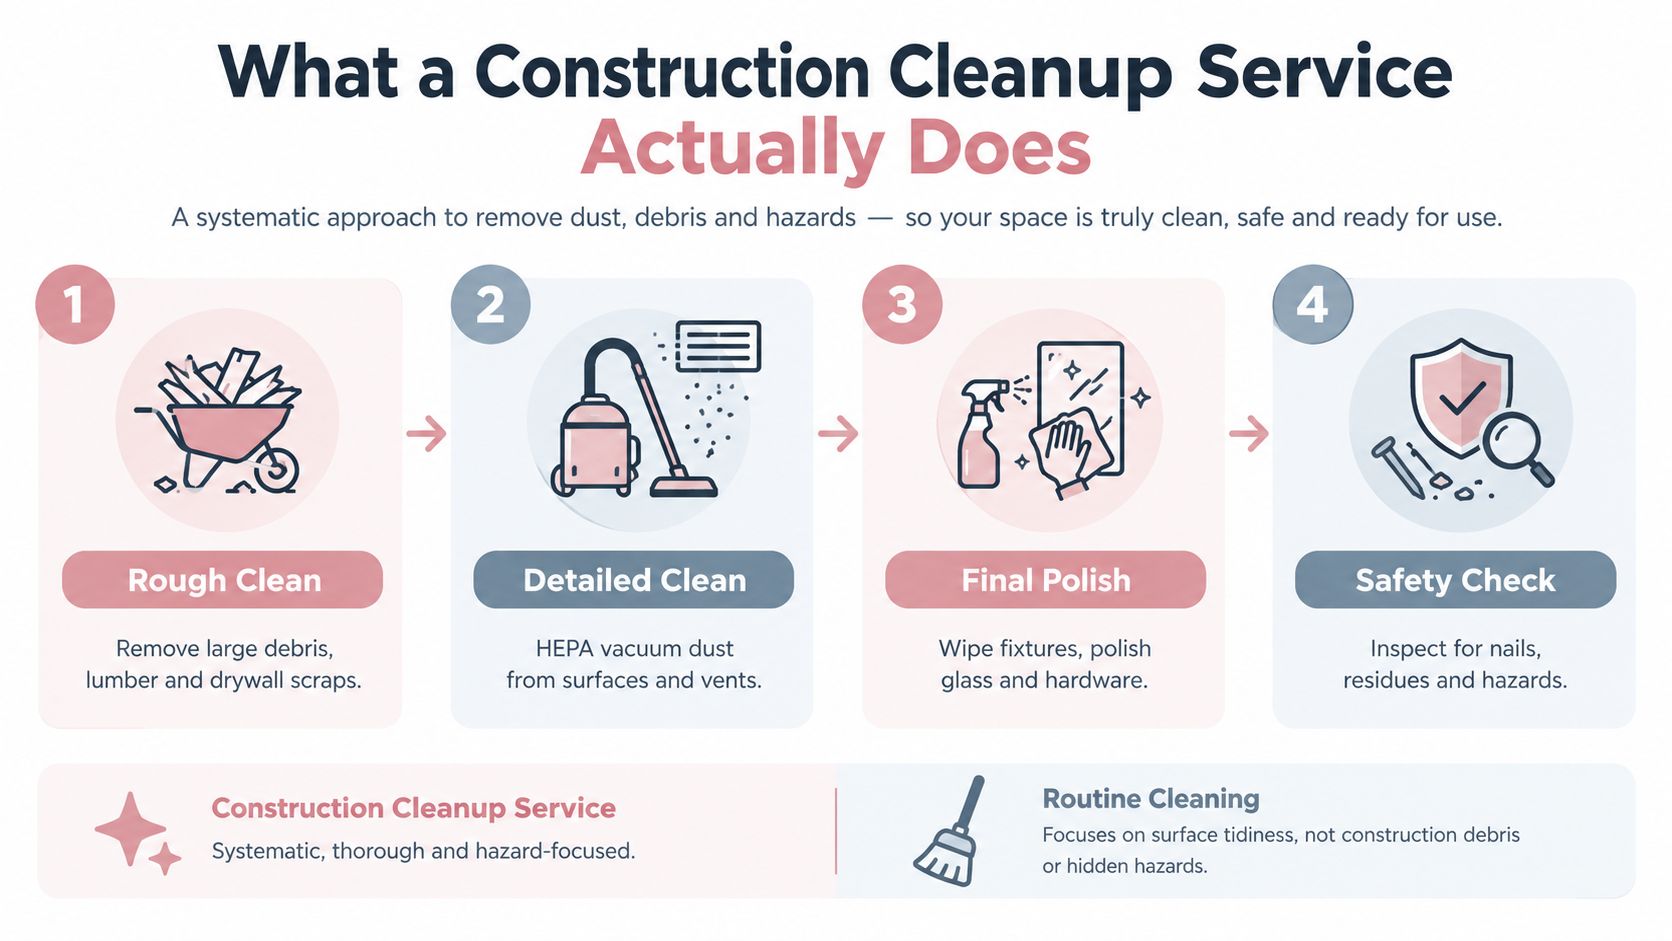
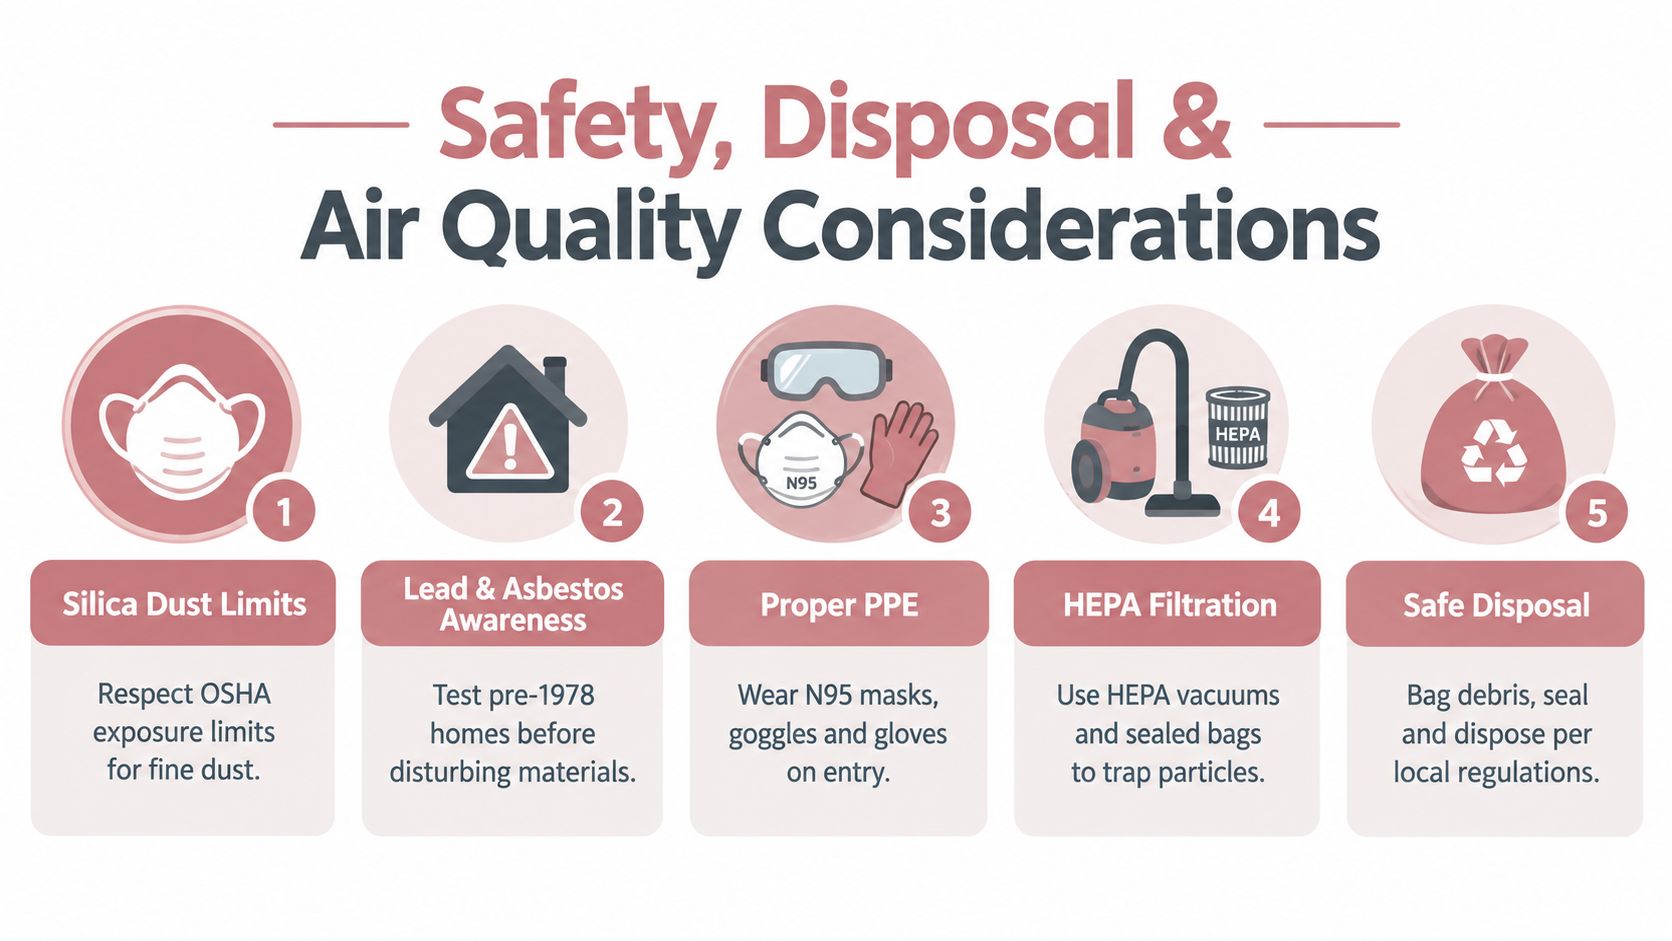
Post-construction cleanup, carpet cleaning, and stain removal can involve dust, debris, moisture, chemicals, mold-related concerns, or construction residue. These services may fall outside a provider's ordinary residential cleaning description or may have exclusions connected to pollution, residue, or specialized operations.
A carpet-cleaning example shows why this matters. Excess water damages a wood subfloor beneath the carpet. The homeowner should ask whether the cleaner carries coverage designed for that operation, rather than relying only on a general statement about liability.
Claims data from a specialty insurer shows why property damage deserves attention. Spills and chemical damage accounted for 29.2% of claims, broken glass for 25%, and scratched or damaged surfaces for 20.8% (cleaning business claims data). The same source reports an average liability payout of $1,562 and a high payout of $8,875 for damaged floors, so a small-looking mistake can have a meaningful financial consequence.
Questions to ask about exclusions
Before booking a specialty job, ask:
Surface damage: Are hardwood, stone, electronics, glass, and delicate finishes treated differently?
Chemical use: Are the products and processes used by the team included?
Water exposure: Does carpet or upholstery cleaning create a separate coverage issue?
Construction residue: Are dust, debris, mold, or post-construction materials excluded?
Handled property: Does care, custody, and control limit protection for items being moved or cleaned?
Completed work: Can a claim arise after the team leaves, and how does the policy address it?
Don't choose based on price alone. A cheaper policy that excludes the service you're booking may provide little practical value when a claim occurs.
What to Ask Your House Cleaner Before Hiring
A cleaner arrives, a bottle tips over, and a finish is damaged. The useful question is not whether the company says it is insured. Ask which policy would respond, whether the work is included, and what proof you can review before booking.
Start with documents
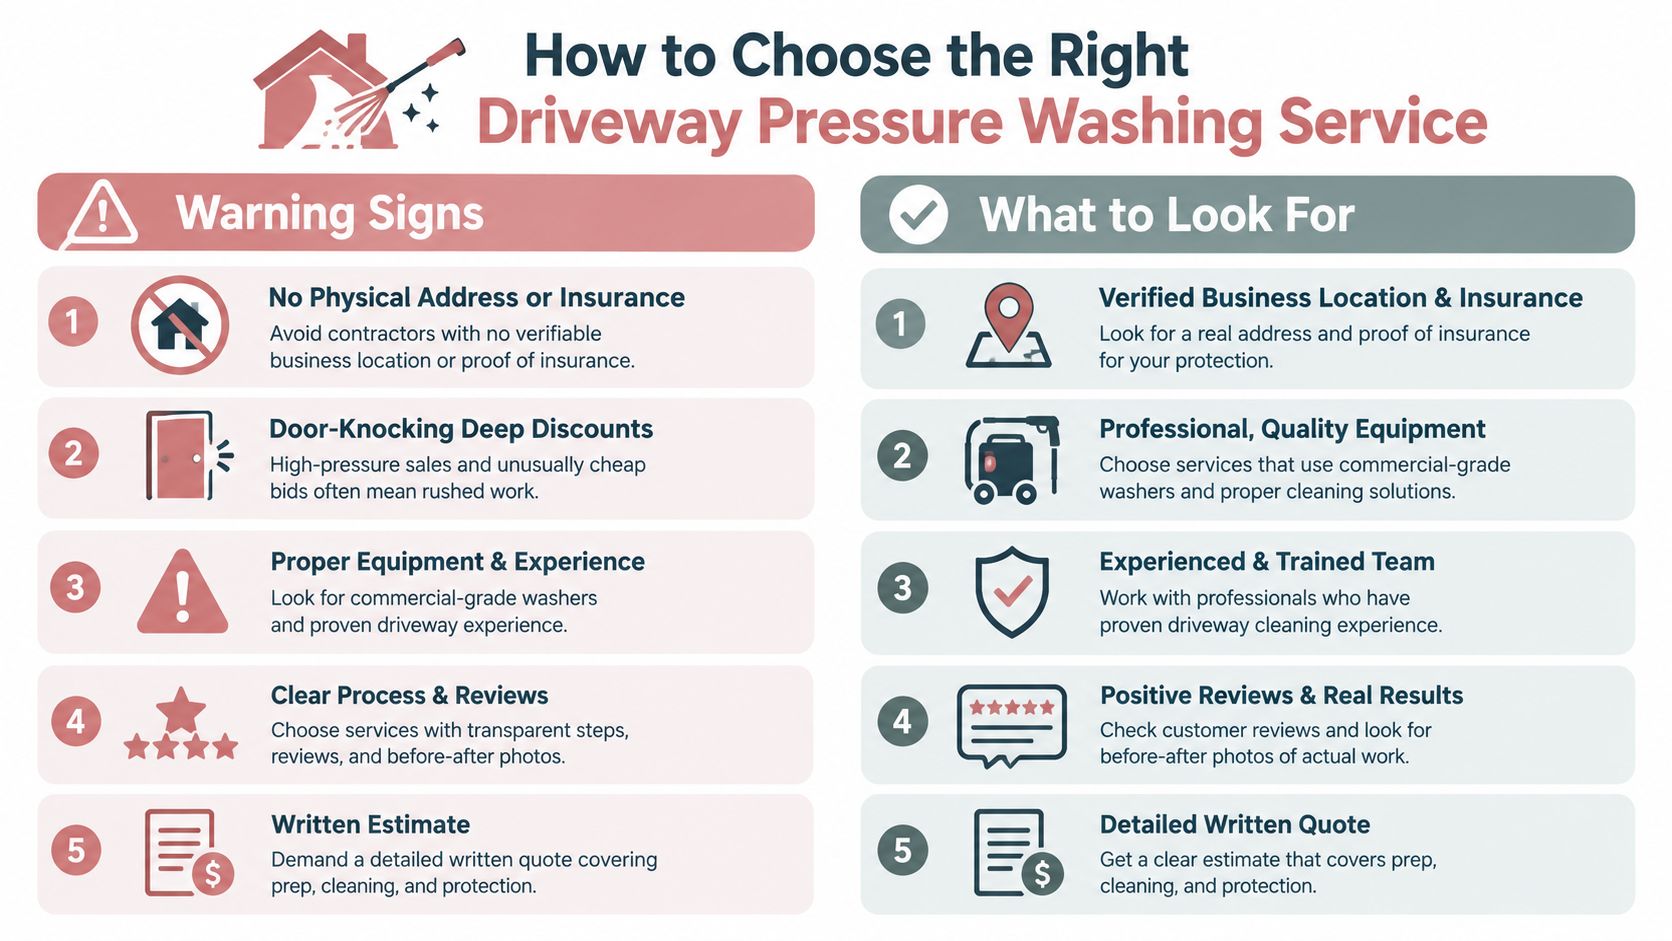
Request a current Certificate of Insurance, or COI, before the first appointment. It should identify the insured business, show active dates, and list relevant coverage. A COI confirms that a policy exists, while the policy wording determines what it pays. Ask follow-up questions for specialty work.
Use this checklist:
Request current insurance proof. Ask for a COI, not just a website badge or verbal assurance.
Confirm general liability limits. Ask for the per-occurrence and aggregate limits, and whether they meet your lease, HOA, or property manager's requirements.
Ask about bonding. Confirm whether the bond addresses verified employee theft and learn the reporting process.
Check workers' compensation. If the company uses employees, ask whether workers' compensation is carried where applicable.
Name the exact service. Say “post-construction cleanup,” “carpet cleaning,” or “stain removal,” rather than only “house cleaning.”
Ask about additional insured status. If a contract requires it, ask whether the homeowner, landlord, HOA, or property manager can be added.
Some property agreements specify $1,000,000 or more in general liability coverage (residential cleaning insurance market reporting). Check your own lease or association rules instead of assuming every policy meets them.
Read answers for clarity
A reliable answer should name the insurer, coverage type, active term, and steps for reporting an incident. Be cautious if the company says a bond covers every type of damage, refuses to provide a COI, or cannot say whether the requested service is included.
Ask for the documents before handing over keys or scheduling specialty work. Review these insurance verification steps online and save the COI, written answers, appointment details, and receipts together. Those records create a simple trail if an accident occurs.
Insurance is only one part of the hiring conversation. Use these housekeeper interview questions to ask about training, access, products, and communication. A company that answers clearly gives you a better basis for choosing the service and understanding what protection is available.
How Aquastar Demonstrates Insurance and Worker Vetting in Practice
A homeowner can see the difference between a policy label and a working process by looking at how a cleaning company prepares its teams. In Kennesaw and North Atlanta, Aquastar Cleaning Services, LLC describes its crews as insured and bonded, background-checked, and professionally trained. It also uses defined room-by-room processes for recurring housekeeping, deep cleans, move-in and move-out work, and post-construction cleanup.
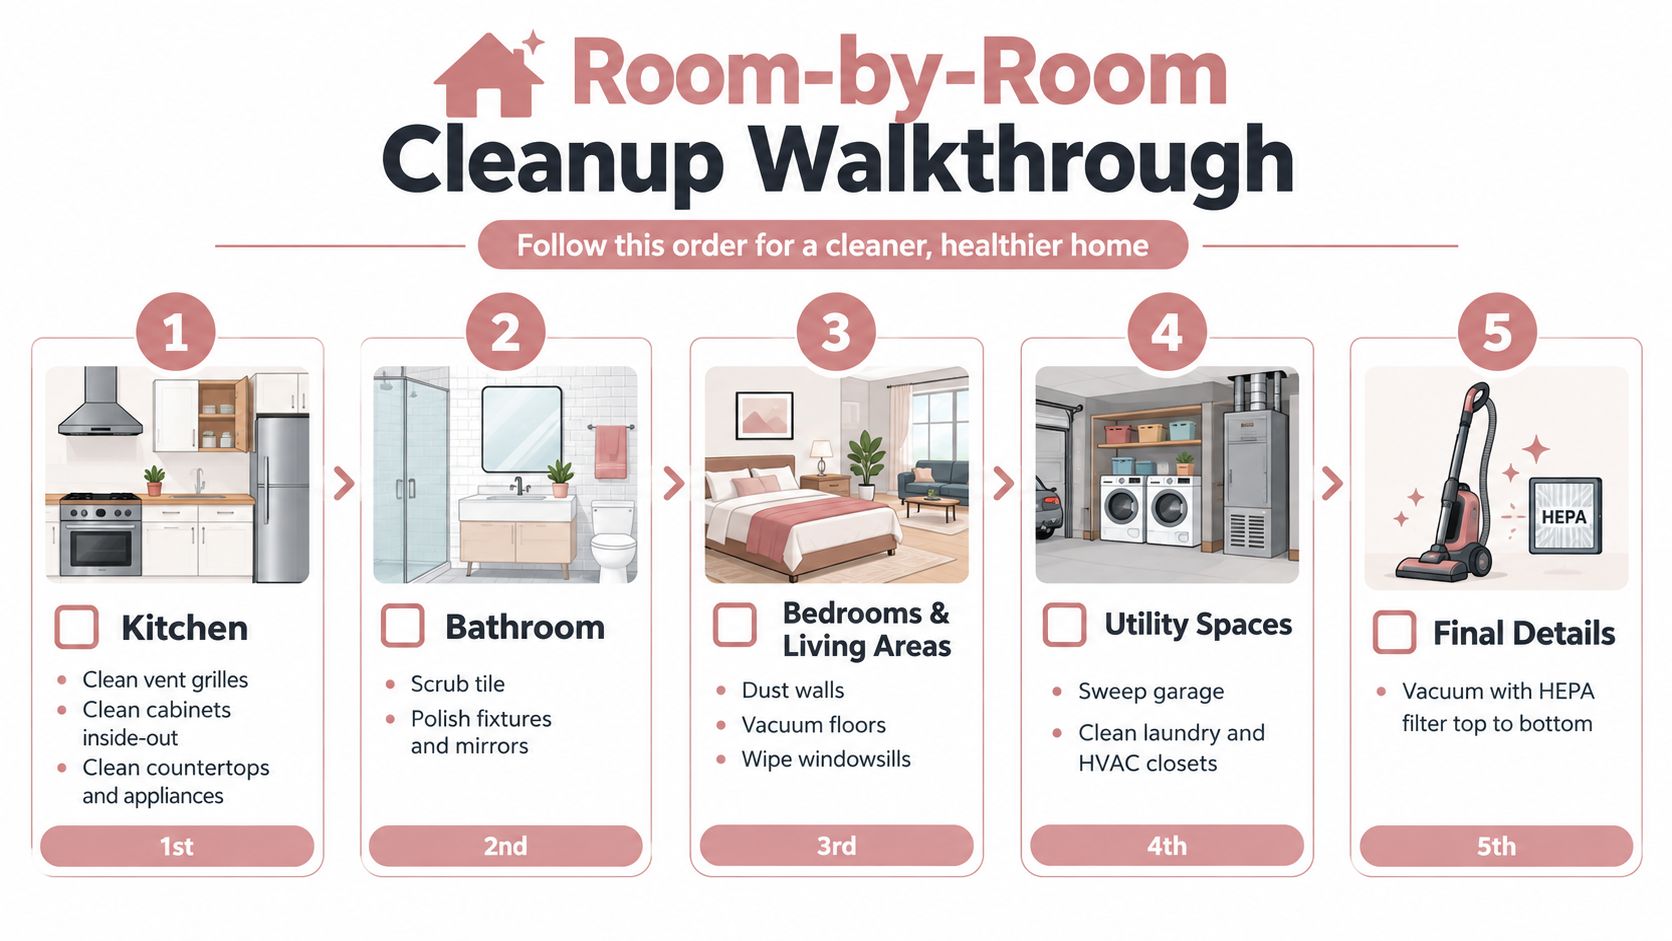
Consider a recurring visit. The team follows a documented scope for kitchens, bathrooms, bedrooms, living areas, and laundry spaces. That process helps identify what should be cleaned, what should be left untouched, and where fragile surfaces or homeowner instructions need attention. The insurance conversation then becomes practical: the company can connect its work process, team structure, and coverage questions instead of offering a generic promise.
Different jobs create different questions
A move-out cleaning may involve appliances, cabinets, floors, and inspection-sensitive surfaces. A post-construction cleanup may involve fine dust, debris, and residue that require a closer look at exclusions. Carpet cleaning involves equipment and moisture, so the homeowner should confirm that the service is included before booking.
Workers' compensation pricing also illustrates why a company's staffing model matters. A historical benchmark classifies residential house cleaning under NCCI class code 0917, with one commonly cited average workers' compensation rate of $3.31 per $100 of payroll (house cleaning insurance market benchmark). The figure is a benchmark, not a quote, and actual pricing depends on the business and policy details.
Aquastar reports more than 25 years in operation and 4,000+ homes cleaned yearly in its publisher information. Those details don't replace a COI or policy review, but they show how insurance, worker vetting, training, and repeatable checklists can operate together. Learn more about the company's team and service approach before deciding what questions to ask.
Choosing a Protected Cleaning Service With Confidence
A protected cleaning service should pass three simple tests. First, it can provide current proof of liability coverage. Second, it can explain whether bonding and workers' compensation apply to its team. Third, it can answer specific questions about your service, especially if you need carpet cleaning, post-construction work, move-in or move-out cleaning, or care around valuable surfaces.
Use this decision filter:
Documents: Is the COI current and issued for the company you're hiring?
Limits: Do the liability limits meet your home, contract, HOA, or property manager's requirements?
Scope: Does the coverage discussion include the actual service and products involved?
People: Does the company explain worker vetting and workers' compensation clearly?
Claims: Do you know whom to contact if a vase breaks, a floor is damaged, or someone is injured?
Insurance should make booking easier, not more confusing. If you manage several properties or coordinate recurring vendors, software resources such as this JobsiteStack list can help you think about scheduling and service documentation, while the cleaner remains responsible for providing accurate insurance proof.
For more homeowner guidance, read how to choose a cleaning company. Then request the COI, confirm the limits, ask about exclusions, and save the answers before the first visit.
Aquastar Cleaning Services, LLC provides recurring housekeeping, deep cleaning, move-in and move-out cleaning, and post-construction cleanup for homes in Kennesaw and North Atlanta, with insured and bonded teams and customizable service plans. Visit Aquastar Cleaning Services, LLC to request a quote and discuss the coverage questions that matter for your home.
You've just finished cooking, the sink is full, chicken packaging is on the counter, grease is dotted across the stovetop, and someone has left a damp dishcloth beside the faucet. A quick wipe may make the kitchen look better, but it can also move residue from one surface to another. The most effective answer to how to clean a kitchen is a fixed order that handles clutter, food-contact surfaces, high-touch items, appliances, and floors without making you redo earlier work.
After cleaning thousands of homes, the pattern is clear: a kitchen stays fresher when you clean the right areas at the right time, not when you scrub every visible surface at random. This routine also works well with biodegradable products and recurring housekeeping, especially for busy households in Kennesaw and North Atlanta.
Why a Set Kitchen Cleaning Order Saves Time and Germs
After dinner, the mess usually appears in the wrong order. Grease sits on the stovetop, crumbs collect under the table, and a damp cloth rests beside the faucet. Wiping whichever area looks worst can spread residue, then force you to repeat work. A fixed sequence keeps food debris, dirty water, and used cloths from crossing clean surfaces.
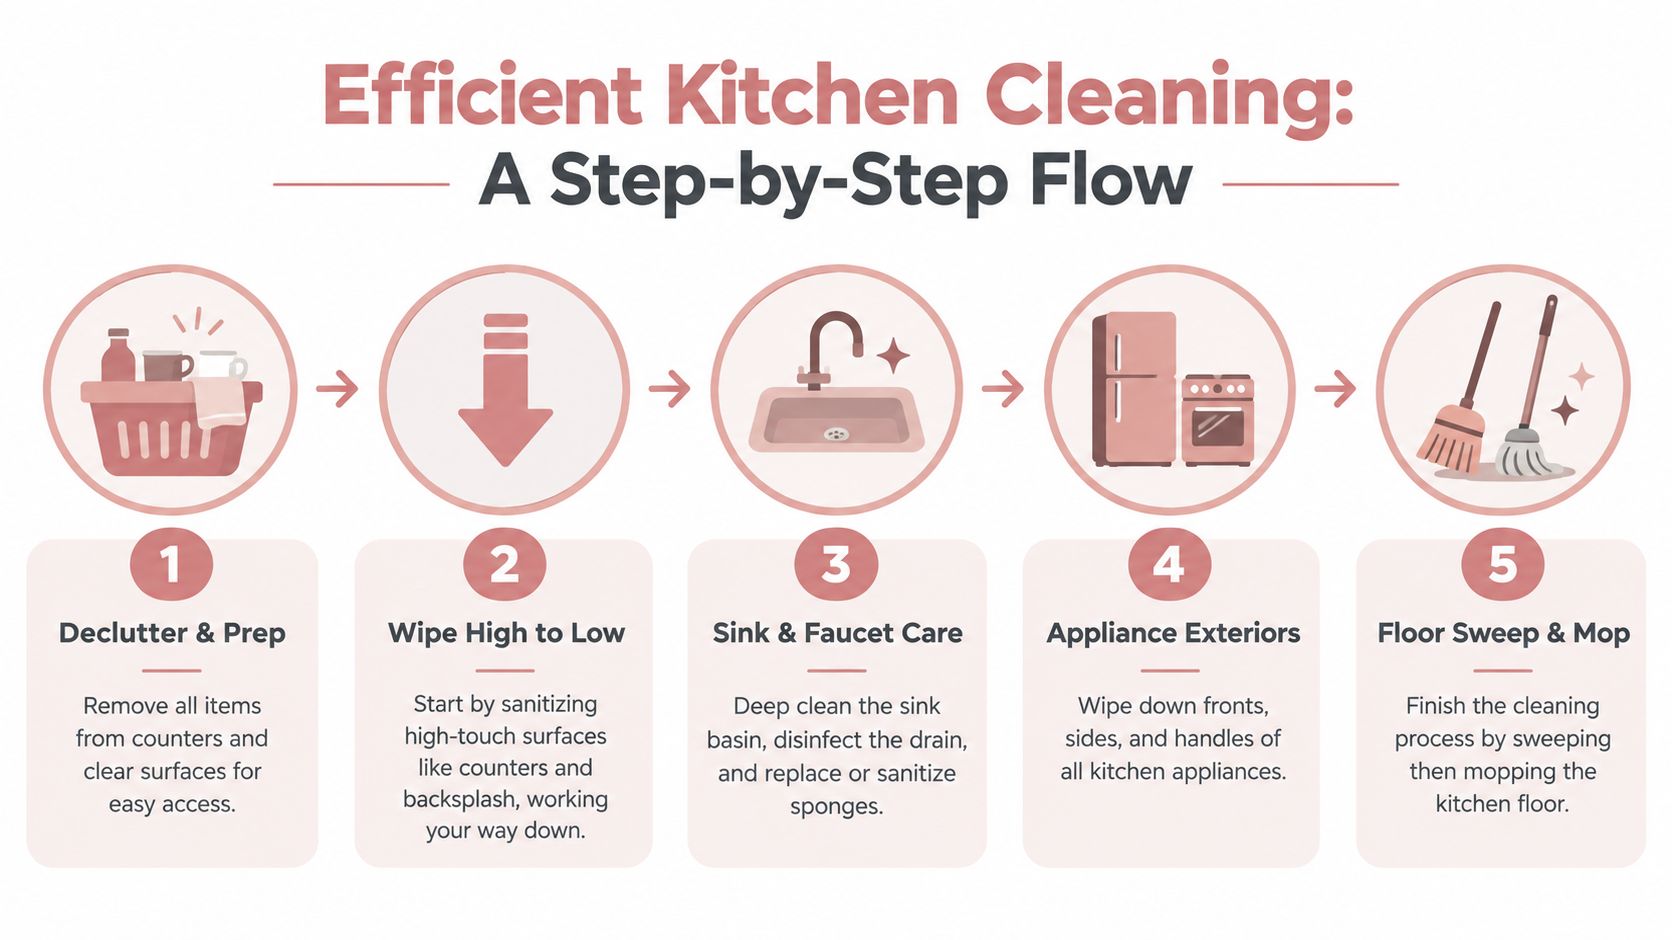
Work from dry and high surfaces toward wet and low surfaces. Clear loose items first, clean food-contact areas next, then deal with the sink, sponge, and cloths. Finish with the floor. This follows the same practical principle as Aquastar's top-to-bottom house cleaning guide, and it reduces recontamination because debris moves downward instead of back across finished work.
Timing matters in a kitchen because food preparation creates repeated contact. The FDA Food Code says food-contact surfaces and utensils used with TCS food must be cleaned throughout the day at least every 4 hours, with an additional 24-hour cleaning requirement in the relevant exception framework of the 2022 Food Code (FDA Food Code). A household does not need a commercial schedule, but frequently used cutting boards, counters, and utensils need attention during active preparation, not only at night.
Practical rule: Clean a surface according to its use, contact, and position, not only its appearance.
A two-year study of 10 U.S. household kitchens found contamination at almost every location at some point. Fecal coliforms appeared in 63% of sink samples and 67% of sponge samples, while E. coli appeared in 16.7% of sink surfaces and 33.3% of sponges. The study's findings make the priority clear: wash or replace the sponge, clean the sink and faucet, and launder food-contact cloths before spending time polishing cabinet doors.
Short on time? Handle the areas people touch and use first, then stop before low-impact detailing. For a realistic look at what a brief visit can cover, read can 40 minute cleaners do enough. A timed routine protects hygiene and prevents rework, even when a full deep clean must wait.
What to Gather Before You Start Cleaning
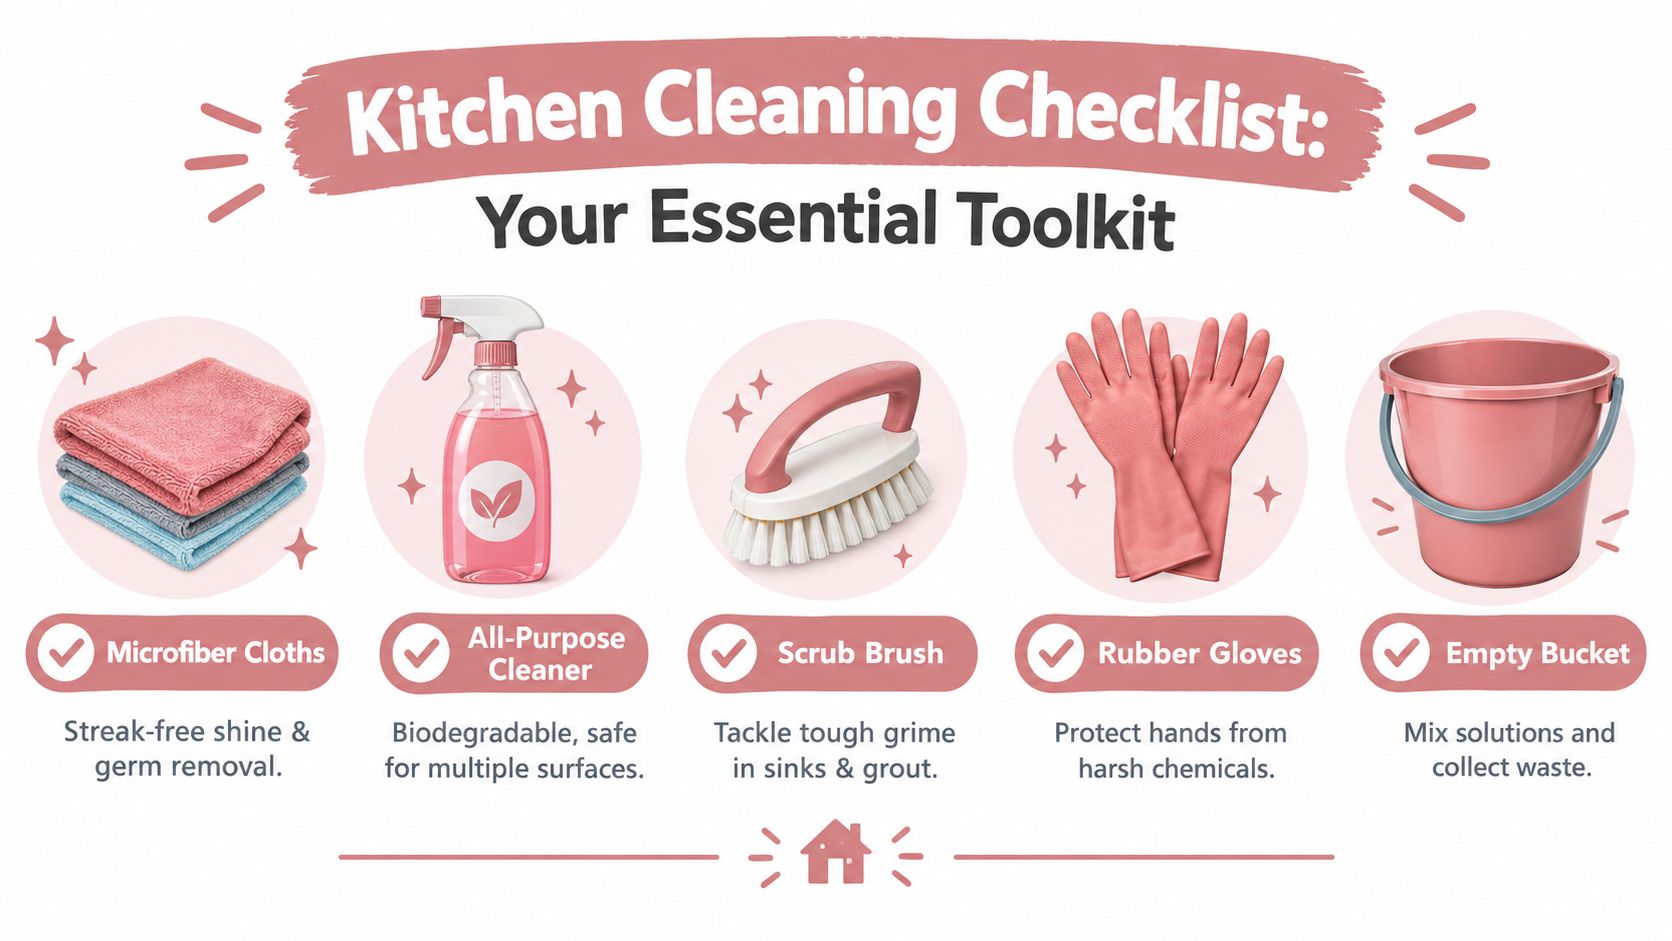
A kitchen clean slows down when supplies are scattered. Set up a bucket or caddy near the work area, then gather microfiber cloths, a scrub brush, a non-scratch sponge, rubber gloves, a broom or vacuum, a mop, dish detergent, and a biodegradable all-purpose cleaner suited to your surfaces. A house cleaning supplies checklist can help you replace missing basics before you begin.
Keep separate cloths for food-contact surfaces, appliance exteriors, and floors. Mark them by color if that prevents mix-ups. A cloth that touched the floor must not return to a counter, sink, or cutting board.
Wash. Use warm water and detergent to loosen grease and soil.
Rinse. Remove detergent and loosened residue with clean water.
Sanitize. Apply hot water or a suitable sanitizer according to its label.
Air-dry. Let the surface dry naturally instead of wiping it with a towel.
Sanitizer cannot work properly through grease or food debris. Clean with soap and water first, then rinse, dry, and sanitize where appropriate, as outlined in the CDC cleaning guidance. The Hong Kong Centre for Food Safety cleaning guidance uses the same sequence for counters, sinks, and utensils.
For a chlorine solution, the University of Missouri Extension food-safety guide gives a common mixture of 1 tablespoon of regular, unscented household bleach per 1 gallon of water, or 1 cup per 5 gallons of water. Never combine bleach with ammonia, acids, vinegar, or other cleaners. Follow the product label, ventilate the room, and use bleach only on compatible surfaces.
Contact time determines whether sanitizing works. Some chlorine guidance allows about 50 to 100 ppm for roughly 10 seconds, while other products require 30 seconds to 1 minute, depending on the label. Keep the surface visibly wet for the stated time, then let it air-dry. The domestic disinfectant guidance explains why the label's contact time matters.
How to Clean a Kitchen From Counters to Floors Without Rework
Start by emptying the sink and clearing the counters. Put dishes in the dishwasher, return food to the refrigerator, and place unrelated items in a basket. Don't spray around appliances, utensils, or food containers when you can move them first.
Start high and work toward the messiest areas
Wipe cabinet handles, the backsplash, counters, and the kitchen table from high to low. Use a damp microfiber cloth with a compatible cleaner, then switch to the wash, rinse, sanitize, and air-dry sequence for food-contact areas. If you've prepared raw chicken, treat the cutting board and nearby counter as a separate food-safety task. Remove the board, wash it thoroughly, rinse it, sanitize it if the material allows, and keep it away from ready-to-eat food until dry.
For ordinary grease, warm water and detergent usually outperform repeated sprays. An all-purpose cleaner can be useful for suitable counters, cabinet fronts, and appliance exteriors, and this guide to uses for all purpose cleaner at home offers ideas for using one product more efficiently. Always check whether the surface is sealed, natural stone, finished wood, or manufacturer-protected.
Give the sink and sponge their own pass
The sink is where dirty dishes, raw-food packaging, and cleaning tools meet. Scrub the basin, rim, faucet base, drain area, and handles with detergent and a brush. Rinse away loosened soil before applying sanitizer, and don't use the same cloth on the sink and counter without washing or replacing it.
Treat the sponge and dishcloth as cleaning equipment, not permanent fixtures. A 2020 ASM report found that E. coli, Salmonella, and Staphylococcus aureus survived up to 16 days on a kitchen sponge and up to 13 days on microfiber towels (ASM report). Replace worn or sour-smelling items, wash reusable textiles properly, and leave them open to dry rather than bunched beside the faucet.
Clean appliances before the floor
Wipe the stovetop after it cools. For greasy splatter, let warm detergent solution sit briefly, then lift the residue with a non-scratch pad instead of scrubbing aggressively. Clean microwave walls, the turntable, control buttons, refrigerator handles, and dishwasher edges. If you're cleaning a refrigerator interior, remove food and loose shelves first, then wash removable parts with mild detergent and dry them before replacing them.
For appliance seals, control panels, and finishes, use less moisture than you think you need. Excess liquid can collect around buttons and gaskets. Read the manufacturer's instructions before using abrasive products, bleach, steam, or an oven's self-cleaning cycle. Aquastar's deep cleaning checklist can help you identify appliance interiors and other tasks that don't belong in a quick daily reset.
Finish with floors
Sweep or vacuum under the table, around the baseboards, beside the trash can, and beneath accessible appliances. Pick up food particles before mopping, especially after cooking with flour, rice, or raw ingredients. Use a diluted floor cleaner appropriate for the flooring, change the solution when it becomes visibly dirty, and avoid flooding wood or laminate.
A clean floor should be the final result, not the first task. If you mop before wiping counters and cleaning the sink, falling crumbs and dirty drips force you to repeat the work.
Hidden Spots Often Missed During a Deep Clean
A kitchen can look clean while residue remains in refrigerator drawer tracks, door seals, microwave seams, coffee-maker reservoirs, dishwasher filters, cabinet undersides, faucet bases, and the narrow gap around the sink drain. These areas deserve attention because routine wiping rarely reaches them.
Rinsing removes loose debris and some bacteria, but it does not guarantee a hygienic surface. Cleaning followed by thorough drying or an appropriate disinfectant generally gives better control than rinsing alone. Use the product only on compatible surfaces, follow its label, and allow the required contact time.
Start with removable parts. Wash refrigerator drawers, coffee-maker components, dishwasher filters, and other detachable pieces with detergent, rinse away residue, and dry them fully before putting them back. Wipe seals and tracks with a cloth that is damp rather than dripping, then dry those folds and edges. Moisture left inside a gasket or drawer channel invites odor and buildup.
The sink drain needs separate handling. Remove accessible food debris first, then follow the fixture manufacturer's instructions. Aquastar's guide to cleaning a kitchen drain covers the parts that surface scrubbing misses. Never combine drain chemicals, and do not pour an incompatible product into the drain to mask an unpleasant smell.
Sponges and dishcloths are hygiene hotspots because they stay damp and collect food residue. Rinse them thoroughly, wring them out, and spread them open to dry. During a deep clean, wash reusable cloths according to their care instructions and replace items that remain sour-smelling or visibly worn. A quick rinse followed by immediate reuse leaves more contamination behind than proper washing and drying.
Finish by checking the spaces behind removable parts, appliance gaskets, fridge drawers, microwave seals, and coffee equipment. Cleaning these points after the surrounding surfaces prevents dirty drips from undoing earlier work.
How Often to Clean Each Part of Your Kitchen
Frequency depends on use, not just appearance. A household that cooks raw meat regularly needs faster attention to boards, counters, utensils, and sink areas than a household that mainly reheats prepared food. Food-safety guidance recommends cleaning and sanitizing high-use food-contact surfaces after each use, when changing from raw to ready-to-eat food, after contamination interruptions, and at least every 4 hours during continuous room-temperature use (Centre for Food Safety guidance).
Area
Daily
Weekly
Monthly Deep Clean
Counters and food-preparation surfaces
Clean after food preparation
Inspect edges and backsplash
Clean behind small appliances and wall junctions
Sink, faucet, and drain area
Wash away food residue
Scrub basin, rim, and faucet base
Detail drain components and difficult-to-reach gaps
Sponges and dishcloths
Rinse, wring, and dry openly
Wash reusable textiles and inspect odor
Replace worn or persistently sour items
Stovetop and microwave
Wipe visible spills
Clean knobs, seams, and interior splatters
Detail grease buildup and removable parts
Refrigerator
Wipe fresh spills and handles
Check drawers, shelves, and seals
Remove shelves and clean the full interior
Floors
Sweep food debris and spot-mop
Full sweep and mop
Clean edges, corners, and accessible areas beneath appliances
A short daily reset prevents weekly work from becoming a restoration project. Between recurring visits, use mild biodegradable products where suitable, keep a clean cloth reserve, and assign one household member to check the sink and floor after the evening meal. For families balancing work, school, and activities, a house cleaning schedule for a busy family can turn these tasks into predictable habits.
Pro Tips to Keep Your Kitchen Clean Longer
The cleanest kitchen isn't maintained by one heroic scrub. It stays manageable because small contamination points are handled before they spread.
Replace cloths on schedule: Safefood reported in 2026 that 90% of adults felt confident in their kitchen hygiene, while 73% skipped key practices, including replacing dishcloths every 2 days and thoroughly washing hands, utensils, surfaces, and chopping boards after raw-food contact (Safefood survey coverage). Build cloth replacement into the routine instead of waiting for odor.
Clean raw-food areas immediately: Don't leave chicken juices, egg residue, or raw seafood drips until bedtime. Wash the board and surrounding counter before preparing anything ready to eat.
Keep clean and dirty tools separate: Use different cloths for counters, sinks, and floors. Store dry cloths where air can circulate.
Choose gentler products thoughtfully: Biodegradable cleaners can suit households with children and pets, but “natural” doesn't automatically mean safe for every finish or effective as a sanitizer. Check the label and surface instructions.
Delegate the hidden work: DIY is practical for daily resets. A recurring professional visit makes sense when appliance interiors, cabinet edges, floors, and whole-room detail keep slipping from the schedule.
Aquastar Cleaning Services, LLC offers recurring housekeeping, deep cleaning, interior refrigerator and oven add-ons, and customized room-by-room checklists for homes in Kennesaw and North Atlanta. Its insured and bonded teams can use gentle biodegradable solutions when requested, which helps households maintain a consistent kitchen routine without redoing missed areas.
If your kitchen needs more than a quick counter wipe, visit Aquastar Cleaning Services, LLC to request a quote for recurring housekeeping, a deep clean, or interior appliance add-ons. Choose the service scope that fits your home, your schedule, and the kitchen hotspots you want handled first.
You want the kitchen counters wiped, the bathroom sink fresh, the floors clean enough for bare feet, and the sofa free of mystery spots. You probably don't want a cabinet full of harsh sprays, heavy fragrance, and half-used specialty bottles that all promise different things. Most homes don't need more products. They need better matching between the mess and the cleaner.
That's where practical eco friendly cleaning tips help. Instead of treating every job the same way, use one cleaner for grease, another for mineral buildup, another for organic stains, and skip ingredients that can damage the surface or irritate the people living there. The safest routine is usually simple: mix small batches, label them clearly, ventilate the room, keep products out of reach of children and pets, and use reusable cloths instead of disposable wipes when possible.
A good example is keeping a labeled castile-soap solution under the sink for weekly floor cleaning, while reserving an enzyme product for a pet accident on the rug. That approach cuts waste, avoids over-cleaning, and keeps stronger treatments for jobs that need them. It also helps if you already prefer lower-fragrance options like a non toxic spray for Aussie homes.
1. Vinegar and Baking Soda for All-Purpose Surface Cleaning
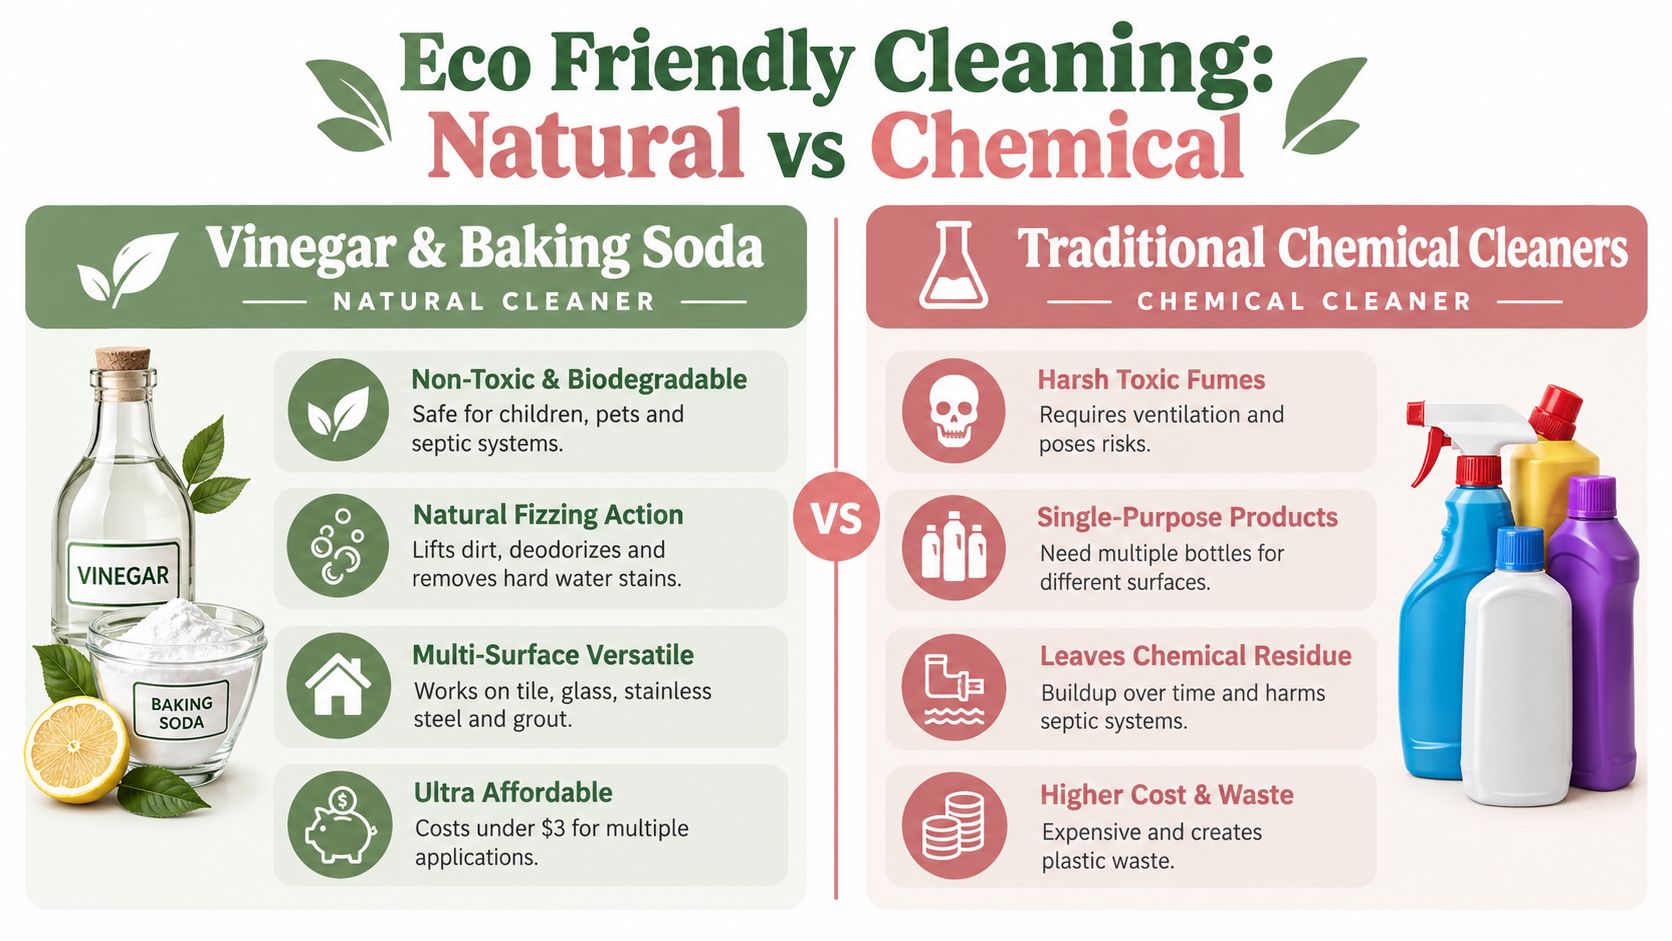
Vinegar and baking soda still earn their place in a real home cleaning kit, but only when you use them for the right jobs. Baking soda gives you mild abrasion and odor control. Vinegar helps with soap scum, light mineral residue, and general wipe-downs. Together, they're useful for bathrooms, sinks, and grime on hard surfaces, especially when you want to avoid bleach-heavy routines.
The American Academy of Pediatrics shares a simple green-cleaning mix of 1 cup vinegar plus 2 cups water in a spray bottle, and notes that vinegar can be used on glass, walls, cupboards, floors, sinks, stovetops, toilets, bathtubs, and coffee makers in many households through its family cleaning guidance on safer product choices for your family. For extra scrubbing, use baking soda separately as a paste on a damp sponge.
Where it works best
Use this pairing for jobs like bathroom tile, a kitchen sink after food prep, or a move-in wipe-down when you want to remove residue without filling the room with fumes. In a family bathroom, for example, you can spray the vinegar mix on the mirror, faucet, and tile, then scrub the tub edge with baking soda on a damp microfiber cloth.
It also works well for weekly maintenance in rentals or recently renovated spaces where the mess is mostly dust, dried splashes, or surface grime. If grout has buildup, spread a baking soda paste first, then work it with a cloth or soft brush.
Practical rule: Ventilate well and test painted or delicate surfaces first. Vinegar can dull some stone, and baking soda can leave a haze if you don't rinse.
A few habits make this more effective:
Use microfiber cloths: They pick up loosened grime better than paper towels and reduce streaking on mirrors.
Let paste sit when needed: On a ring around the tub or sink, leave baking soda paste in place for a while before scrubbing.
Keep the bottle labeled: A marked spray bottle under the bathroom sink makes weekly cleaning more likely.
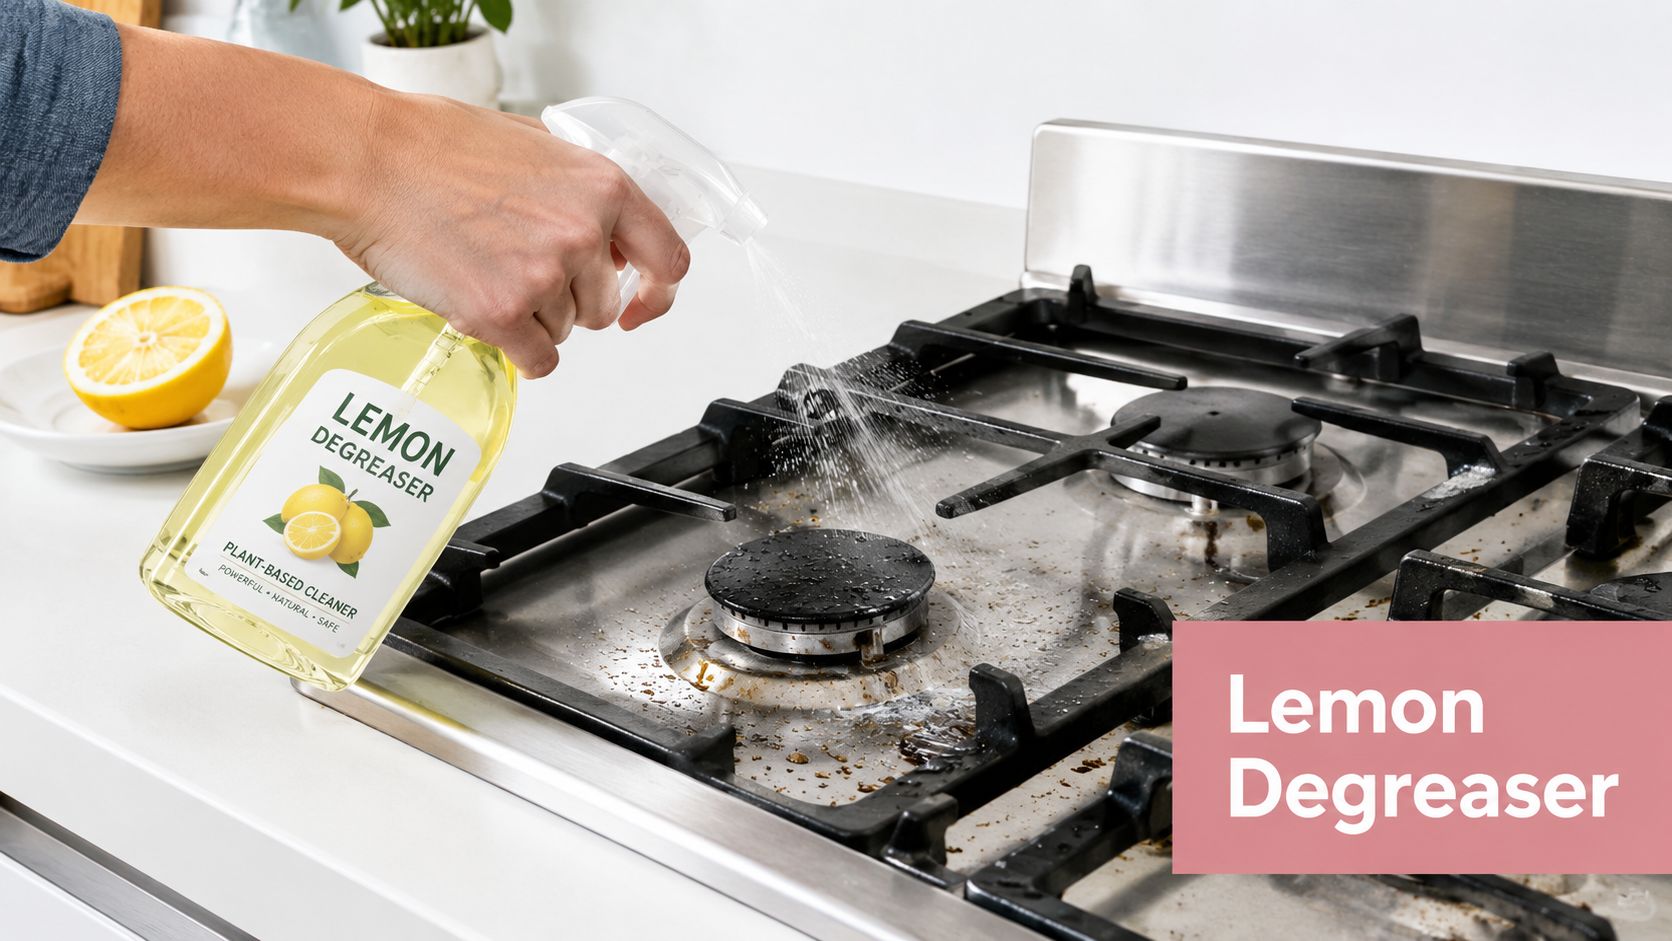
Dinner cleanup usually leaves the same trail. Oil mist near the stove, a sticky spot on the fridge shelf, and a sink that smells faintly of onions or fish. Lemon juice earns its place on those jobs because the acid helps loosen light grease and food residue, and the fresh citrus scent disappears faster than many fragranced sprays.
Use it where kitchen grime is shallow and recent. A cut lemon works well on a stainless sink after prep, and a bowl of hot water with lemon slices helps soften microwave splatter so it wipes off with less scrubbing. For a greasy patch on the backsplash, squeeze a little juice onto a damp cloth, wipe the area, then rinse with clean water so the surface does not stay tacky.
Lemon also has limits, and those limits matter more than the scent. It helps with everyday reset cleaning. It does not replace a proper disinfectant after raw chicken juices on the counter, a sick-day cleanup, or any high-risk food-contact mess.
One simple way to keep it useful is to match the method to the job:
Microwave splatter: Heat a bowl of water with lemon slices until the cavity turns steamy, wait a minute, then wipe the softened residue from the walls and door.
Sink deodorizing: Rub half a lemon around the basin, focus on the drain area and rim, then rinse and dry with a cloth to reduce water marks.
Stovetop grease film: Apply lemon juice to a cloth first, wipe around burner caps or control panels, then follow with a damp cloth so acidic residue does not sit on the surface.
Cutting board refresh: Rub with fresh lemon, let it sit briefly, then rinse and dry fully. This helps with odors, but it is still not a full sanitizing step after raw meat.
Skip lemon on marble, travertine, limestone, and other natural stone because the acid can etch the finish. Use caution on delicate metal finishes too. On some surfaces, repeated use can dull the shine rather than improve it. Gloves help if your hands are already dry or cracked.
That trade-off makes lemon a practical kitchen tool instead of an all-house cleaner. It is best for light degreasing, odor control, and quick maintenance between deeper cleans.
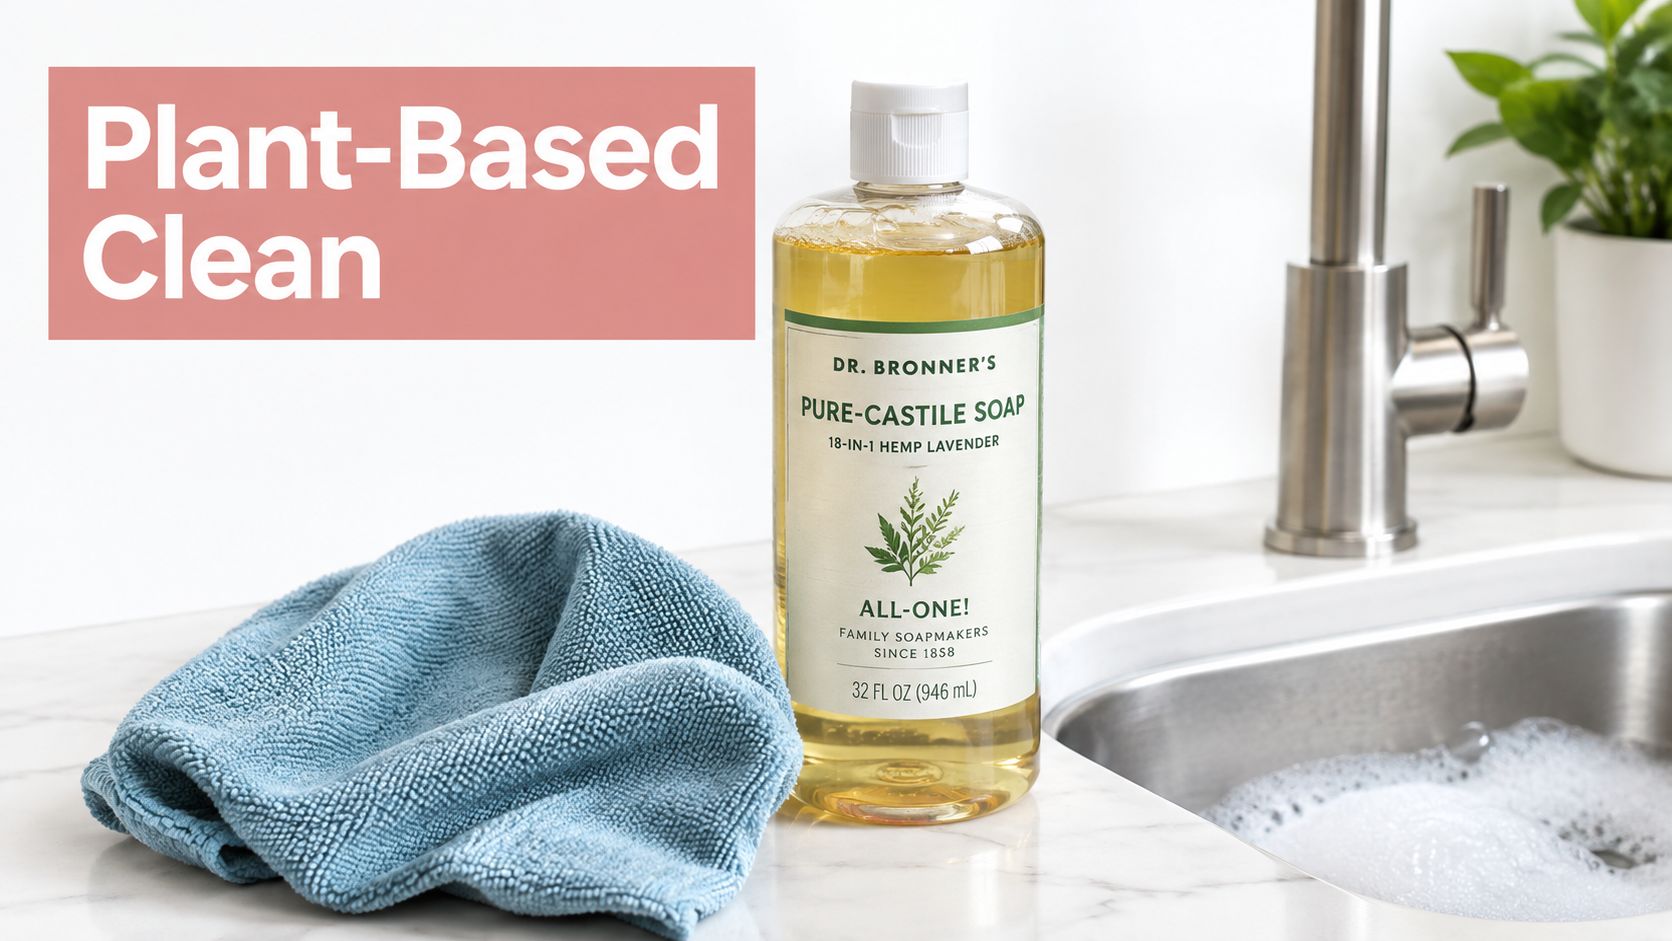
3. Castile Soap Base for Custom Gentle Cleaners
A muddy entry floor, fingerprinted light switches, and a dusty bathroom vanity do not need three different products. Castile soap earns its spot because it handles routine soil across several rooms with one gentle base, as long as you mix it lightly and match it to the surface.
I use it for maintenance cleaning, not problem solving. It works well on sealed floors, painted baseboards, sink exteriors, and washable cabinet fronts. It does not do much for mineral scale, heavy grease baked onto a stovetop, or any job that needs a registered disinfectant.
The main mistake is overmixing. Too much soap leaves a film that grabs more dirt, especially on dark tile or laminate. Start with a small amount in warm water, then adjust only if the cloth is not lifting grime. In a hallway, for example, a lightly diluted bucket is usually enough to clean shoe prints without leaving the floor tacky after it dries.
A second trade-off is finish sensitivity. Castile soap is gentler than many all-purpose sprays, but "gentle" does not mean universal. Test it on painted cabinets, sealed wood, and specialty flooring before doing the whole room. If a bathroom vanity has a soft painted finish, wipe with a damp cloth, then dry it right away so water does not sit along the edges.
Hard water can also get in the way. If the surface dries dull or streaky, the soap may be reacting with minerals in the water rather than with dirt on the surface. In that case, use less soap, rinse your cloth more often, and buff dry. That small adjustment matters on floors and glossy cabinet doors.
For a simpler setup, keep one labeled spray bottle for light wipe-downs and one bucket mix for floors. This house cleaning supplies checklist is useful if you want to trim duplicates and keep only products that cover distinct jobs.
Castile soap is a good base cleaner. It is not a stand-in for every other method in this article. Used in the right places, it cuts bottle clutter and handles weekly upkeep with less waste and less residue.
“Natural” needs more caution here. Essential oils can make a room smell fresh, and some people like them in homemade sprays for bathrooms and high-touch areas. But strong scent doesn't equal better cleaning, and oils can be a problem for people with asthma, fragrance sensitivity, children, or pets.
That concern isn't theoretical. A summary cited by AAAAI reports that persistent and increased home use of green cleaning products was associated with higher asthma symptom risk over time, including mean score ratios of 1.08 and 1.07, discussed in this article on eco-conscious cleaning tips and green product tradeoffs. So if you use essential oils at all, use them lightly and only where they help.
Use scent carefully
A bathroom spray with a small amount of tea tree or eucalyptus may feel cleaner after wiping the sink, faucet, and toilet handle. In a guest bath that gets musty, that can be useful. But in a child's bedroom, a nursery, or a tightly closed home office, fragrance can create more trouble than benefit.
For kitchen counters after regular meal prep, I'd rather see a low-fragrance or fragrance-free product than a heavily scented homemade spray. If someone in the home gets headaches or wheezing, this is one of the first things I'd cut back.
Fragrance-free usually beats pleasantly fragranced when someone in the home is sensitive.
5. Enzyme-Based Stain Removers for Organic Matter
A wiped-up stain can still keep working against you. The carpet looks clean, but a sour milk smell returns by evening, or the dog goes back to the same corner because residue is still sitting in the fibers and pad.
That is the job for an enzyme cleaner. It works on organic material such as pet urine, vomit, food spills, sweat, and other protein-based messes that standard surface cleaners often leave behind. Vinegar can help with some odor, and soap can remove surface grime, but neither one breaks down these residues the way an enzyme formula is designed to.
Use it where the mess soaked in, not where the stain only looks bad on top. A rug by the back door, a mattress cover with sweat buildup, a sofa cushion after spilled milk, or the seam of a pet bed are all good candidates.
The method matters more than force. Blot first so you are not pushing the stain wider. Then apply enough cleaner to reach the full depth of the spot. On carpet, that often means the backing and sometimes the pad. If the product dries too quickly, the enzymes do less work, so follow the dwell time on the label and give it time before blotting again.
A common example is a dog accident in a bedroom. Blot with towels, apply the enzyme cleaner generously over the full affected area, and let it sit as directed. Come back later and blot again with clean towels. If you only mist the surface and wipe right away, the odor often returns because the residue below the pile is still there.
Two limits are worth respecting. Heat can set some protein stains, so skip hot water unless the product label says otherwise. And do not mix enzyme cleaners with bleach or strong disinfectants in the same step, because those can reduce how well the enzymes work.
Test upholstery or carpet in a hidden spot first, especially on darker fabrics or delicate blends. Fresh stains are easier to remove, but older spots can still improve if you treat them thoroughly instead of rushing the job.
If pet messes are a regular part of the routine, this guide to house cleaning for pet owners can help you build stain treatment into the rest of your cleaning plan.
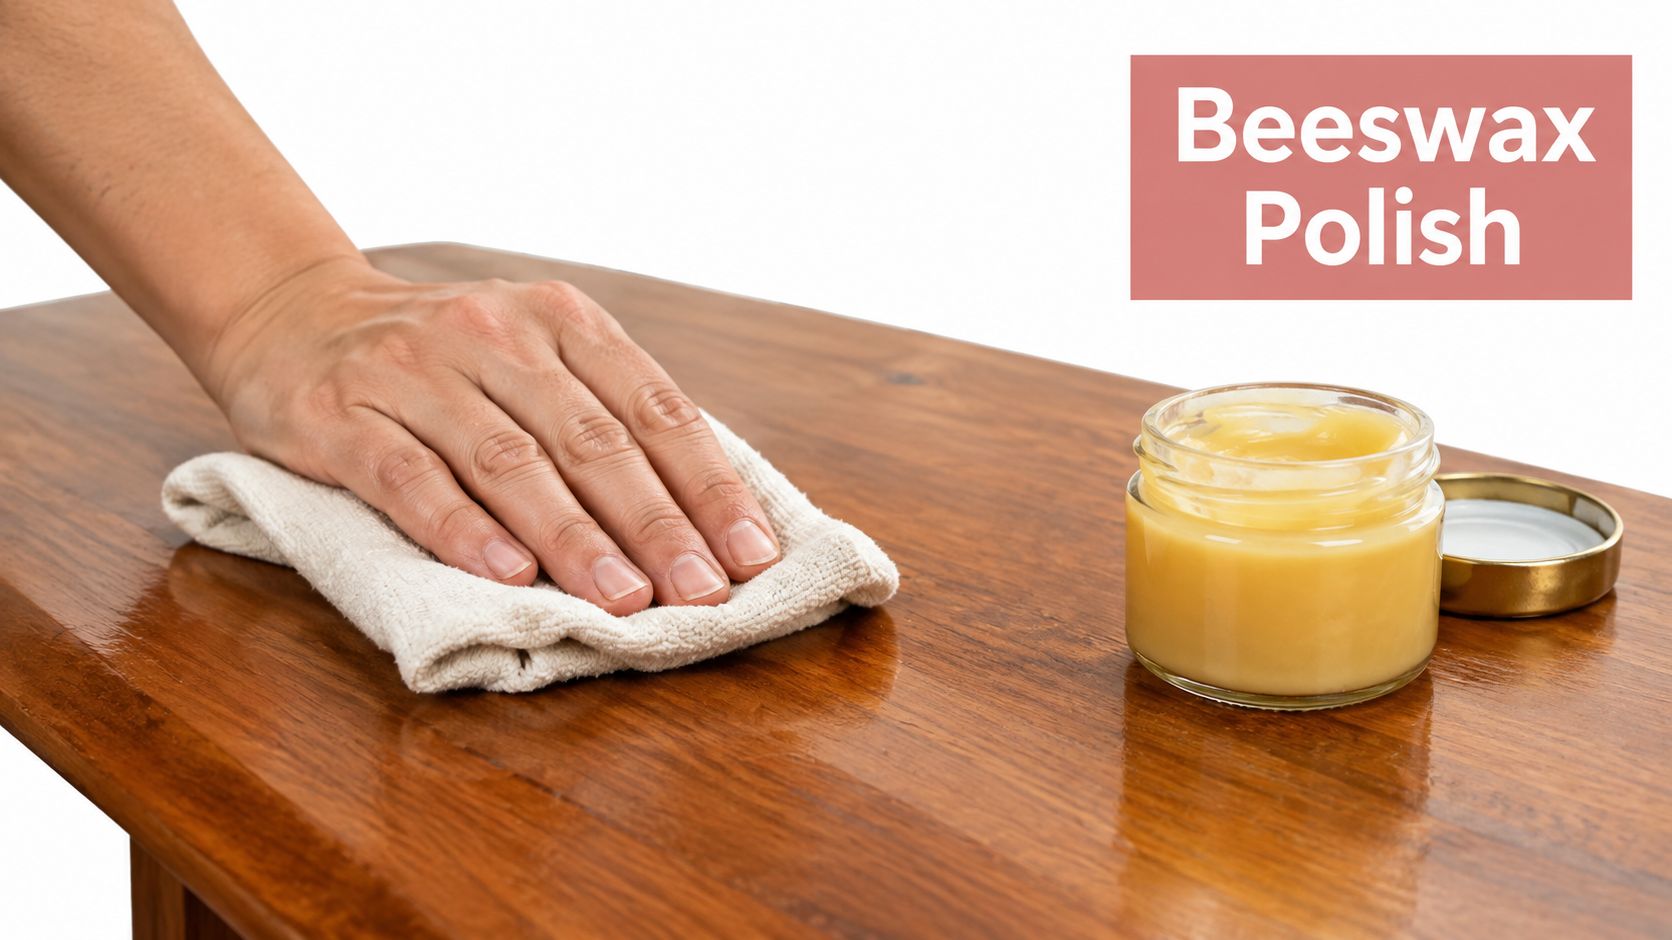
6. Beeswax and Plant Oil Polish for Wood Surfaces
Wood needs a different mindset from tile, laminate, or painted drywall. The goal isn't just to make it look shiny. It's to clean lightly, protect the finish, and avoid buildup that turns tacky over time. A beeswax and plant-oil polish can help with that if you use a thin coat and buff it well.
That makes sense on dining tables, wood cabinets, and some hardwood surfaces that look dry or dull after regular dusting. It does not mean every wood surface needs a rich polish every week. Overdoing wax is one of the easiest ways to create a sticky feel that grabs dust.
Keep the coat thin
A realistic example is a dining table that gets wiped daily and starts looking flat around the edges. After removing crumbs and surface dirt with a dry or slightly damp cloth, apply a very small amount of polish, spread it thinly, and buff it with a clean microfiber cloth until the surface no longer feels slick.
The same method can help on wood cabinet doors in kitchens where hands leave dull patches near the pulls. Thin application matters more than the exact oil blend.
Wood polish should leave the surface conditioned, not greasy.
For butcher block or food-adjacent wood, be more selective about what you apply and how often. This guide to cleaning a butcher block is a useful reference before treating prep surfaces.
If you want to see the polishing process in action, this video is a helpful visual:
A few limits matter here:
Test first: Natural finishes, sealed wood, and engineered surfaces can react differently.
Avoid thick buildup: More polish doesn't mean more protection.
Buff completely: If you can feel residue, keep buffing.
Skip damaged finishes: Peeling or broken finish needs repair, not more wax.
7. Salt Scrub for Heavy-Duty Scouring and Deodorizing
A roasting pan with browned residue, a stained sink, a cutting board that smells like onion. These are the jobs where salt earns space in the cabinet.
Salt works by abrasion first. It helps scrape off residue that a soft cloth leaves behind, and it can help with odor control in closed spaces after the surface has already been cleaned. That distinction matters because salt does not cut grease well on its own, and it does not disinfect.
Use it where friction is the need. A stainless steel sink is a good example. After washing away loose grime, sprinkle salt over the stained area, add a little lemon juice or water to make a gritty paste, then scrub with the grain using a sponge. Rinse well and dry the sink so you do not leave mineral marks behind.
Cookware is another strong fit. For a roasting pan with baked-on bits, cover the sticky area with coarse salt, add just enough water to dampen it, and work it with a scrub pad. The salt gives you more bite than soap alone. On cast iron, many cooks use salt to lift stuck food without stripping the seasoning, but the pan needs a quick rinse, thorough drying, and a light coat of oil right after.
Salt can also help with odor after the main cleanup is done. If a refrigerator still smells after a spill has been wiped up, or a trash bin keeps a faint odor after washing, set out a small open bowl of salt for a short period and see if it improves. It is a simple low-waste option, but it is slower and less absorbent than baking soda.
A plain scrub also avoids loading the job with fragrance. Analysts summarized by EWG's report on cleaning-product emissions found that many cleaning products release a wide range of VOCs, with fragrance-heavy formulas contributing more. If all you need is abrasion, salt keeps the product list short.
Use judgment on finishes:
Coarse salt gives more scrubbing power for pans and sinks.
Fine salt is better for smaller jobs or surfaces that scratch more easily.
Skip salt on delicate nonstick coatings, soft stone, fiberglass, and easily scratched finishes.
Wipe and dry metal well after scrubbing to reduce spotting and corrosion.
This is one of the cheapest substitutions in a greener cleaning routine. It works best on narrow, messy jobs where physical scrubbing solves the problem faster than another specialty product.
8. Hydrogen Peroxide for Disinfection and Stain Lifting
Hydrogen peroxide is one of the most useful “use it when needed” products in a greener routine. It's good for stain lifting and for some disinfection tasks, especially in bathrooms and on washable fabrics that can handle mild bleaching action. This is the bottle to keep for specific problems, not a spray to use casually on everything.
Think grout discoloration, a blood spot on a pillowcase, or a toilet area that needs more than soap and water. In those cases, peroxide is often more practical than a heavily fragranced bathroom cleaner.
Better for problem spots than daily wipe-downs
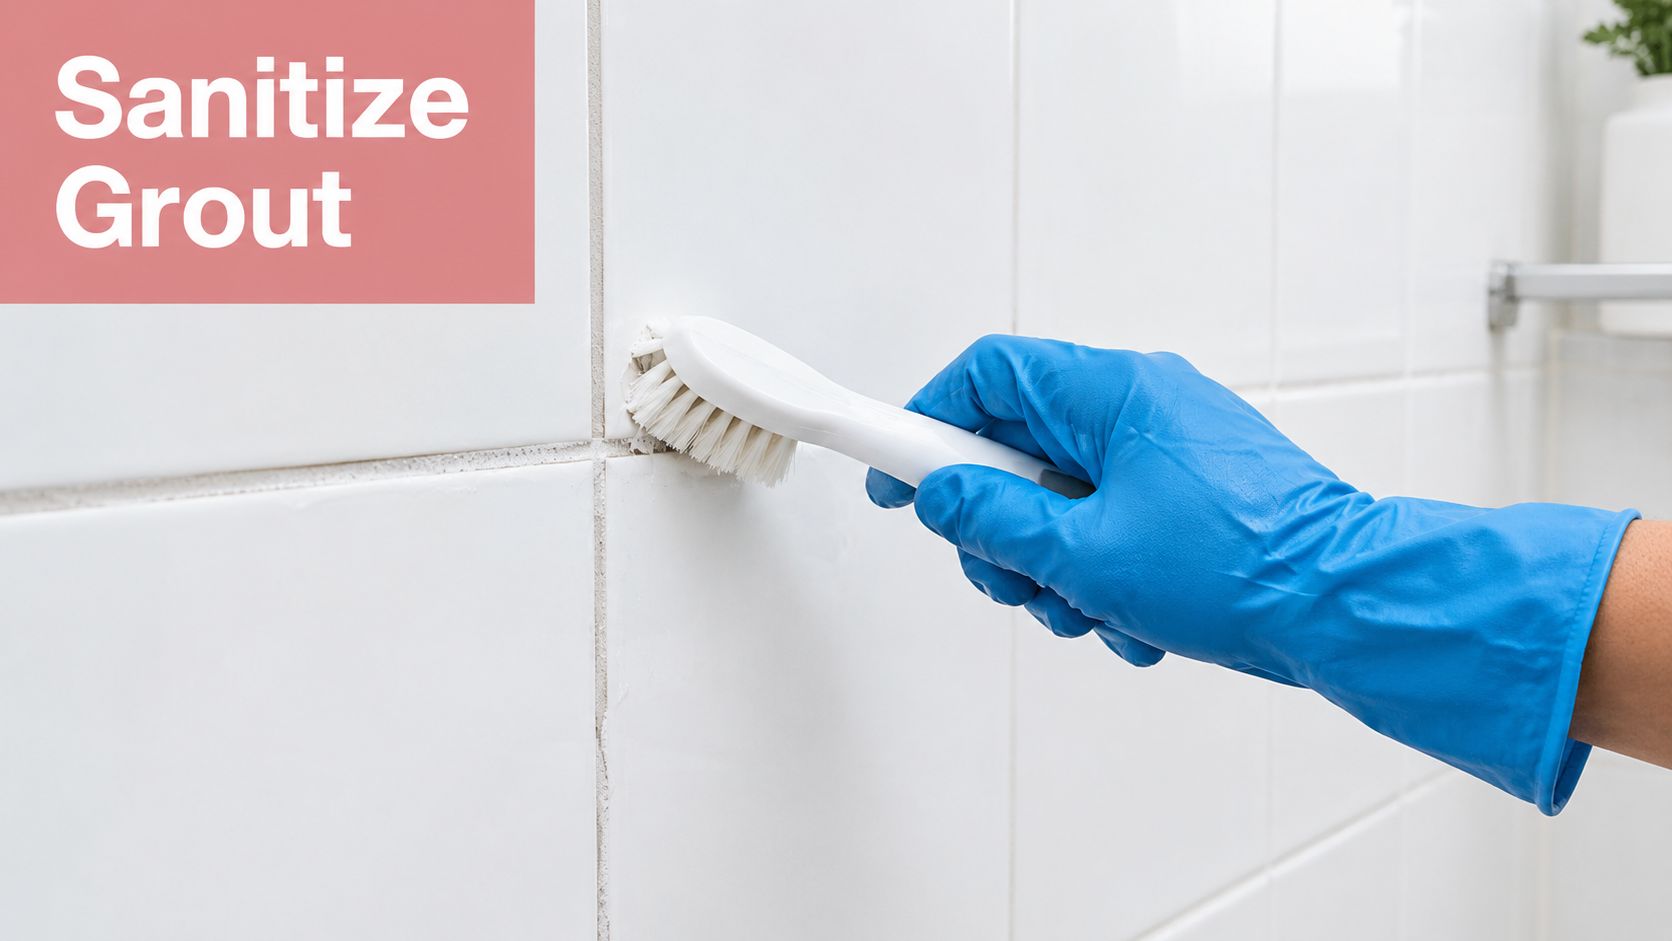
For grout, apply peroxide to the discolored line, let it sit for a bit, then scrub with a small brush and rinse. For a fresh fabric stain, blot first, test a hidden area, then apply peroxide and blot again after it has had time to work.
The same goes for mold-prone bathroom corners. If you've got a windowsill or caulk line that darkens repeatedly, peroxide can be part of a targeted cleanup. Still, moisture control matters more in the long run. Use the fan, dry the surface, and don't rely on chemicals alone.
EPA guidance on identifying greener cleaning products and ready biodegradability is a good reminder to choose products that meet a real standard rather than trusting vague eco language. That's especially useful when you're buying a bathroom cleaner and trying to decide between a certified product and a bottle with a leaf on the label.
Another reason to be selective with sprays is the larger emissions picture. Research summarized through science.gov on household cleaning product emissions reported that volatile chemical products emitted an estimated 7.6 ± 1.5 teragrams of VOCs in the U.S., compared with 3.5 ± 1.1 teragrams from mobile sources in the same line of research. Choosing lower-emission cleaners and using fewer airborne products, especially sprays and fragrance-heavy formulas, makes sense at both household and broader scale.
Use peroxide where you need stain lifting or targeted disinfection. Don't turn it into your all-purpose cleaner.
8 Eco-Friendly Cleaning Methods Compared
Item
🔄 Implementation Complexity
💡 Resource Requirements
⚡ Speed / Efficiency
⭐ Key Advantages
📊 Ideal Use Cases
Vinegar & Baking Soda for All-Purpose Surface Cleaning
Low, simple mixing; paste prep for tough spots
Very low, vinegar, baking soda, water, spray bottle; <$3 per batch
The easiest way to keep a greener home clean is to stop chasing a perfect product and build a repeatable system. Use gentle cleaners for daily mess, stronger targeted products for real stains, and keep each formula matched to the job. Vinegar helps with hard-surface maintenance. Lemon helps with light grease and odor. Castile soap covers regular floor and surface cleaning. Enzymes handle organic stains. Peroxide steps in for grout, bathroom trouble spots, and certain fabric stains.
Keep the routine small enough that you will follow it. A labeled castile bottle for weekly floors, a vinegar spray for sinks and glass, baking soda for scrubbing, and one stain treatment for fabrics or carpet can cover a lot of a normal household. Store small batches safely, keep them out of reach, and never mix ingredients casually just because they are all considered natural or low-toxicity.
Reusable tools matter too. Microfiber cloths, washable mop pads, refillable spray bottles, and a small scrub brush cut down on disposable waste and make quick cleaning easier. If you're trying to buy smarter, third-party standards help more than front-label claims. Certification criteria discussed in this overview of eco-friendly cleaning product standards and labels point to why benchmarks such as biodegradability, aquatic-toxicity limits, and tighter product screening are more useful than broad “green” marketing.
A practical cadence keeps the whole system manageable:
Weekly jobs: Kitchen counters, sink, bathroom fixtures, toilet exterior, high-touch spots, and floors in busy areas.
Bi-weekly jobs: Shower walls, baseboards, appliance fronts, under furniture edges, and a closer pass on bedrooms and living areas.
Monthly jobs: Refrigerator shelves, interior appliance detail, cabinet fronts, deeper wood care, and targeted stain review on rugs or upholstery.
Some homes outgrow DIY pretty quickly. Large homes, packed family schedules, move-in or move-out deadlines, post-construction dust, and carpet problems often need more time, equipment, and consistency than a single weeknight allows. That's also true when sensitivity to fragrance or harsh products means the process has to be more deliberate.
For households in Kennesaw and North Atlanta, Aquastar Cleaning Services fits naturally into that gap. The company is family-owned, serves local homes with recurring housekeeping, deep cleaning, move-in and move-out cleaning, post-construction cleanup, and carpet cleaning through specialists, and offers eco-friendly products when requested. If you want service details, plan options, or a quote, visit Aquastar's cleaning services and quote information.
The broader shift supports that approach. The global eco-friendly cleaning products market was estimated at USD 13.2 billion in 2025 and is projected to reach USD 33.6 billion by 2035, implying roughly 10.0% CAGR, according to this eco-friendly cleaning products market outlook. Households clearly want lower-toxicity, lower-waste options. The trick is choosing methods that work in real rooms, on real surfaces, with real limits.
Aquastar Cleaning Services, LLC provides recurring housekeeping, deep cleanings, move-in and move-out cleaning, post-construction cleanup, and eco-friendly product options for homes in Kennesaw and the North Atlanta area. If you want help turning these eco friendly cleaning tips into a routine that fits your home, pets, schedule, and surface types, visit Aquastar Cleaning Services, LLC for service details and quote options.
The place usually looks “pretty clean” right before a move. Boxes are gone, counters are wiped, and the floors may even look decent from the doorway. Then inspection day gets close, and the problem areas show up fast. Dust on trim, grease inside the oven, film in the refrigerator drawers, grout discoloration, vent covers, and the condition you forgot to document.
Start with the handover date and work backward. Give yourself two weeks for sorting, patching, and pulling things away from walls. Use the final week for room-by-room deep cleaning. Save the last day for floors, appliance interiors, trash removal, and photos of each finished room. If you clean the refrigerator too early, for example, you'll often end up using it again and wiping it twice. Empty it late, defrost if needed, then do the final clean when it will stay shut.
Modern move-out cleaning is tied closely to the inspection record. In many rentals, the move-in checklist is used again during the pre-move-out inspection and when deciding whether any deposit is retained for cleaning or repairs, as shown in Colorado's rental property condition checklist. That's why a good move out cleaning checklist isn't just about making the place look fresh. It's about matching the handover standard inspectors use.
If you want a useful overview of what pros usually include, this guide to the components of a bond clean is a helpful comparison point.
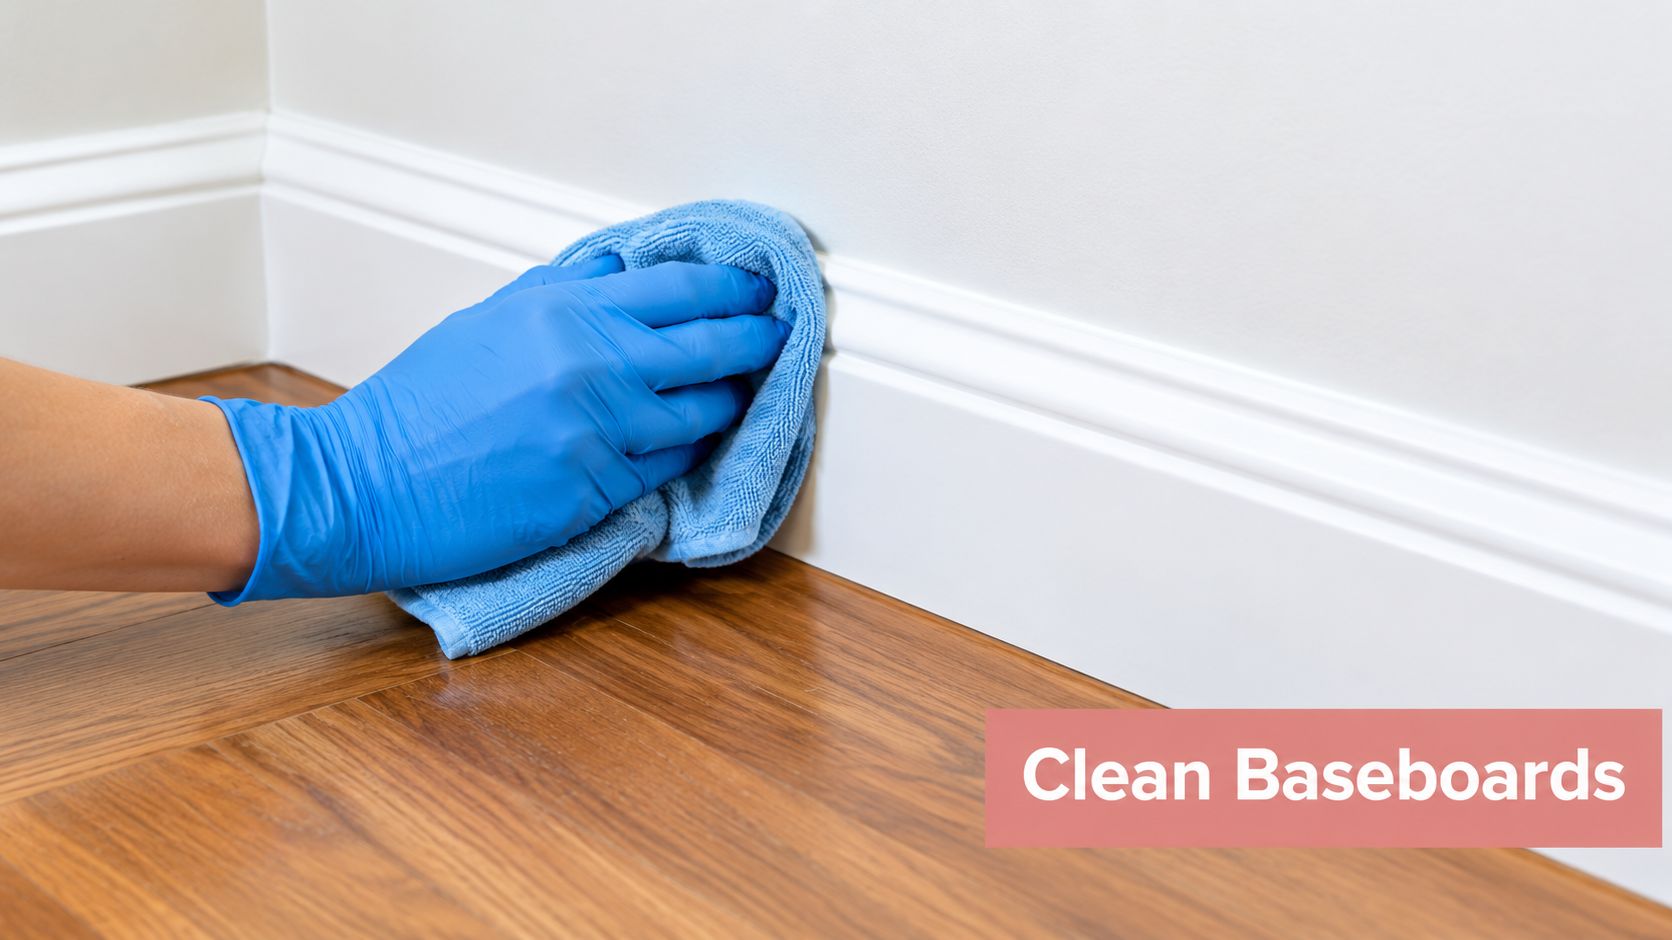
1. Deep Clean Baseboards and Trim Work
Baseboards are easy to ignore because you don't look at them at eye level every day. Inspectors do. Along with door trim and window trim, they collect dust, pet hair, kitchen residue, and scuff marks that make an otherwise clean room feel unfinished.
A practical example. A family in Kennesaw gets the house ready to list and thinks the paint has yellowed. Once they wipe the baseboards and door casings with a damp microfiber cloth, the original cream color shows through. The room looks brighter without repainting a thing.
For renters, this matters because trim is one of those details that can support a “not cleaned thoroughly” complaint. In practice, landlords and property managers increasingly use itemized inspection forms that compare room condition against the move-in baseline, rather than relying on an informal walkthrough, as discussed in Buildium's overview of the rental inspection checklist process.
How to clean trim without making more work
Use a microfiber cloth dampened with a mild biodegradable cleaner. Dry dusting often just pushes debris into corners. On textured trim, use a soft brush first, then wipe.
A practical example. In a Marietta apartment, a renter with a shedding dog finds fur packed where the baseboard meets the carpet edge. Vacuuming alone leaves a gray line behind. A brush attachment followed by a damp cloth removes it properly.
Start high in the room: Dust door frames, window trim, and ledges first so debris falls before you clean the lower trim.
Work corners carefully: The spot where trim meets a door casing is a common inspection point.
Separate scuffs from paint damage: If a mark lifts with a cloth, it's cleaning. If the paint is chipped, that's a repair question.
Practical rule: If the room looks clean but still feels dull, wipe the trim before you do anything drastic.
If you're assembling supplies, this list of move-out cleaning supplies helps you avoid buying five overlapping products when two cloths, a brush, and one gentle cleaner will do.
2. Interior Appliance Deep Cleaning Refrigerator, Oven, and Microwave
Appliance interiors decide a lot of move-out inspections. A kitchen can photograph well and still draw a deduction if the refrigerator smells stale, the microwave ceiling is splattered, or the oven door edge is lined with grease. Inspectors and landlords open these doors.
Leave this task for the final stretch, usually in the last two to three days after most packing, patching, and dust-producing work is finished. Clean too early and you risk refilling the fridge, reheating food in the microwave, or tracking fresh dust back into the oven vent and door seals.
A practical example. In a Buckhead rental, the counters are clear and the sink is spotless, but the oven floor still has carbon buildup and the refrigerator crisper drawers hold grit under the tracks. That kitchen does not read as move-out ready, even though the visible surfaces look good.
Use a simple kit here: microfiber cloths, a soft scrub pad, a biodegradable degreaser, dish soap, baking soda, and warm water. Strong oven cleaners save time on heavy buildup, but they also need careful ventilation and can damage nearby finishes if they drip. For light to moderate residue, a slower, lower-toxicity approach is usually enough.
Independent move-out guidance treats appliance interiors as part of deep cleaning, along with other overlooked areas such as vents, cabinet interiors, and floors, as outlined in this move-out house cleaning checklist.
What to clean, and what to leave for repair
Separate dirt from mechanical problems before you spend an hour scrubbing. Grease, food residue, sticky spills, and odor from old food are cleaning issues. Torn refrigerator gaskets, a cracked microwave turntable, broken oven light covers, or an oven that still smokes after residue is removed fall into repair or maintenance.
That distinction matters at handover. Cleaning can improve condition quickly. Broken parts usually need approval, replacement, or a specialist.
Refrigerator: Empty it fully, remove shelves and drawers, wash and dry them, then wipe interior walls, shelf supports, drawer channels, and door seals. Check under the bottom drawers because crumbs and pooled liquid collect there.
Oven: Remove racks first. Let degreaser or a baking soda paste sit long enough to soften residue, then scrub the door glass, side rails, floor, back panel, and the lower lip inside the opening where grease hardens.
Microwave: Clean the turntable, ceiling, inner door, and the area around the vent screen. Steam from a bowl of hot water helps loosen light splatter, but burned-on residue may still need a soft scrub pad.
If the home will be shown for sale or a deposit dispute seems possible, take photos after each appliance is dry and reassembled. Get one wide shot with the door open and one close shot of problem areas you cleaned, such as oven racks or refrigerator drawers. Those photos help if the handover notes are vague later.
A clean appliance passes the open-door test. It should look and smell clean the moment someone checks inside.
3. Bathroom Deep Sanitization Grout, Caulk, and Hidden Areas
Bathrooms often decide the tone of the walkthrough. A clean mirror and fresh towel bar help, but inspectors and buyers usually look lower and closer. They notice the grout at the shower edge, the scale around the faucet base, the dust on the exhaust fan cover, and the buildup behind the toilet.
A common move-out problem shows up in the final week. The vanity, mirror, and toilet bowl are already done, but the shower corners still have dark grout lines and the cabinet under the sink has drips, dust, and old product rings. The room smells clean, yet it still looks unfinished in photos and in person.
Start this room about two weeks before handover if the grout or hard-water buildup is heavy. That gives cleaners time to do one pass, let surfaces dry, and decide whether a second pass will solve the problem or whether the issue is failed caulk or damaged grout. Save the last touch-up for the final two days, after daily use is finished.
Use pH-neutral tile cleaner or a mild soap-based product first. White vinegar can help on some hard-water residue, but skip it on natural stone and any surface that etches easily. Refillable spray bottles, microfiber cloths, and a small scrub brush cut waste and usually handle bathroom soils well without resorting to harsher chemistry.
What to clean first, and what to stop scrubbing
Soap film, mildew film, toothpaste residue, and mineral deposits are cleaning issues. Split caulk, missing grout, loose taps, active leaks, and soft drywall near wet areas are repair issues. That line matters during a rushed move because scrubbing damaged caulk rarely changes the result enough to pass inspection.
In one Kennesaw sale prep, brightening the floor grout changed the whole bathroom. In another rental, the caulk around the tub stayed blotchy because it had broken down, not because it was dirty. The right move there was to clean it, photograph it, and note that replacement was separate from cleaning.
Focus on the spots that get missed during routine weekly cleaning:
Shower corners, grout joints, and the lower tile rows
Caulk lines at the tub, shower pan, and backsplash
Around faucet bases and drain trims
Behind the toilet base and around the seat hinges
Underside of the sink rim and the cabinet floor below plumbing
Exhaust fan cover, light trim, and window tracks if the bathroom has a window
For a tighter room-by-room process, Aquastar's bathroom deep cleaning checklist helps catch the hidden areas that often trigger comments at handover.
Optional add-ons depend on the property and the deadline. Glass shower doors may need scale removal. Large primary baths may justify steam cleaning. If mold has spread into porous caulk, drywall, or subflooring, treat that as specialist work, not routine move-out cleaning.
Before the final walkthrough, take photos once every surface is dry. Get one wide shot of the full bathroom, then close shots of the shower corners, grout lines, under-sink cabinet, and toilet base area. Those images are useful if the inspection notes are vague or if a deposit dispute comes up later.
Later in the process, it helps to see the scrub pattern and tool choice in motion:
In a small bathroom, missed detail stands out fast. Clean the visible surfaces, then check the edges, corners, and fixtures that get judged up close.
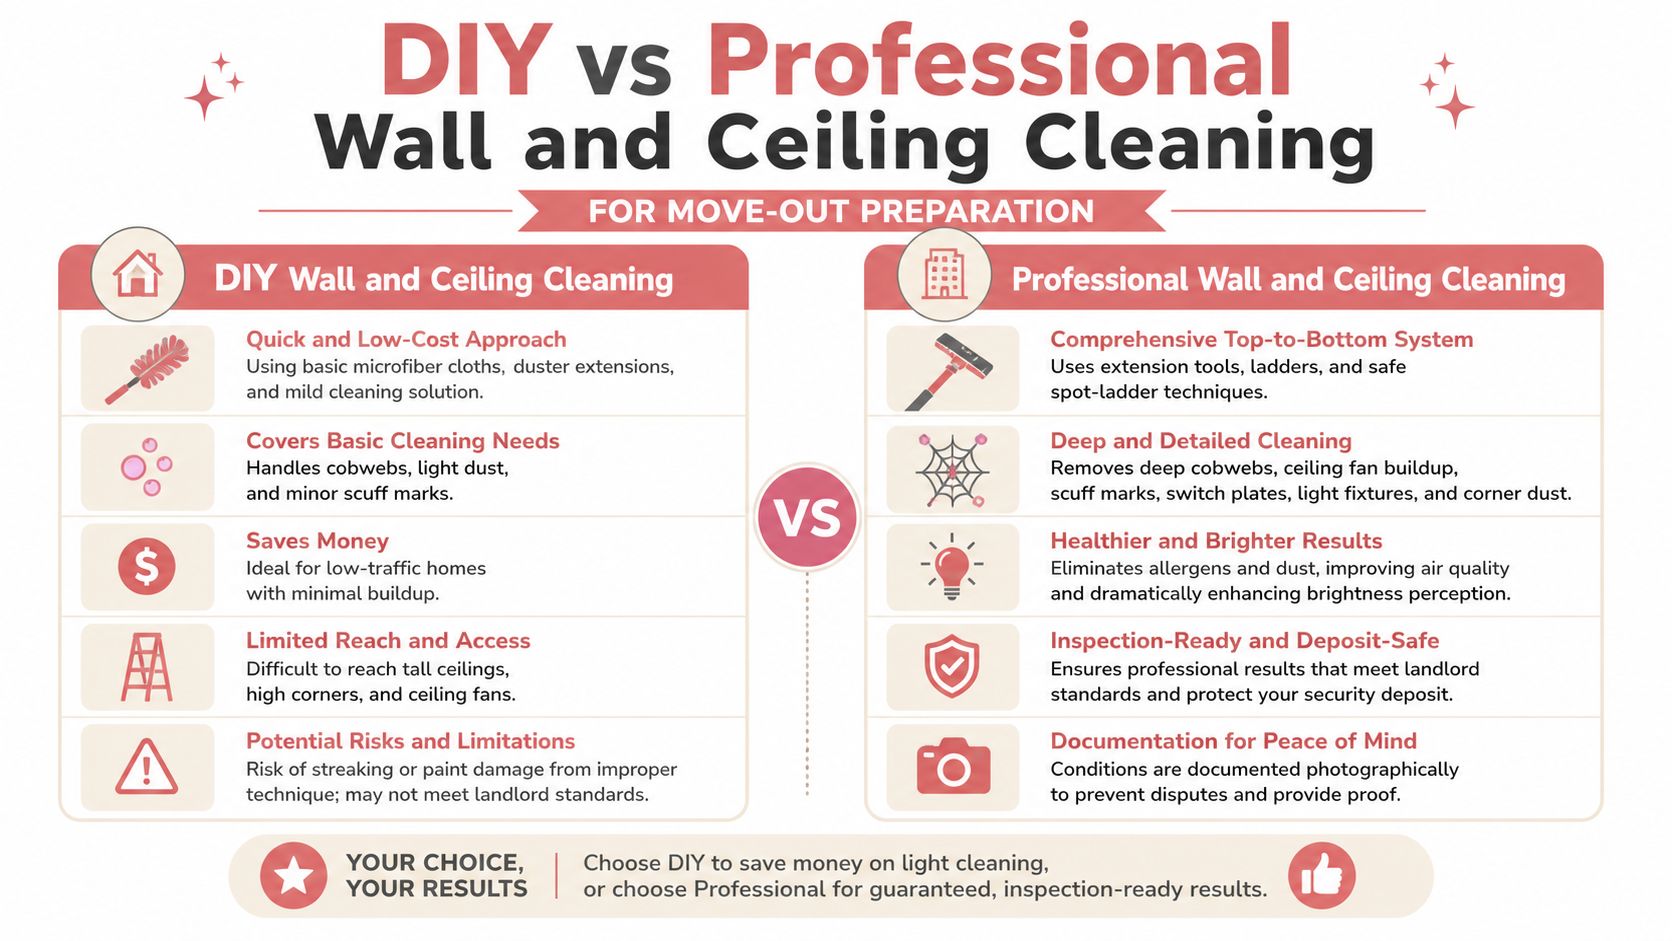
4. Wall and Ceiling Cleaning Dust, Scuffs, and Marks Removal
Two weeks before handover is the right time to check walls and ceilings. Once shelves, art, and furniture are gone, dust lines, nail-hole shadows, and hand marks show up fast under empty-room lighting. If you wait until the last day, you end up cleaning above finished floors and creating avoidable rework.
This part of the job is inspection-focused. Landlords and buyers usually notice grime around switches, door frames, vents, and ceiling corners before they notice a wall that was washed carefully but still has old paint wear. That trade-off matters. Clean what reads as dirt first. Treat chips, failed patching, and water stains as repair issues, not routine cleaning.
Use a top-down sequence and keep the supplies simple. A microfiber duster, vacuum with brush attachment, two cloths, a mild plant-based soap, warm water, and a melamine sponge for limited spot work will cover most painted surfaces. Test any cleaner in a low-visibility area first, especially on flat paint, which can burnish or lift if scrubbed too hard.
Start high: Ceiling corners, light fixture covers, fan blades, and vent grilles drop dust downward.
Work the touch points: Switch plates, around handles, door frames, and wall edges near stairs or hallways usually need wiping.
Spot-clean marks carefully: Shoe scuffs and greasy fingerprints often lift. Crayon, smoke residue, or paint transfer may need more than basic cleaning.
Know when to stop: Stained ceilings, patched drywall, and peeling paint usually need repair or repainting.
A practical example. In an Atlanta move-out, the faster approach is often to dust ceilings and vents during the first week, then do wall spot cleaning after pictures come down, then photograph each room once the surfaces are fully dry. That fits a two-week countdown better than trying to wash every wall in one long session.
For a practical method on painted surfaces, Aquastar's guide on how to clean the walls is a useful reference.
If you want an eco-friendlier setup, skip heavy fragrance and harsh degreasers unless the residue calls for it. Mild soap, diluted vinegar on appropriate non-painted trim, and washable microfiber cloths usually handle dust and light marks with less residue in the room. Save stronger products for kitchens, nicotine buildup, or adhesive residue, and use them only where needed.
Before the final walkthrough, take one wide photo of each room, then closer photos of any wall area that was heavily marked before cleaning. Include repaired nail holes only if they are part of the move-out agreement, since patch-and-paint expectations vary by lease and by sale prep plan.
5. Floor Deep Cleaning and Spot Treatment Carpets, Tile, and Hardwood
Floor condition affects the handover more than renters expect. An otherwise clean room can still fail the eye test if the carpet has visible traffic lanes, the tile feels sticky, or hardwood shows dried spills near the baseboards.
A practical example. A renter in Cobb County vacuums the main rooms the night before key return. The center of the carpet looks fine at first glance, but pet hair is still packed along the perimeter, and a drink spot near the sofa flashes under window light during inspection photos.
Start floor work about a week before the walkthrough if stains or odor are involved. That gives spot treatments time to dry and lets you decide whether a rental machine, a professional carpet service, or simple detail cleaning is enough. Leave the final vacuum or mop for the last 24 hours after furniture is out.
Match the cleaning method to the material
Finished hardwood needs light moisture, soft pads, and a wood-safe cleaner. Too much water can swell edges or leave dull patches. Tile can handle more scrubbing, but grout often holds the discoloration, so the floor may need targeted work rather than a full soaking. Carpet responds best to slow vacuum passes first, then stain treatment, then extraction only if soil is still embedded.
A practical example. In a Kennesaw sale prep, black heel scuffs near the entry lift from hardwood with a damp microfiber pad and a little cleaner, while the nearby area rug needs separate spotting and drying time. One method would not suit both surfaces.
Inspection priorities are usually simple:
Vacuum or sweep edges, corners, and under radiators or vents.
Treat isolated spots before cleaning the whole floor.
Check for residue in grout lines, around toilet bases, and at kitchen transitions.
Let every surface dry fully before photos or foot traffic.
Separate cleaning issues from repair issues. Torn carpet, chipped tile, deep scratches, and warped boards need repair, not more product.
Eco-friendlier supplies work well here if the floor is mostly dealing with dust, tracked dirt, and light marks. Reusable microfiber pads, a pH-neutral wood cleaner, and a simple tile cleaner with low fragrance usually cover the job without leaving heavy residue. Save stronger solvents or bleach-based products for specific cases, and only where the flooring material allows them.
The trade-off is time versus result. DIY cleaning usually handles surface soil and minor spotting. Persistent pet odor, carpet matting, heavy grout staining, or finish damage often needs specialist equipment or repair. Before the final walkthrough, take one wide photo of each room and a few close photos of any floor area that needed extra treatment, especially entries, pet zones, and visible stains that improved but did not disappear completely.
6. Kitchen Deep Cleaning Cabinets, Countertops, and Appliance Exteriors
Kitchen inspections are close-range inspections. A room can look fine from the doorway and still fail the handover once someone opens a drawer, runs a hand along a cabinet pull, or spots grease haze on the range hood and fridge door.
Two weeks out, this is the room to assess. If the buildup is light, a careful DIY clean usually gets it done. If grease has hardened around cooking areas, if laminate edges are swelling from old leaks, or if there is mold under the sink, cleaning may improve the appearance but it will not fix the underlying problem.
Start by emptying all storage spaces completely. Cabinets, drawers, pantry shelves, and the area under the sink need to be cleaned from the back forward so loosened crumbs and residue come out instead of getting pushed deeper into corners. Dry each surface after wiping. Inspectors notice tacky shelves and drip marks almost as quickly as visible dirt.
Use products that match the surface. A low-fragrance degreaser or diluted dish soap works well for painted cabinets and many appliance exteriors. Stone counters need a cleaner approved for that material. Wood cabinets and butcher block need less water, not more. The eco-friendly option here is simple and effective: microfiber cloths, a refillable spray bottle, and a surface-safe cleaner with a short ingredient list usually handle food soil without leaving heavy perfume behind.
Focus first on the areas that cost tenants the most during deposit disputes:
Cabinet fronts near the stove, trash pullout, and main prep area
Drawer interiors with crumbs, liners, or sticky residue
Backsplash lines and counter edges where grease settles
Sink fixtures, drain rim, and the cabinet base under plumbing
Appliance exteriors, including handles, control panels, and side edges that show once the kitchen is viewed from an angle
A common miss is sequence. Clean upper cabinet fronts and backsplash first, then counters, then lower cabinets and appliance exteriors. Leave the floor for later so you do not track fresh debris back onto cleaned surfaces.
One trade-off matters here. Pulling out a refrigerator or range can improve the result, but it also risks scratched floors, damaged water lines, or lost time late in the countdown. If the lease or sale prep does not require moving heavy appliances, clean the visible sides, toe-kick areas, and exposed gaps well, then document the condition. Save appliance interior work for the earlier appliance section, and treat damaged caulk, leaks, broken hinges, or swollen cabinet panels as repair items rather than cleaning tasks.
For the final handover, take wide photos of the full kitchen and close photos of the cleaned trouble spots: inside the sink cabinet, empty drawers, cabinet faces near the stove, and appliance handles. Renters dealing with a deposit return often benefit from keeping that photo set alongside receipts and a move-out checklist, as outlined in this renter moving-out checklist.
7. Window, Glass, and Mirror Cleaning Interior and Exterior
Two days before a walkthrough, windows often become the reason a room still looks unfinished. Floors are done, counters are clear, but fingerprints on the patio door, dust in the tracks, and a hazy bathroom mirror still catch the eye first in natural light.
For move-out work, glass is an inspection item and a photo item. Clean panes brighten listing photos and final handover photos, but the pass or fail detail is usually in the sill, lower track, and frame corners where debris collects.
Start inside unless the exterior glass is easy and safe to reach from the ground. Upper-story exterior panes, storm windows, damaged screens, and mineral-stained glass often turn into specialist work or a separate service call. Cleaning should improve visibility and presentation. It does not fix failed seals, cracked panes, torn screens, or hard-water etching.
Clean the frame first, then the glass
Begin with dry removal. Vacuum tracks, brush out corners, and wipe the sill before any spray touches the glass. If you wet gritty tracks too early, the dust turns into mud and takes longer to remove.
A practical sequence helps:
Dust frames, ledges, and blinds first
Vacuum window tracks and sliding door channels with a crevice tool
Wipe sills and frame edges with a damp microfiber cloth
Clean the glass with a reusable microfiber cloth and a squeegee or lint-free towel
Buff mirror edges and glass corners last to remove residue lines
Use shaded windows first if possible. Direct sun dries cleaner too fast and leaves streaks that show up once the room is photographed.
Eco-friendly products work well here if they are used correctly. A mild plant-based glass cleaner or diluted vinegar solution can handle routine film on interior glass, while plain water and microfiber often work for mirrors. Skip abrasive pads and strong acidic products on tinted film, coated glass, old mirror backing, and painted frames.
Sliding doors deserve extra attention because inspectors notice them fast. Dirty rollers, pet hair in the lower channel, and handprints around the handle suggest rushed cleaning even if the rest of the room is in good shape.
In the two-week countdown, handle all interior glass and mirrors early, then save a short touch-up for the final 24 hours. That second pass matters because windows collect fingerprints during packing. Before handover, take wide photos that show clear glass in natural light and a few close shots of tracks, sills, and bathroom mirrors. Those photos help document condition if a deposit question comes up later.
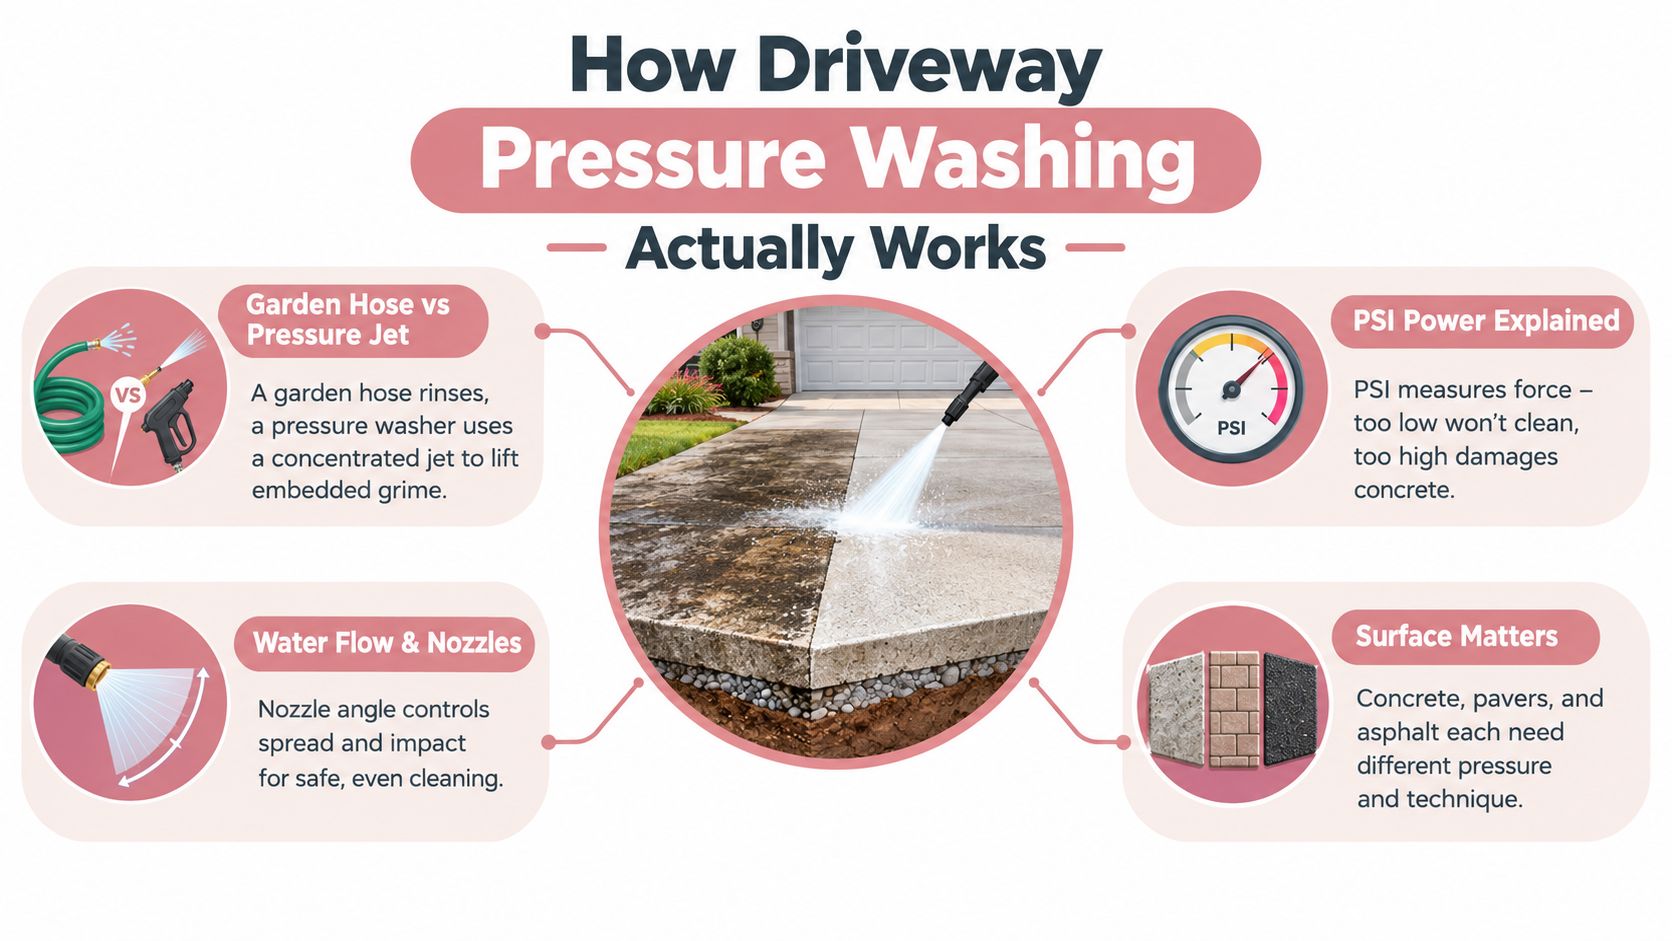
8. Garage and Exterior Surface Cleaning Debris Removal and Pressure Washing
The garage is where leftover items hide during a rushed move. Paint cans, shelf scraps, old hooks, cardboard, and random hardware often remain until the final hour. Exterior surfaces have the same issue in a different form. Dirt, leaves, and driveway staining make the property feel neglected before anyone even steps inside.
A practical example. In Marietta, a tenant empties the unit but leaves broken shelving and loose trash in the garage corner. The living room passes inspection easily, but the handover still turns into a cleanup issue because the garage wasn't fully cleared.
Clean first, wash second
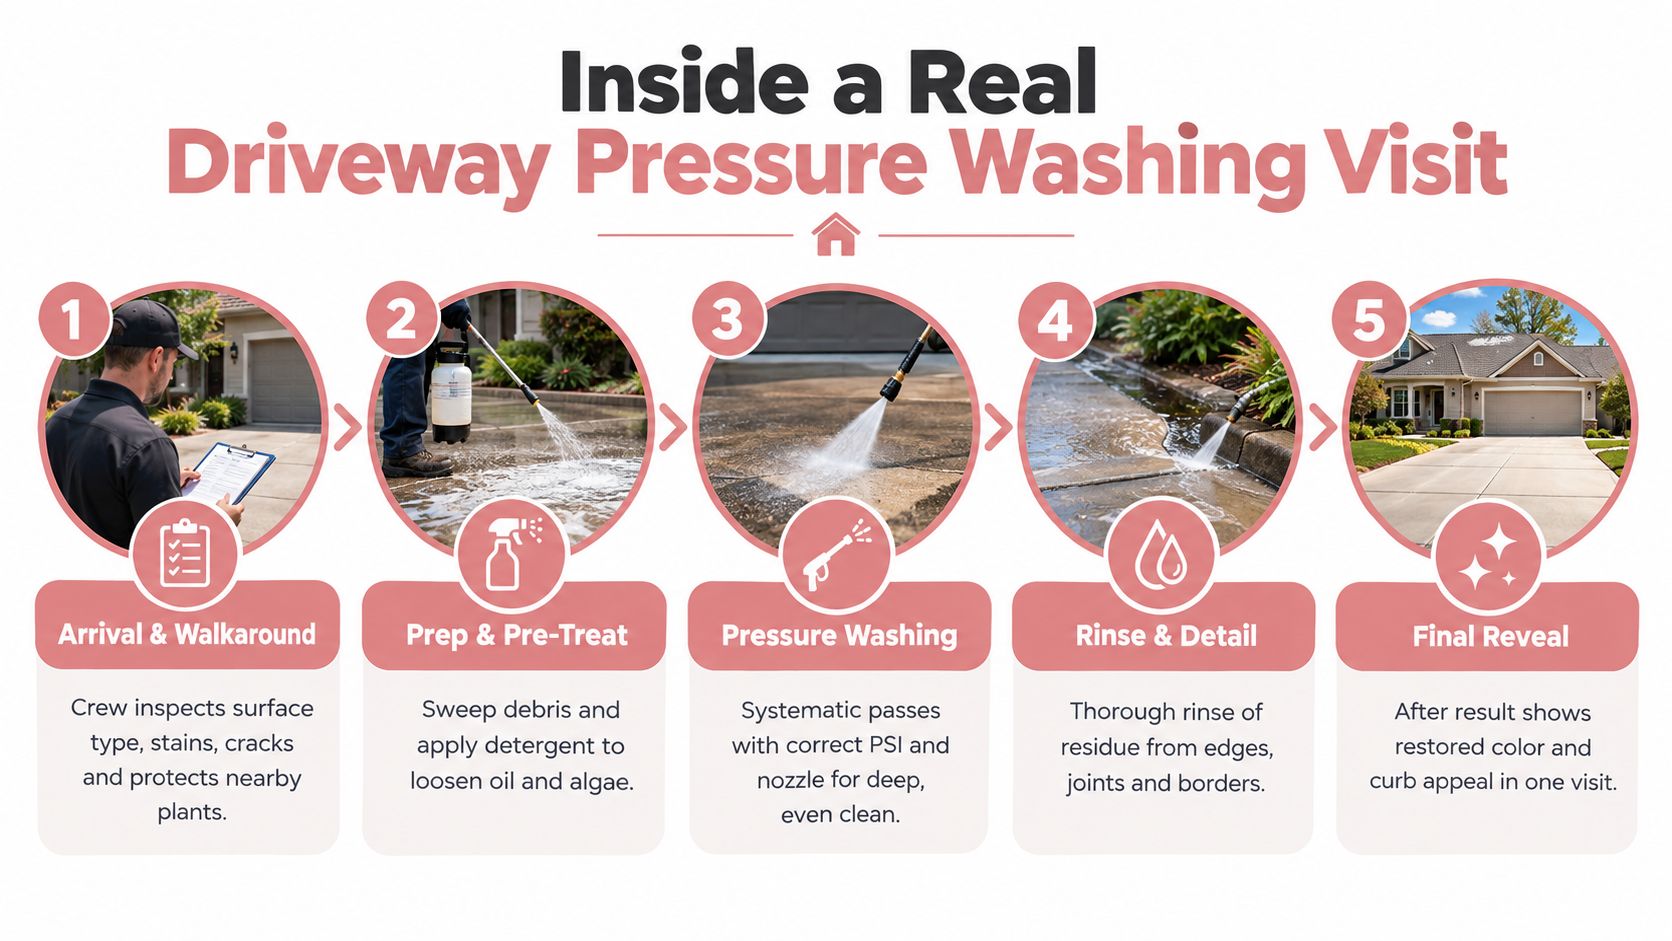
Remove belongings and sweep debris before any pressure washing starts. Otherwise, water drives dirt into corners and around stored items. On patios and driveways, pretreat stubborn spots if needed and test pressure on an inconspicuous patch.
A practical example. In a Kennesaw home sale, pressure washing the driveway and front walk changes first impression immediately. It doesn't repair cracked concrete, but it does remove surface buildup that distracts buyers and inspectors.
Current turnover guidance increasingly treats move-out work as part of a broader inspection-ready process that includes photos, safety checks, system checks, and consumable replacements, not just visible tidying, as described in this moving-out rental checklist guide.
Garage walls and floor: Sweep, spot clean, and remove all personal property.
Patio or balcony: Clear planters, trash, and loose debris.
Driveway and path: Wash only if the surface can handle it safely.
Pressure washing is cleaning, not repair. Oil saturation, broken concrete, rotted trim, and failing exterior sealants need separate attention.
9. Air Vent, HVAC Filter, and Ductwork Cleaning
A home can look clean and still fail the sniff test during a walkthrough if the vents are dusty and the filter is overdue. Inspectors, buyers, and landlords notice the gray buildup on return grilles because it signals deferred maintenance, even when the floors and counters are spotless.
This task fits best in the final stretch of a two-week move-out plan. Clean vent covers after the heavy dusting, wall wiping, and floor work are done. Replace the filter near the end, not at the start, so the new filter does not spend days catching construction dust, lint, or debris from the rest of the turnover.
If you want to keep supplies low-tox and simple, use a microfiber cloth, a vacuum with brush attachment, and a mild soap solution for the grille covers. Avoid spraying liquid directly into the duct opening. Surface cleaning is part of move-out cleaning. Mold inside ducts, pest contamination, damaged duct runs, and mechanical servicing fall into specialist work.
A practical example. A renter in Roswell finishes the bedrooms early, then skips the return grille in the hallway. At inspection, the unit smells stale when the air kicks on, and the dark dust lines around the grille become a discussion point. Ten minutes of vacuuming, wiping, and a new filter would have dealt with it.
Return grilles: Vacuum first, then wipe the face and edges where dust collects fastest.
Supply vents: Remove and wash the cover if possible, or wipe carefully in place to avoid bending the fins.
HVAC filter: Check the size and airflow direction before installing a replacement.
Duct openings: Clean only the reachable dust at the surface. Do not present deep duct cleaning as a standard DIY cleaning task.
Handover record: Take a clear photo of the installed filter and cleaned vent covers for your final documentation set.
There is a real trade-off here. For a rental handover, clean covers and a fresh filter are usually enough unless the lease assigns more responsibility. For a sale, visible vent dust can still undermine the impression of good upkeep, especially if buyers are already looking closely at systems. If you are deciding whether basic surface cleaning is enough or whether a contractor should handle deeper buildup, Aquastar's guide to AC duct cleaning cost is a useful reference.
10. Move-Out Photo Documentation and Final Inspection Preparation
The last hour before key handover is when small misses turn into deposit disputes. A room can look clean during the final walk-through, then show streaks, crumbs, or cabinet dust in harsher light later. Good photos close that gap. They record what was delivered on handover day.
Treat documentation as part of the move-out cleaning checklist, not an afterthought. For rentals, the goal is simple: show that the property was clean, empty, and inspection-ready. For a sale, the same photo set helps confirm condition before buyers, agents, or contractors come through again. Photos do not replace cleaning, and they do not cover repairs or specialist work, but they do help separate a cleaning issue from pre-existing wear, damage, or maintenance problems.
What to photograph before key handover
Work room by room. Take one wide photo from the doorway, then add close shots of any area that commonly gets questioned during inspections.
Empty rooms, with floors fully visible
Inside the oven, microwave, refrigerator, and freezer
Sink basins, faucets, and drain areas
Countertops and backsplash sections with good lighting
Inside cabinets, drawers, and closets
Bathroom toilets, tubs, shower glass, vanity tops, and exhaust covers
Window sills and tracks if they were part of your cleaning scope
Garage, trash area, patio, or entry points if those spaces are included in the lease
Utility details such as the installed HVAC filter, if you replaced it during move-out cleaning
Take the photos after the final wipe-down and after trash is removed. Daylight helps because it shows residue, dust, and wall marks more accurately than warm interior bulbs.
There is a practical trade-off here. A full photo set takes time, and that time often falls on the same day you are loading a truck, returning keys, and finishing touch-ups. For that reason, I suggest building it into a two-week countdown instead of leaving it all for the last morning. During the first week, photograph finished low-traffic areas such as guest rooms, linen closets, and the garage once they are done. In the final two days, photograph kitchens, bathrooms, entry floors, and appliance interiors because those are the spaces most likely to change.
Short video can help with disputed condition, especially for appliance interiors and empty-room walkthroughs, but still photos are easier to sort, send, and match to a checklist.
If a landlord or buyer raises a question later, a clear image of the oven floor, refrigerator shelves, or cleaned vanity top is more useful than a general room shot. Organize the files by room and date, then keep receipts for supplies, carpet service, or any optional add-ons you hired out. If you want a simple model for that record, Aquastar's guide to before-and-after cleaning photos shows a practical format.
Use eco-friendly supplies where they make sense, but be realistic. Microfiber cloths, diluted dish soap, white vinegar for glass, and oxygen-based bathroom products work well for many final-pass tasks and leave less chemical odor before inspection. Heavy grease, etched hard-water staining, broken caulk, and chipped surfaces are different issues. Those may need stronger products, repair work, or a specialist, and the photo record should show condition clearly rather than trying to hide it.
Before handing over the keys, do one final inspection with your checklist and phone in hand. Open every cabinet once. Check corners, switch plates, and the inside edge of the front door. Flush toilets, run faucets briefly, confirm appliances are empty, and make sure all personal items are out. Then save the photo set to cloud storage and email it to yourself so it is easy to retrieve if questions come up later.
10-Point Move-Out Cleaning Comparison
Item
Implementation Complexity 🔄
Resource Requirements ⚡
Expected Outcomes ⭐ / 📊
Ideal Use Cases 💡
Key Advantages ⭐
Deep Clean Baseboards and Trim Work
Moderate, manual, detail work; bending and reach required
Microfiber cloths, soft brushes, eco cleaner; moderate time
Provides indisputable evidence; speeds resolution; low cost relative to disputes
Leave the Home Ready for the Walkthrough
The best move out cleaning checklist is the one that matches the handover timeline. Don't start with random scrubbing. Start with the date you lose access to the property, then build backward so the final clean happens after the home is empty and before the walkthrough.
Here's the printable version I'd use.
Two weeks before
Check the lease and handover notes: Look for cleaning instructions, carpet requirements, key return details, and whether any professional services are expected.
Sort cleaning versus repairs: Dirty grout is cleaning. Broken blinds, damaged caulk, leaks, and large wall damage are repair issues.
Book help if needed: This is the right time to line up support for carpet cleaning, windows, pressure washing, or post-construction detail work.
Gather supplies and plan eco-friendly options: If you prefer biodegradable products, choose them early so you're not improvising at the end.
One week before
Pack aggressively: Empty closets, clear shelves, and remove wall items so hidden dust and marks are visible.
Do the first deep pass: Start with trim, walls, ceilings, vents, cabinet interiors, and bathroom buildup.
Schedule a pre-vacate check: Some renter guidance recommends a walkthrough about seven days before move-out so small issues can be fixed before charges escalate, as noted earlier.
Take progress photos: They're useful if you uncover old damage or need to show what changed during your cleanup.
The day before
Finish kitchen and bathrooms fully: Clean cabinet interiors, counters, backsplashes, fixtures, tubs, showers, grout, and mirrors.
Empty and clean appliances late: Refrigerator, oven, and microwave should be cleaned close enough to handover that they won't be used again.
Remove all trash and belongings: Leftover personal items and uncleared garbage can lead to hauling or extra cleaning fees, a point reflected in this move-out cleaning checklist with removal reminders.
Leave floors for last: Vacuum, mop, or treat spots once the rest of the dust-producing work is done.
Final inspection day
Open blinds and use daylight: You'll catch smears, crumbs, and missed corners faster.
Photograph every room systematically: Include closets, cabinets, appliance interiors, windowsills, bathrooms, garage, and exterior access areas.
Check keys and access items: Make sure remotes, mailbox keys, garage openers, and entry keys are accounted for.
Do one last slow walkthrough: Stand in each doorway and look high, low, and behind doors.
If you're a renter, remember that cleaning standards often turn on the distinction between normal wear and tear and chargeable condition issues. If you're a homeowner preparing to sell, the same details affect buyer impression and inspection confidence. Either way, a calm room-by-room process works better than trying to “deep clean everything” in one exhausted day.
If you're listing a home, this advice on declutter before listing pairs well with a handover-focused cleaning plan.
For local households in Kennesaw and North Atlanta, Aquastar Cleaning Services can fit into this process as a practical option for customizable move-out cleaning, along with appliance, window, garage, driveway, carpet, and post-construction add-ons. That kind of support is especially useful when the deadline is fixed and the final result needs to be inspection-ready, not just generally clean.
Aquastar Cleaning Services, LLC provides move-in and move-out cleaning for homes in Kennesaw and the North Atlanta area, with optional help for appliance interiors, windows, garages, driveways, and post-construction detail work. If you want a room-by-room clean that lines up with a real handover checklist, visit Aquastar Cleaning Services, LLC to review the available services and request a quote.
Weekly house cleaning usually costs $75 to $200 per visit, and a common range for many homes is $100 to $175. If you book weekly instead of monthly or one-time service, the per-visit price is often 5% to 20% lower because there's less buildup to tackle each time (HomeAdvisor recurring cleaning pricing).
If you're staring at crumbs under the breakfast bar, fingerprints on the fridge, and a bathroom that never seems to stay clean for more than a day, you're in the same spot as a lot of busy Kennesaw homeowners. The question usually isn't just how much does a weekly house cleaning cost. It's whether the price makes sense for the way your home gets lived in.
A weekly clean is usually a maintenance service, not a top-to-bottom rescue job. That's why the price often lands in a middle range instead of feeling like a luxury-only expense. Industry pricing guides show that weekly service in major U.S. markets often falls around $75 to $200 per visit, with one guide noting a weekly average of $160, and broader monthly equivalents often landing around $300 to $800 depending on home size and service level (HomeAdvisor maid service cost guide).
For a North Atlanta family, that often looks like this: two working adults, one or two kids, maybe a dog, and just enough clutter to slow a cleaner down if nobody does a quick pickup first. One house might stay near the lower end because it's tidy and easy to maintain. Another similar-size home can move higher because pet hair collects fast, toys cover the floors, and the kitchen gets heavy daily use.
If you want a broader look at what homeowners typically pay for recurring and one-time service, this average cleaning service cost guide helps put weekly pricing into context.
Introduction to Weekly House Cleaning Costs
A lot of people assume weekly house cleaning must be expensive because it happens every week. In practice, the opposite can be true on a per-visit basis. When cleaners return regularly, they spend less time fighting soap scum, grease buildup, and layers of dust, so the appointment is often simpler and more predictable.
Think about a Kennesaw household with a couple, two kids, and a shedding dog. If that home gets cleaned every week, the crew is usually maintaining order: wiping surfaces, sanitizing bathrooms, vacuuming fur, and mopping traffic areas. If the same home waits a month between visits, the cleaner often has to catch up before they can even begin the normal routine.
Why weekly service often feels more affordable than expected
The sticker shock usually comes from comparing the full monthly total to a single one-time appointment. That's not the right comparison. A better comparison is cost per visit for maintenance, and weekly plans are often discounted because the home stays in better shape between cleanings.
Here's the practical part:
Smaller, routine jobs stay faster: Less buildup means less scrubbing.
Recurring schedules are easier to price: The cleaner knows what condition the home will likely be in.
Weekly service can replace weekend catch-up cleaning: Many families aren't buying perfection. They're buying consistency.
Practical rule: If your home gets messy fast, weekly cleaning often saves more effort than it adds cost.
What the numbers mean for a local homeowner
National guides are useful, but homeowners usually need help translating ranges into a real house. A tidy townhome with no pets doesn't price the same way as a busy two-story home where the mudroom, kitchen, and bathrooms get hammered every day.
That's why the range is broad. Pricing changes with square footage, room count, pets, clutter, and service scope. Later, I'll walk through concrete home examples so you can see how the numbers fit real-life situations rather than abstract averages.
What a Standard Weekly Cleaning Includes
Most confusion about pricing starts with one simple issue: homeowners and cleaning companies aren't always picturing the same job. A standard weekly cleaning is usually a maintenance visit. It keeps the home under control. It isn't the same as a deep clean.
A good analogy is a car wash. A weekly clean is like a regular wash and vacuum. It keeps things looking good and prevents buildup. A deep clean is closer to full detailing.
What's usually included
In most homes, a weekly visit focuses on the rooms that affect how clean the house feels day to day.
Kitchen upkeep: Wiping counters, cleaning the sink, spot-cleaning appliance exteriors, and mopping the floor.
Bathroom maintenance: Cleaning toilets, tubs or showers, sinks, mirrors, and floors.
Living areas and bedrooms: Dusting accessible surfaces, straightening obvious disorder, vacuuming, and mopping if needed.
Floor care: Sweeping, vacuuming, and mopping main traffic areas.
Trash removal: Emptying bins and replacing liners if they're provided.
Homeowners sometimes get surprised. If a job takes detail work, extra time, or special equipment, it often isn't folded into a standard weekly rate.
Common extras include:
Inside appliances: Refrigerator and oven interiors
Interior windows: Especially if they need hand-detailing
Laundry tasks: Washing, folding, or ironing
Inside cabinets and drawers: More common for move-out or deep cleaning
Specialty floor work: Carpet treatment usually involves separate tools or a dedicated specialist
A weekly clean should make your home feel reset. It usually won't include every hidden or hard-to-reach surface unless you ask for it.
That distinction matters when you compare quotes. One company may give a lower base price because it covers only visible maintenance tasks. Another may appear higher because it includes more detailed work.
If your home needs carpet work along with housekeeping, it also helps to understand how specialty services are marketed and separated from general cleaning. These carpet cleaning visibility tips explain why carpet service often sits in its own category.
A practical Kennesaw example
Say you have a three-bedroom home near Kennesaw with one dog and mostly hardwood floors. A standard weekly clean would usually cover bathrooms, kitchen surfaces, dusting reachable furniture, vacuuming rugs, mopping, and trash. If you also want the inside of the oven cleaned, dog hair brushed off upholstered chairs by hand, and interior windows wiped every visit, you're no longer in basic weekly maintenance. You're adding labor.
That's why asking for a checklist before booking matters just as much as asking for a price.
Key Factors That Determine Your Weekly Price
A weekly cleaning quote works a lot like a haircut quote. The base idea sounds simple, but the final price depends on how much work the cleaner has to get through each visit, how detailed you want the result, and how consistent the home stays from week to week.
Home size and layout
Square footage gives cleaners a starting point, not a final answer. More square feet usually means more flooring, more bathrooms, more dusting, and more edges to work around.
Layout matters too. A 2,000 square foot ranch in Kennesaw with open living areas may clean faster than a 1,700 square foot home with lots of smaller rooms, tight furniture placement, and two staircases. The larger home has more area, but the smaller one can have more stop-and-start labor.
Room count often explains the difference. Three bathrooms usually take more weekly effort than two, even if the total square footage looks close on paper.
Pets add repeat work
Pets change the pace of a weekly clean because they create the same labor again and again. Fur collects under tables, along baseboards, and in corners. Nose prints show up on glass doors. Paw traffic can make floors need extra passes.
Here is a common local comparison. A tidy 1,800 square foot home in West Cobb with no pets may price lower than a similar-size home in Kennesaw with two shedding dogs and a cat, because the second home needs more vacuuming and more detail work every visit.
One dog does not always change a quote much. Multiple shedding pets usually do.
Clutter slows the visit
Clutter is one of the biggest pricing factors homeowners overlook. Cleaners can wipe, vacuum, and mop much faster in a home where surfaces are accessible.
A simple example helps. Picture two homes near downtown Kennesaw, both around 1,600 square feet. Home A has clear bathroom counters, open floors, and a mostly empty kitchen island. Home B has mail stacks, charging cords, toys, laundry piles, and crowded vanities. Home B often costs more to clean each week because the crew spends part of the visit working around items instead of cleaning open space.
That is why a smaller home can sometimes cost as much as a larger one.
Weekly condition affects labor
Weekly service usually costs less per visit than less frequent service because the home stays in maintenance mode. Dirt, soap buildup, and pet hair have less time to pile up, so the crew can spend more of the visit on routine work instead of catch-up work.
The easiest way to picture it is lawn care. A yard cut every week is quicker to maintain than one left alone for a month. House cleaning follows the same pattern.
If your home stays fairly picked up between visits, your weekly rate is usually easier to keep steady.
Add-ons and preferences change the scope
Special requests raise the weekly price when they add time to every appointment or turn a standard visit into a more detailed one. Product preferences can matter too if a company uses different supplies for fragrance-free or eco-focused service.
Aquastar Cleaning Services, LLC is one local option that bases recurring quotes on practical labor drivers such as home size, pet load, clutter, and product choices. That approach matches how weekly cleaning works in lived-in homes.
The big takeaway is simple. Your weekly price is not just about square footage. It is about how long it takes to bring your specific home back to reset condition each week.
How Weekly Cleaning Is Priced Hourly Versus Flat Rate
A Kennesaw homeowner might call for weekly service and hear two very different quote styles. One company says, "We charge by the hour." Another says, "Your home is $145 every Friday." Both can be fair. They just solve the pricing question in different ways.
The easiest way to sort them out is to ask one practical question first. Are you buying a set result, or are you buying a block of cleaning time?
Hourly pricing
Hourly pricing means you pay for labor time. If two cleaners work for two hours, you are paying for four labor hours total. That sounds simple, and for some homes it is.
Hourly billing usually fits homes where the weekly priorities change. One week you may want the team to focus on bathrooms and floors. The next week you may want extra attention on the kitchen after hosting family. In that setup, hourly pricing works a lot like hiring a handyman for a punch list. The clock sets the budget, and you decide what gets done first.
It can also save money in smaller or partial-home jobs. A tidy 1,000-square-foot townhome in Kennesaw with one dog, clear counters, and only two bathrooms may move quickly if the crew is only handling the lived-in areas.
The tradeoff is uncertainty. If toys are spread across the floor, dishes are stacked in the sink, or golden retriever hair is packed along baseboards, the same home can take longer than usual. A quote that looked lower at first can end up higher by the end of the visit.
Flat-rate pricing
Flat-rate pricing gives you one set price for a defined weekly scope. The company looks at your home, estimates the labor behind the scenes, and then offers one number for the visit.
Busy homeowners often prefer this model because the cost is easier to plan around. If your weekly routine stays fairly stable, flat pricing removes the question of whether this week's visit will run 30 minutes longer.
A flat rate often works best for true maintenance cleaning. For example, a 2,200-square-foot Kennesaw home with three bedrooms, two and a half baths, one shedding dog, and moderate family clutter might be quoted at one weekly price as long as the checklist stays the same. Bathrooms, kitchen surfaces, dusting, vacuuming, and mopping are covered. Extra oven scrubbing or interior windows are not.
The catch is scope drift. If the original quote assumed picked-up rooms and the home regularly needs more pickup, heavier pet-hair removal, or detailed hand-wiping of crowded surfaces, the cleaner may need to adjust the price later.
Where per-square-foot pricing fits
Some companies also use square footage as a starting formula, but weekly cleaning rarely lives on square footage alone. Two 2,000-square-foot homes can price very differently if one has two cats, a child who leaves toys in every room, and four busy bathrooms, while the other stays orderly all week.
That is why square footage works better as a measuring tape than a final answer. It helps organize the quote, but it does not explain the whole job.
Hourly versus flat rate in real-life weekly service
Here is the practical difference.
Pricing Model
How It Works
Often Best For
Watch Out For
Hourly
You pay for the crew's time
Partial-home cleaning, changing priorities, smaller tidy homes
The final bill can rise if the visit takes longer than expected
Flat rate
You pay one set price for a defined checklist
Full-home weekly maintenance, stable routines, households that want a predictable budget
The quote only stays accurate if the scope stays consistent
Per square foot
Size helps set the estimate
Early quote comparisons for similarly maintained homes
It can miss pets, clutter, and room-by-room complexity
A simple side-by-side helps. If your home stays picked up and you want the whole house reset the same way every week, flat pricing often saves more stress, even if the number is slightly higher on paper. If your goal is, "Spend up to two hours and hit the top priorities," hourly pricing can save money because you are controlling time instead of paying for a full checklist.
For homeowners who want to see the logic behind that math, this guide on how cleaners build home cleaning prices explains the estimating process in plain terms.
One last rule helps avoid surprises. Ask whether your quote is based on time, tasks, or both. That single question clears up most pricing confusion before the first weekly visit.
Practical Weekly Cleaning Cost Examples by Home Size
A weekly cleaning quote makes more sense when you attach it to a real home, not a wide national range. A 600-square-foot apartment in Kennesaw does not clean like a 2,000-square-foot house with dogs, kids, and counters that collect the week's leftovers.
One helpful way to read the examples below is this: square footage sets the stage, but pets, clutter, and room use usually decide whether your price stays near the low end, middle, or high end.
Example one, small apartment with simple upkeep
A one-bedroom apartment around 600 square feet is usually the easiest weekly visit to price. If there are no pets, very little clutter, and just one bathroom, the cleaner can move room to room without losing time picking up items or fighting buildup.
In plain terms, this kind of home often fits near the lower end of common weekly pricing ranges noted earlier. A flat weekly rate often works well here because the checklist stays predictable. Wipe kitchen surfaces, clean the bathroom, dust, vacuum, mop, done.
A practical Kennesaw version would be a tidy apartment near downtown with laminate floors, one bathroom, and clear counters. That home cleans more like a quick reset than a catch-up visit.
Hourly pricing can save money if the owner only wants the kitchen, bathroom, and floors done. Flat pricing usually makes more sense if the whole apartment gets the same routine every week.
Example two, mid-size family house with one pet
Now look at a 1,500-square-foot three-bedroom home with two bathrooms, one dog, and normal weekday traffic. Weekly pricing starts to behave less like a simple size calculation and more like a workload calculation.
Here is why. The dog adds hair on floors and furniture edges. Two bathrooms double the wet-area work. A family kitchen used every day usually needs more wiping and spot cleaning than a single-person apartment.
If the family does a 10-minute pickup before the crew arrives, this home often stays in a moderate weekly price range. If toys, papers, and laundry are spread through the main rooms, the same house can cost more because the cleaner spends part of the visit creating access before cleaning starts.
For a broader comparison point on full-home pricing, this whole house cleaning price guide helps show how room count and condition affect the total.
This short video also gives a useful visual sense of what homeowners think about recurring cleaning value and home maintenance expectations.
A quick side-by-side makes the pricing choice clearer:
Hourly may save money if the family wants to cap the visit at a set amount of time and focus on the busiest areas first.
Flat rate may save money if the cleaner is handling the full house each week and the home's condition stays fairly steady.
The same 1,500-square-foot house can price differently based on pickup level, pet hair, and whether the crew is cleaning around clutter or cleaning actual surfaces.
Example three, 2,000-square-foot home with pets and more detail
A 2,000-square-foot home shows how quickly weekly pricing can spread out. On paper, the size alone looks straightforward. In real life, two homes with the same square footage can clean very differently.
Take two Kennesaw-area examples:
Home A: 2,000 square feet, no pets, three bedrooms, counters mostly clear, and a regular weekly routine.
Home B: 2,000 square feet, two dogs, multiple bathrooms, busy family traffic, and a request to rotate extra detail tasks like baseboards or appliance interiors.
Home A is usually easier to place on a stable flat weekly plan because the work repeats in a consistent pattern. Home B often takes longer each visit because pet hair builds up fast, bathrooms need more attention, and the extras add labor even when the home is cleaned every week.
That difference matters. Square footage is like the size of the map. Pets, clutter, and room use tell you how rough the road is.
The fairest quote is the one that matches how your home lives from Monday through Sunday.
Simple Ways to Lower Your Weekly Cleaning Cost
If your quote feels a little higher than expected, you usually don't need to give up on weekly service. Small changes in how you prepare the home can reduce labor without lowering quality.
Clear the path before cleaning day
Decluttering is the fastest low-effort money saver. If the crew can reach the floor, counters, and bathroom surfaces right away, they spend their time cleaning instead of moving things around.
Practical example: pick up toys, stack mail, and move small appliances you don't use daily into one corner. That alone can help a standard kitchen stay a standard kitchen.
Use weekly service for true maintenance
Weekly cleaning works best when the home is already staying close to manageable. Because recurring weekly service may be 5% to 20% cheaper than standard pricing, booking at the right frequency can lower your per-visit cost while also reducing buildup (HomeAdvisor recurring discount guide).
If your home gets messy fast, stretching visits farther apart can backfire. The cleaner spends more time catching up, and the visit stops being a simple maintenance appointment.
Bundle extras carefully
Not every add-on should happen every week. Interior oven cleaning, refrigerator cleaning, and detailed window work are better scheduled occasionally unless you need them often.
Occasional add-ons: Appliance interiors, interior windows, garage or basement cleanup
Specialty services: Carpet care handled separately when needed
Help with pet maintenance between visits
Brushing pets and doing quick spot vacuuming yourself can keep fur from building into corners and under furniture. You don't need to deep clean. Just slow the accumulation.
Cleaners charge for labor time. Anything that keeps the home in maintenance shape usually protects your weekly rate.
Getting Your Personalized Weekly Cleaning Quote
By now, the big picture should feel clearer. Weekly house cleaning often falls in a recurring-service range rather than a luxury-only category, and the final number depends less on guesswork than on the condition of your home.
The most useful next step is getting a quote that reflects your actual situation. That means sharing details like home size, how many bathrooms need weekly attention, whether pets shed heavily, and whether you want only routine maintenance or a few rotating extras. A basic checklist beats a vague phone estimate every time.
What to have ready before you ask for pricing
A cleaner can usually give a more accurate quote if you can answer a few simple questions:
Home layout: Square footage and number of bedrooms and bathrooms
Household habits: Kids, pets, and whether clutter tends to build up
Priorities: Full-house maintenance or focus on kitchens, baths, and floors
Add-ons: Inside appliances, windows, or specialty floor care
Product preferences: Standard supplies or eco-friendly options
If you want to see how service providers frame quote requests and what information matters most, this home cleaning services quote guide is a useful reference.
For readers who are curious how cleaning companies try to reach local homeowners online, this cleaning company advertising guide offers helpful context from the marketing side.
A personalized quote matters because two homes with the same square footage can still clean very differently. One is tidy and easy to maintain. The other has pets, busy bathrooms, and constant kitchen traffic. The only accurate price is the one built around your home, not someone else's.
If you want a weekly cleaning plan that matches how your home is used, Aquastar Cleaning Services, LLC offers recurring housekeeping, custom checklists, eco-friendly options, and quote methods that work online or by phone for Kennesaw and North Atlanta homes. If you're comparing costs, it's a practical next step to request a custom estimate based on your square footage, pets, and the rooms you want cleaned every week.
Saturday morning, the driveway is usually the first thing that tells you winter and spring have overstayed their welcome. A two-car concrete slab may be mottled with mildew, leaf tannins, and a faint oil slick near the garage, while dark tire marks run toward the curb. You want better curb appeal and safer footing, but you don't want to scar the concrete or send dirty water into a storm drain.
Learning how to pressure wash a driveway doesn't require professional experience. It does require the right balance of pressure, water volume, nozzle choice, detergent, and runoff control. For most residential concrete, the practical range is 1,500 to 3,000 PSI, with 2,500 to 3,000 PSI often providing a useful balance of speed and cleaning power on standard slabs. Concrete driveway pressure-washing guidance also warns that new concrete under 12 months old should stay below 2,000 PSI with a 40-degree nozzle.
The project becomes manageable when you divide it into equipment selection, preparation, washing, troubleshooting, and maintenance. You'll also see why biodegradable detergent and water containment deserve equal attention, especially because municipal guidance in places such as San Francisco and San Diego warns against sending wash water into storm drains. Stormwater protection guidance from San Francisco Public Utilities Commission is a useful reminder that driveway cleaning is both a surface-care job and a runoff-management job.
Picture a Cleaner Driveway by Sunday
A driveway can look dramatically better by the end of a weekend, but the result depends more on control than brute force. Start with a small test area, work in sections, and treat stains before you reach for a narrow nozzle. That approach protects the slab while giving detergent time to loosen the grime that water alone won't remove.
For a typical two-car concrete driveway, plan to use a machine suited to residential concrete, a surface cleaner if available, a concrete-safe biodegradable detergent, and a way to direct or capture wastewater. Keep vehicles off the slab until the surface is finished and dry enough for normal use. If the driveway slopes toward a street drain, preparation should include a berm, wet vacuum, or other containment method.
Practical rule: More pressure isn't automatically better. The safest setting is the lowest one that cleans the surface without forcing you to linger over a single spot.
Before Sunday dinner, you can work through this sequence:
Choose the machine: Match PSI and GPM to the concrete's age, finish, and condition.
Prepare the area: Remove vehicles and loose grit, protect plants, and plan the runoff route.
Treat the stains: Use biodegradable degreaser for oil and dense grime before washing.
Wash evenly: Keep the wand moving and overlap each pass.
Inspect and adjust: Increase cleaning strength only after a test area shows that the surface can tolerate it.
Control the discharge: Keep wash water away from storm drains and gutters.
Maintain the result: Sweep, spot-treat, and rinse before dirt becomes embedded.
This pacing also makes renting or borrowing equipment practical. You won't need to rush through the job, and you won't burn the lawn, leave zebra-like stripes, or strip the surface trying to finish quickly.
Picking the Right Pressure Washer and Nozzle
Choose the machine by matching PSI and GPM to the driveway's material and condition. PSI supplies the force that breaks grime loose. GPM supplies the water that carries it away. A washer with high pressure but weak flow can leave residue behind and make a large slab frustratingly slow to clean.
For standard poured concrete, a practical operating range is roughly 2,500 to 3,500 PSI with 3 to 5 GPM, preferably with a surface cleaner. Pressure-washing PSI and GPM guidance explains how stronger flow moves loosened grit away and helps limit striping. Other concrete guidance places many jobs around 2,900 to 3,300 PSI with at least 2.0 GPM. Pavers, stamped concrete, and colored concrete usually need about 1,500 to 2,200 PSI, since excessive force can remove joint sand or damage the colored surface. Concrete pressure and flow guidance treats PSI, GPM, and nozzle choice as one setup rather than separate specifications.
A compact electric washer around 1,800 PSI can handle light dirt on a sound broom-finished slab, although the work may take longer. For a large or heavily soiled driveway, renting a machine with better flow and a surface-cleaner attachment often makes more sense than buying equipment for one project.
Match the nozzle to the work
Nozzle angle controls how concentrated the spray is. Wide fans give you more forgiveness, while narrow fans clean aggressively but punish poor distance and slow wand movement.
Task
Nozzle
PSI Range
Notes
General concrete washing
25-degree green
2,500 to 3,000 PSI
Use on older, intact concrete with the wand moving
Tire marks and concentrated grime
15-degree yellow
Up to about 3,500 PSI
Test first and avoid lingering
Rinse passes
40-degree white
Below 2,000 PSI for new concrete
Provides a wider, gentler fan
Soap application
65-degree black
Low pressure
Applies detergent without forcing it into the slab
Very stubborn spot
0-degree red
Carefully controlled upper range
Reserve for sound concrete after testing
The Consumer Reports surface-safety overview notes that concrete can be cleaned with at least 1,500 PSI, while routine residential work is often kept near lower or middle settings. A setting around 3,500 to 4,000 PSI can damage concrete when used carelessly, especially with a narrow tip held too close.
A rotary surface cleaner keeps the spray at a consistent distance, helping prevent tiger stripes. Apply a biodegradable detergent through a downstream injector or siphon tube at low pressure, then change back to high pressure for rinsing. Gas-powered machines also require stable footing, ear protection, and careful handling of backpressure, particularly on sloped driveways. Choose the least aggressive setup that cleans effectively, because controlling spray and wastewater matters as much as raw pressure.
Getting the Driveway and Gear Ready
Preparation determines whether the wash water stays under control. Move both cars onto the street, sweep loose grit from the slab, and remove planters, furniture, trash bins, and toys. A clean surface lets detergent dwell evenly instead of becoming trapped in piles of sand and leaves.
For a two-car driveway, soak nearby shrubs and grass with fresh water before applying cleaner. Wet vegetation is less likely to absorb concentrated detergent. Cover delicate plants if the low edge of the slab drains toward them, but don't use a tarp as a substitute for runoff planning.
Lay a weighted tarp, absorbent socks, or a containment berm at the low edge. Direct clean rinse water toward a suitable grassy strip where local rules allow it, not toward a curb or storm drain. Some municipalities require capture and proper disposal, so check local requirements before you start. The house-cleaning supplies checklist can help you assemble basic protective and cleaning supplies before the machine comes out.
Set up the machine safely
Place the washer within 50 feet of a spigot, using a suitable garden hose, an in-line filter, and a GFCI outlet for electric equipment. Keep electrical connections away from standing water, and route the hose so you won't trip while backing down the driveway.
Choose a biodegradable, phosphate-free concrete cleaner and follow the product label for dilution. A common label direction may be 10:1, but the product's instructions control. Don't combine cleaners, and don't assume a household product is safe for concrete, plants, or stormwater.
Put on safety glasses, closed-toe shoes with grip, and hearing protection when using a gas-powered unit. Before cleaning the visible surface, perform a 30-second test spray on a hidden corner. Check for etching, loosened aggregate, color loss, and splash reaching plants or drains.
Washing the Driveway Step by Step
Take a realistic driveway with a three-week-old oil spot beside the garage and dark tire marks leading toward the curb. The mistake would be to point a narrow nozzle at both problems immediately. Oil is difficult because water doesn't dissolve it, and aggressive pressure can roughen aged concrete before it removes the stain.
Begin with the oil area. Apply a biodegradable degreaser, allow it to dwell for 5 to 10 minutes, and keep it from drying. Work it with a stiff concrete-safe brush if the label allows. The purpose is to loosen and emulsify surface grease before the pressure washer carries it away.
Work from the garage toward the curb
Rinse the entire surface with water first, using a broad spray. Then apply detergent with the 65-degree black soap nozzle at low pressure, covering manageable sections rather than flooding the whole driveway. Keep the runoff moving toward your planned grass swale or containment area, never toward a storm drain.
Switch to a 25-degree green nozzle for the cleaning passes. Hold the wand about 10 to 12 inches from older, intact concrete, keep it moving, and use slow overlapping strokes that follow the driveway's slope. Starting too close creates visible cuts. Moving too quickly leaves alternating bands of clean and dirty concrete.
For tire marks that remain after treatment, test a small section of sound concrete with a 0-degree red tip only if necessary. Keep the tip moving, use it briefly, and stop if the surface begins to change texture. Guidance on pressure washing a driveway is useful for comparing nozzle technique and cleaning sequence, but your driveway's finish and condition should determine the final setting.
A surface cleaner is the better choice for broad areas because it maintains a consistent distance and reduces striping. After the last pass, rinse from the garage toward the curb or controlled collection point. If you also work on a basement slab, keep the same care around detergents and drainage, as discussed in this guide to cleaning a basement concrete floor.
When the driveway is finished, flush the detergent line and pump with fresh water. Residue left inside the system can dry and crystallize, particularly when the machine is stored through winter. Follow the equipment manufacturer's shutdown instructions rather than leaving chemical solution in the hose.
Troubleshooting Streaks, Stains, and Runoff
The driveway can look clean while wet and reveal problems as it dries. Most issues come from uneven technique, a stain that needs chemistry rather than force, or water that traveled somewhere it shouldn't have.
Diagnose the visible result
Tiger stripes usually mean the wand height, travel speed, or overlap changed between passes. A surface cleaner reduces that risk, but it won't compensate for stopping in place or working at different distances. If you used a wand, repeat the affected area with a consistent 10-inch standoff and a steady walking pace.
An oil shadow that returns after drying usually needs another detergent treatment, not a more aggressive blast. Deep stains need a poultice-style or capillary-action treatment that draws oil from the pores. More pressure on aged concrete can etch the surface while leaving the underlying stain.
Problem
Likely Cause
Recommended Fix
Tiger stripes
Uneven wand height or speed
Rewash with consistent distance and overlapping passes
Oil shadow remains
Oil has penetrated the concrete
Repeat with a suitable degreaser or poultice-style treatment
Rust stain persists
Stain chemistry needs targeted treatment
Use a concrete-safe rust treatment, then rinse carefully
Suds reach the gutter
Detergent and runoff lack containment
Block the flow, capture the water, and use phosphate-free cleaner
Grass shows stress
Concentrated runoff reached vegetation
Flush plants with fresh water and improve diversion
Treat runoff as part of the job
If the final rinse is flowing toward a curb, stop and redirect it toward permeable soil where permitted. Use a wet vacuum, absorbent socks, or berms to block the path. Municipal requirements differ, and some locations demand capture and disposal rather than allowing wash water to flow or evaporate.
For leaves and organic debris, remove the material before washing. Homeowners deciding between mulching leaves and raking can use either approach in the yard, but driveway debris should be swept away so it doesn't become dirty runoff. Eco-conscious households can also review eco-friendly cleaning options before selecting a detergent.
Flow rate matters as much as force. A machine producing at least 2.0 GPM can handle many driveway benchmarks, while roughly 3 to 5 GPM moves loosened grit more effectively on standard poured concrete. If a stain remains, first ask whether the problem is insufficient water volume, the wrong nozzle, or the wrong chemical treatment.
When It Makes Sense to Call a Pro
DIY pressure washing stops being a bargain when the driveway's size, surface condition, access, or drainage requirements exceed your equipment and confidence. A driveway over 1,500 square feet can take much of a Saturday, especially with a small electric unit. Spalling, exposed rebar, loose aggregate, and decorative coloring also call for inspection before spraying.
Ladder work changes the risk. Do not combine an unstable ladder, a reactive wand, and a wet surface. Multi-story homes, steep slopes, and tight access points are better handled by a crew with suitable equipment and safety procedures.
Stormwater rules may decide the issue. Some municipalities require commercial recovery equipment, while a professional may bring containment, vacuum recovery, and disposal procedures that a homeowner lacks. A residential electric washer at 1.4 GPM will not move water like a truck-mounted system producing 4 to 8 GPM, so a project that seems manageable can take far longer. The earlier PSI and GPM guidance covers these equipment differences.
Aquastar Cleaning Services, LLC lists driveway pressure washing alongside residential cleaning. Its service options may suit homeowners who want exterior surface maintenance handled with other home-cleaning needs. Compare providers by their process, not promises.
Ask these questions before booking:
Insurance: Can the company provide proof of current insurance?
Recovery: How will the crew contain, recover, and dispose of wastewater?
Chemicals: Can they provide detergent SDS sheets and explain plant-safety measures?
A professional is especially useful when wastewater cannot be safely diverted, the slab may be damaged, or the work requires ladders and specialized recovery equipment.
Keeping Your Driveway Cleaner for Longer
A clean driveway stays presentable when you prevent grit, leaves, oil, and standing moisture from building into a larger problem. The maintenance routine doesn't need to be complicated. It needs to happen before stains become embedded.
Sweep weekly to remove grit that can grind into the finish under tires. After pollen or sap falls, rinse with a garden hose and move the water toward a permitted permeable area. If soap is involved, use catchment rather than allowing suds to reach the gutter.
Use a simple maintenance rhythm
Spot-treat oil drips within 48 hours with a biodegradable degreaser. Fresh contamination is easier to address than a dark shadow that has settled into the concrete. Rotate where you park when practical, which spreads tire wear and reduces repeated loading in one location.
A full pressure wash every 12 to 18 months can suit many driveways, depending on shade, traffic, mildew, and the amount of organic debris. A shaded slab may need attention sooner, while a sunny, lightly used driveway may stay presentable longer. Use the mildest effective method and repeat the small test area when conditions change.
Resealing can help limit moisture and oil penetration, with many maintenance recommendations placing resealing around every 2 to 3 years. Choose a sealer compatible with the concrete finish, and don't apply it until the surface is clean, dry, and free of residue.
For broader home-care routines, the house-cleaning tips collection offers a useful place to organize recurring tasks. Tape this checklist inside the garage door:
Weekly: Sweep grit, leaves, and loose debris.
After spills: Blot and spot-treat oil promptly.
After seasonal buildup: Rinse pollen, sap, and organic residue toward an approved area.
Before deep cleaning: Inspect cracks, spalling, plants, drains, and runoff routes.
During washing: Use biodegradable detergent and contain soapy water.
After washing: Flush the machine and check the dry surface for stripes or stains.
Every few years: Evaluate the sealer and surface condition before recoating.
Aquastar Cleaning Services, LLC offers driveway pressure washing for exterior surface maintenance, along with residential cleaning and eco-friendly product options when requested. If you'd rather have the concrete, runoff planning, and surrounding home-care tasks handled by an insured local team, visit Aquastar Cleaning Services, LLC to request a quote.
You walk out to the driveway and notice what you've been ignoring: tire-track shadows near the garage, rust-colored drips beneath the air-conditioning unit, and dark mildew stripes spreading in from the lawn. The concrete still works, but it no longer looks cared for. That's when the question comes up, is a driveway pressure washing service worth booking, or can the stains wait another season?
The honest answer depends on the surface, the stain, and the cleaning method. Proper equipment can lift embedded grime without needlessly wearing the concrete, while the wrong nozzle or careless runoff can create new problems. A good service isn't just someone pointing a powerful wand at the slab. It's surface inspection, stain treatment, controlled rinsing, and responsible cleanup.
Why Homeowners Book a Driveway Pressure Washing Service
The driveway can make a cared-for home look tired in a few hours. Tire marks, green growth, and uneven discoloration occupy a broad area near the entrance, so visitors notice them before smaller exterior details. Homeowners often schedule cleaning before a property showing, during seasonal maintenance, or because arriving home feels better when the entrance looks orderly.
Appearance is only one reason. Algae and mildew can leave concrete slick after rain, particularly where shade, lawn edges, or poor drainage keep the surface damp. Washing removes growth from the slab, but it cannot solve the drainage condition that keeps carrying moisture back across the same spot.
Appearance is only part of the value
Oil, salt residue, organic growth, and similar contaminants can settle into concrete pores or collect between pavers. Time gives stains more opportunity to bond, so cleaning may improve some areas without making every mark vanish. Deep rust and oil that has soaked into concrete for years may lighten rather than disappear.
A clean driveway also helps before listing a home because it forms a large, visible part of the property presentation. It can work with washed siding, trimmed landscaping, and tidy entry steps to create a more finished arrival. That does not guarantee a higher offer or faster sale. It removes one avoidable negative impression.
Practical rule: Book cleaning to restore and maintain the surface, not to disguise cracks, settlement, failing sealer, or drainage defects.
The wider pressure washer market has become a multi-billion-dollar category. One market study valued it at USD 3.19 billion in 2025 and projected USD 4.03 billion by 2030, with a 4.8% CAGR. Those figures describe the broader equipment and service market rather than guaranteed local demand, but they help explain why exterior cleaning is now a routine maintenance option across residential, commercial, and industrial properties. Market overview and projections
The equipment choice matters as much as the reason for booking. A contractor may adjust PSI, select a wider or narrower nozzle, or switch from pressure washing to a gentler soft-washing method when the surface or nearby material calls for it. On the property side, the crew should protect plants, follow local runoff requirements, and keep dirty water from entering places it should not.
Before hiring, read Aquastar Cleaning Services testimonials and ask what the visit includes. A responsible crew identifies the material, matches treatment to the stain, explains realistic results, and handles cleanup instead of treating the driveway as an isolated slab.
How Driveway Pressure Washing Actually Works
A garden hose mainly rinses away loose dirt. A pressure washer forces water through a smaller opening, creating a focused stream that can loosen grime caught in concrete pores, paver joints, and textured finishes. It works much like using a firm brush instead of a light sweep, except the operator must keep that force matched to the surface.
PSI, or pounds per square inch, measures water pressure. GPM, or gallons per minute, measures how much water the machine delivers. PSI helps separate dirt from the surface, while GPM carries the loosened material away. High pressure with weak flow may hit hard but rinse poorly. High flow without enough pressure may leave embedded residue behind.
Nozzle angle controls the risk
A 0-degree nozzle produces a pencil-thin stream. Its impact is concentrated in one tiny spot, which can etch concrete, cut softer material, or leave marks. It is rarely a sensible general-purpose choice for a driveway.
A 25-degree nozzle spreads water into a fan and is commonly used on standard cured concrete. One driveway guide recommends working about 6 to 10 inches from the surface with this nozzle. Controlled, overlapping passes help reduce streaks. Concrete driveway washing guidance
A 40-degree nozzle creates a wider, gentler pattern. It is better suited to delicate work and newer concrete than a narrow tip. A low-pressure soap nozzle lets the operator apply detergent first, helping loosen algae, mildew, and oily residue before rinsing.
Surface matching matters because concrete, brick pavers, stamped concrete, and exposed aggregate do not respond identically to the same pressure or distance. Decorative concrete also depends on texture and sealer condition. This stamped concrete stain removal guide explains why those details affect the cleaning approach.
For standard cured concrete, professional work commonly centers on 2,500 to 3,000 PSI. Pressure above roughly 3,000 to 3,500 PSI, particularly through a narrow nozzle, raises the risk of etching or exposing aggregate on older, weathered slabs. Driveway pressure guidance
The work around the driveway matters too. The crew may protect plants, control runoff, and shift to soft washing when the surrounding materials or contamination call for less force. Hot-water equipment can loosen greasy residue, while a downstream injector draws detergent into the water stream without sending concentrated chemical through the pump. A careful process follows the order of pre-treatment, dwell time, controlled cleaning, and rinsing, rather than trying to solve every stain with more pressure.
What a Driveway Pressure Washing Service Should Fix
You can usually identify the main driveway problem from the curb. The useful question isn't whether the surface looks dirty. It's what kind of dirt you're seeing and whether the cleaning method matches it.
Organic growth
Green algae often appears along damp lawn borders. Black mildew can form in shaded sections, and moss may return each spring where moisture remains trapped. These areas usually respond better to pre-soaping or a suitable algaecide followed by controlled rinsing than to an aggressive blast alone.
The crew should also look for growth in expansion joints and at the edge of the slab. If the surrounding soil stays wet or downspouts discharge across the drive, cleaning may improve the appearance without preventing recurrence.
Vehicle and metal stains
Oil drips, transmission fluid, and tire shadows require different treatment from ordinary dust. Rust bleed beneath fertilizer storage, metal furniture, or a leaking air-conditioning condenser can be stubborn because the color may have migrated into the concrete.
A thorough service should identify these spots before washing, apply a suitable degreaser or rust treatment where appropriate, allow dwell time, and then rinse carefully. One visit can make a strong improvement, but old oil and deep rust may only lighten. A contractor who guarantees complete removal without inspecting the stain is overpromising.
Environmental residue
Leaves release tannins that create brown discoloration. Hard-water deposits can leave pale mineral marks, while pavers may develop efflorescence, a whitish deposit caused by salts moving through masonry. These aren't all solved by the same detergent.
Pressure washing can remove loose surface residue, but efflorescence and mineral deposits may need a material-compatible treatment. Pavers also need careful attention around joints. The same surface-awareness used in fence washing techniques applies here, especially when plants, adjacent materials, and runoff paths are close to the work area.
Surface wear and neglected buildup
Dirt can pack into paver joints, polymeric sand can loosen, and concrete can develop a chalky film after years without maintenance. Washing can reveal the true condition of the surface, including cracks, spalling, worn sealer, or joint loss that grime had concealed.
For a practical comparison, look at how residue behaves on a basement slab in this guide to basement concrete floor cleaning. The key lesson is the same: cleaning restores the surface's appearance, but it doesn't rebuild damaged concrete or replace missing joint material.
Inside a Real Driveway Pressure Washing Visit
A professional visit should feel organized before the machine turns on. The crew arrives, walks the property, identifies the driveway material, notes oil, algae, rust, cracks, and drainage, then checks nearby cars, plants, doors, walls, and outdoor furniture. That short inspection determines whether the job needs standard pressure, a softer setup, chemical treatment, or extra runoff control.
A driveway visit in practical order
First, the crew blows or sweeps away leaves, stones, and loose debris. They pre-soak adjacent grass and shrubs, then apply a surface-appropriate detergent or algaecide. The solution sits for several minutes so it can loosen organic growth and grime before rinsing begins.
Next comes the cleaning pass. On ordinary cured concrete, the operator may use a 25-degree nozzle or a surface cleaner, keeping the tool moving and maintaining a consistent distance. Straight side-to-side passes with about 6-inch overlaps help prevent zebra striping on a typical two-car driveway. Pass and distance guidance
Pavers, stamped concrete, and exposed aggregate may require a wider fan or soft-wash setup. The operator should avoid lingering in one place, particularly around decorative textures, old sealers, edges, and cracks. A surface cleaner can produce an even result across broad concrete areas, while a wand handles borders, steps, and tight corners.
Watch the process in action before you book by reviewing the embedded demonstration below.
After cleaning, the crew rinses residue in a controlled direction and checks edges, joints, and borders. Landscaping should receive a post-rinse if detergent reached it. If paver joints lost sand, re-sanding may be available as an additional service.
Drying time depends on weather, shade, surface porosity, and how much water the crew used. Keep vehicles, toys, and heavy foot traffic off the driveway until the surface is dry. A final inspection should distinguish a remaining stain from a wet patch, and a reputable provider should explain whether a follow-up treatment is worthwhile. For visual examples of completed work, the before-and-after cleaning photos can help you judge the kind of finish to expect.
Driveway Pressure Washing Service Pricing and Eco-Friendly Options
A quote should reflect more than driveway size. Material, access, stain severity, pretreatment, edge work, wastewater controls, and whether the provider uses hot water all affect the job. The verified market information available for this topic doesn't establish reliable local price bands, so a contractor should provide a written, property-specific estimate rather than relying on a universal price chart.
That also means the comparison below should be read as a method guide, not a price promise. The table avoids invented dollar amounts while showing what to ask about.
Driveway Size
Standard Pressure Wash
Soft Wash
Hot Water / Steam
Small
Suitable for ordinary dirt on sound concrete. Confirm minimum service charges and runoff handling.
Useful for delicate surfaces or organic growth. Ask about dwell time and detergent choice.
Consider when localized grease needs heat. Confirm whether equipment setup adds a service charge.
Medium
Efficient for broad cured-concrete areas with the correct nozzle and overlapping passes.
Better suited to pavers, stamped surfaces, and sensitive finishes.
Useful for heavier oil contamination when cold water leaves residue.
Large
Ask how the provider manages consistent cleaning, water use, edges, and collection.
Ask whether low pressure will be paired with enough rinse flow and surface-safe chemistry.
Ask about fuel use, access, heat control, and where contaminated water will go.
Match the method to the stain
Traditional high-PSI washing uses mechanical force to remove embedded dirt from durable concrete. It can be the right choice for a sound slab, but excessive pressure can etch the surface.
Soft washing uses lower pressure with detergents. It can suit pavers, stamped concrete, delicate finishes, and organic growth, provided the chemicals are appropriate and the crew protects plants. Recent industry coverage reports that 65% to 75% of established contractors now offer soft washing, compared with about 45% to 55% in 2022 to 2023, indicating a move toward surface-matched methods rather than one-size-fits-all blasting. Industry soft-washing coverage
Hot-water or steam cleaning can help with oil-heavy areas because heat improves grease breakdown. It may require more equipment and fuel, so ask what problem the added heat solves before paying for it.
Eco-conscious practices include reclaim mats, water recovery, biodegradable surfactants, plant-safe algaecides, sediment control at storm drains, and fuel-efficient or electric equipment. Market reporting also describes movement toward electric and battery-powered tools, water-efficient machines, and eco-friendly cleaning agents. One industry summary projects battery-operated pressure washers as the fastest-growing product segment, with an 8.7% CAGR from 2026 to 2034. Pressure washer market trends
Don't accept a vague “green” label as proof. Request the product name, dilution information, runoff plan, and written method statement. Aquastar Cleaning Services, LLC lists driveway pressure washing and eco-friendly cleaning options among its residential services, so homeowners comparing providers can include those questions in an online quote conversation at Aquastar's eco-friendly cleaning page.
How to Choose the Right Driveway Pressure Washing Service
The lowest bid can become the most expensive option if the contractor etches the concrete, damages plants, leaves stripes, or ignores contaminated runoff. Door-knocking with a deep discount, no verifiable physical address, cash-only demands, and pressure to commit immediately should all make you pause.
Start with documents, not promises
Ask for proof of insurance and liability coverage before work begins. Request a written scope that identifies the driveway material, stains included, pretreatment, cleaning method, edge work, rinsing, and any exclusions.
A capable provider should explain its method in plain language. On a standard cured-concrete driveway, you might hear about a 25-degree fan tip, controlled distance, a surface cleaner, and overlapping passes. On pavers or stamped concrete, the explanation should change. If the contractor says every surface gets the same pressure, nozzle, and chemical, keep looking.
Before-and-after photos of similar driveways are more useful than generic house-washing images. Local references can also reveal whether the crew arrives on time, protects landscaping, handles concerns, and leaves the property orderly.
Ask questions that expose competence
Use these questions during the estimate:
Surface matching: Which nozzle and pressure range will you use on my material?
Stain treatment: Will oil, rust, mildew, or efflorescence receive separate pretreatment?
Landscaping: How will you protect and rinse grass, shrubs, and nearby beds?
Storm drains: How will you prevent detergent, sediment, and oily water from entering the drainage system?
Quality control: What happens if a visible spot remains after the driveway dries?
Damage responsibility: Do your written terms address etching or plant damage?
The contractor choice also depends on the operation. A solo operator may offer direct communication and lower overhead, but availability and backup capacity can vary. A small two-truck crew may balance responsiveness with equipment depth. A national franchise may provide standardized branding and systems, although the local operator still deserves the same document and method checks.
Runoff deserves special attention. San Diego County guidance says polluted power-washing water must not leave a property and enter streets or storm drains, and that only rainwater is allowed in those systems. Power-washing runoff guidance Local rules vary, so ask your provider how it contains and directs wastewater.
For broader cleaning-company vetting questions, this cleaning company selection guide offers a useful checklist mindset. A written process is a stronger signal than a flashy vehicle or a rushed discount.
Your Simple Action Plan for a Cleaner Driveway
A cleaner driveway starts before the equipment arrives. Give the contractor a clear record of the surface, stains, access points, and result you expect.
Photograph the trouble spots. Capture tire shadows, oil, rust, mildew, moss, lost paver-joint material, cracks, and areas that stay wet. Close photos help separate staining from surface damage.
Record the material and size. Note whether it is standard or stamped concrete, pavers, exposed aggregate, or another surface. Estimate the area and identify nearby lawns, shrubs, walls, vehicles, doors, and storm drains.
Match the method to the surface. Sound, cured concrete may suit controlled pressure washing. Newer, decorative, weathered, or delicate areas may require a wider fan, lower pressure, soft washing, or a test patch. Newly poured slabs under 12 months old should stay below 2,000 PSI with a 40-degree nozzle. Older concrete with an intact surface layer can often handle 2,500 to 3,000 PSI with a 25-degree nozzle. Concrete age and nozzle guidance
Get two or three written quotes. Ask each provider to list the pressure range, nozzle, detergents, dwell time, edge treatment, plant protection, runoff handling, and the plan for stains that improve but do not disappear.
Prepare the work area. Choose a dry weather window. Move vehicles, toys, tools, loose debris, and fragile items away from the driveway. Point out outdoor outlets, water access, drainage routes, and stains needing inspection.
Check the surface after drying. Wet concrete can hide missed edges and remaining marks. Once dry, look for stains, striping, exposed aggregate, or incomplete areas, then contact the provider promptly if the agreed scope was not finished.
Set up simple maintenance. Sweep loose dirt, address oil drips early, and keep downspouts from discharging across the slab. Ask whether sealing or joint maintenance fits the surface. If washing reveals cracks, arrange repair or sealing instead of treating cleaning as a structural fix.
Save the maintenance plan for the next service. Driveway care works best as a small, repeatable habit.
Aquastar Cleaning Services, LLC offers driveway pressure washing for exterior surface maintenance alongside residential cleaning services in Kennesaw and North Atlanta. Visit Aquastar Cleaning Services, LLC to request information about a driveway cleaning plan suited to your home's surfaces and maintenance needs.
You've finally got the renovated kitchen back. The cabinets are installed, the counters are gleaming, and the contractor has packed up. Then morning light hits the room, revealing drywall dust on the marble, sticker residue on the windows, scraps of packaging near the island, and a faint film on surfaces that looked clean the night before. Your HVAC system may also be carrying fine particles into rooms that weren't renovated.
That's when most homeowners discover that a construction cleanup service isn't a single sweep-out. It's a staged process that protects indoor air quality, removes job-site hazards, prepares the property for inspection, and makes the space livable. The three stages are rough cleanup, final cleanup, and touch-up cleanup. Each has a different purpose, and skipping one usually leaves the next crew working around dust and residue.
A homeowner can handle light organizing and some low-risk wiping, but fine construction dust demands better tools and a more deliberate sequence. This construction dust cleaning guide reflects the right principle: capture dust instead of redistributing it.
The Day After the Contractor Leaves
The contractor's truck pulls away, and the renovated kitchen feels finished until you run your hand across the island. A pale coating comes off on your fingers. New windows still carry labels and adhesive, the cabinet interiors hold sawdust, and small pieces of trim or plastic packaging remain behind appliances. In the hallway, the dust is less visible, but it has settled on baseboards, door frames, vents, and light fixtures.
A homeowner might reasonably ask, “Why can't I just vacuum and mop?” The answer is that construction residue behaves differently from ordinary household dirt. Drywall dust, tile residue, sawdust, and masonry particles settle into seams, grilles, tracks, and textured finishes. A standard broom can lift fine particles back into the air instead of removing them.
Practical rule: If the remodel involved sanding, cutting, demolition, or cabinet refinishing, treat the property as a work site until the dust has been captured from high surfaces, vents, walls, fixtures, and floors.
The right sequence starts while trades are still finishing. Rough cleanup removes bulky debris and clears access for painters, installers, and punch-list work. Final cleanup follows completed construction and removes fine residue from the home. Touch-up cleanup happens after corrections, inspections, or moving activity create new marks.
That timing matters. Cleaning floors before a painter finishes can mean cleaning the same floors again. Polishing fixtures before a plumber returns can leave fingerprints and tool dust behind. The staged approach keeps each visit tied to a real handoff point rather than treating cleanup as an afterthought.
Your first morning should be practical, not frantic. Photograph dusty surfaces, unfinished areas, window tracks, vents, and leftover materials. Ask the contractor what debris they're removing and what remains in the cleaning scope. Then decide whether you need a debris haul, a detailed construction clean, or a specialist for materials that ordinary cleaners shouldn't disturb.
What a Construction Cleanup Service Actually Does
A construction cleanup service systematically removes the dust, debris, residue, and hazards left after building or remodeling. It isn't the same as routine housekeeping, which maintains an occupied home, and it isn't the same as junk hauling, which mainly removes bulky material.
OSHA's construction housekeeping rule, 29 CFR 1926.25, requires construction sites to remain free of debris and hazards. OSHA's respirable crystalline silica standard sets a permissible exposure limit of 50 micrograms per cubic meter as an eight-hour time-weighted average. Cutting, grinding, and demolishing concrete, masonry, and similar materials can create respirable dust, so cleanup is directly connected to occupational safety, not just appearance. See the OSHA construction dust guidance for the regulatory context.
Particles below 10 micrometers are considered inhalable and can reach the trachea and bronchi. Guidance connected with environmental dust management associates inhalable dust exposure with reduced lung function and respiratory distress, which is why source control, containment, and HEPA capture are preferable to dry sweeping alone. The construction environmental dust management plan provides useful technical background.
The core deliverables
A professional crew should define its work in writing. A thorough scope commonly includes:
Debris sorting: Bagging and organizing small construction waste, with large-material hauling confirmed separately.
HEPA vacuuming: Capturing fine dust from floors, trim, cabinet interiors, vents, ledges, and fixtures.
Residue removal: Addressing adhesive, tape, paint splatter, caulk, grout haze, and protective film with surface-appropriate tools.
Top-to-bottom wiping: Cleaning ceiling-level fixtures first, then walls, trim, counters, cabinets, and floors.
Glass and fixture detailing: Removing labels and residue from windows, polishing hardware, and cleaning light fixtures.
Air-quality mitigation: Protecting HVAC pathways, replacing appropriate filters when included, and preventing settled dust from becoming airborne again.
A construction cleaner can remove ordinary residue and dust. They shouldn't claim to perform asbestos abatement, lead abatement, mold remediation, or other hazardous-material work without the required specialization. If the job involves suspected hazardous materials, stop disturbing them and use a qualified specialist.
Service Tiers and What Each One Covers
The three-tier model works because construction creates different cleaning problems at different points. Rough cleanup clears the site. Final cleanup removes the fine residue. Touch-up cleanup corrects the marks created after final cleaning. Combining those jobs sounds efficient, but it usually forces a crew to clean around unfinished work and repeat labor.
Comparison table
Tier
When It Happens
Core Tasks
Typical Crew
Homeowner DIY?
Rough cleanup
During construction or after trades leave
Bag debris, remove packaging, clear lumber and drywall scraps, organize remaining materials
Often one or more laborers, depending on debris volume
Light organizing and bagging, if materials are safe and disposal is allowed
A small professional crew is usually more practical than one cleaner
Low-risk wiping and basic organizing, but fine-dust removal is better assigned to trained workers
Touch-up cleanup
After inspection, corrections, or final walkthrough
Remove new smudges, dust, stickers, fingerprints, and small residues
A small crew or returning detail cleaner
Often manageable if the remaining work is genuinely minor
DIY rough cleanup makes sense when the contractor has already removed hazardous and bulky materials. For example, you can collect clean cardboard, group unused hardware, and wipe accessible shelves. Don't sweep drywall dust through the house or carry unknown debris in open bags.
Final cleaning is where professional equipment earns its place. OSHA's Technical Manual identifies vacuuming as the most reliable method for cleaning dusty surfaces, and research on dust-control methods supports wet extraction and other controlled approaches. A systematic review found reductions in total dust fall rates ranging from 30.3% to 93% with water misting, 23.9% to 94% with foaming, and 36.7% to 99.04% with wet dust extraction (systematic review of construction dust controls). Those methods aren't interchangeable for every home, but they support the basic decision to capture and dampen dust rather than dry sweep it.
Touch-up cleaning is a good DIY task when the home has already received a proper final clean. Removing a missed window sticker or wiping a new fingerprint is different from trying to correct a whole house that was cleaned before sanding ended.
Best value: Pay for the correct tier at the correct time. A cheap combined visit often becomes two visits after dust settles or trades return.
A company offering premium maid services may handle routine and detail cleaning, but confirm that its post-construction scope includes HEPA equipment, residue removal, and staged scheduling.
A Room-by-Room Cleanup Walkthrough
Clean every room from high to low. Start with vent grilles, ceiling fans, upper cabinets, and light fixtures. Move to walls, windows, trim, furniture surfaces, and floors last. This prevents overhead dust from falling onto areas you've already finished.
Kitchens
Begin with vent grilles and the top edges of cabinets. Use a HEPA vacuum with a soft brush, then wipe with a damp microfiber cloth. Clean cabinet interiors before exteriors, because dust from shelf corners can fall onto doors and counters.
Check drawers, appliance gaps, backsplash seams, and the area above the range. Degrease splash zones only after removing abrasive construction residue, since rubbing gritty dust across a finish can scratch it. Wipe appliance exteriors with a product approved for the material, and ask the cleaner to confirm whether refrigerator or oven interiors are included.
For adhesive on glass or metal, soften the residue first and use a scraper designed for that surface. Don't use a razor on a delicate coating or scrub a new stone counter with an unapproved abrasive.
Bathrooms
Vacuum ceiling corners, exhaust grilles, and light fixtures before cleaning mirrors or chrome. Inspect grout lines for haze, check caulk edges for excess material, and polish fixtures after the surrounding tile has been cleaned.
Glass shower panels need controlled residue removal. A professional may use a nonabrasive tool and a compatible solution, while a homeowner can handle light fingerprints and ordinary water marks. If grout haze remains widespread, bring in a crew that knows the tile manufacturer's care requirements.
Bedrooms and living areas
Closets, outlet covers, baseboards, windowsills, and trim collect dust even when the main floor looks clean. HEPA vacuum those edges, then wipe with a slightly damp microfiber cloth using straight, overlapping passes rather than circular motions that spread residue.
Protect floors according to their finish. Vacuum first, damp mop only after the fine dust is gone, and change rinse water or mop heads when they become visibly dirty. A homeowner can manage a small bedroom with minimal residue, but whole-home dust after drywall sanding is slower and safer with professional containment and filtration.
Utility spaces
Garage floors, laundry areas, storage rooms, and HVAC closets deserve their own pass. Remove loose debris, clean accessible shelving, and inspect filters and vent openings. Don't open or alter HVAC equipment beyond your competence. If dust entered ductwork, ask an HVAC professional whether duct cleaning or filter replacement is appropriate.
A final HEPA pass should move from upper surfaces to the floor. This kitchen cleaning service resource is useful for separating ordinary kitchen maintenance from the more demanding residue work required after remodeling.
Use this video as a visual reference for the room sequence, but follow product and finish instructions for your specific materials.
What Drives the Price and What to Expect to Pay
A construction cleanup quote should reflect labor and risk, not just floor area. Two homes with the same footprint can require very different work if one has light packaging residue and the other has drywall dust in vents, adhesive on glass, stone counters, and restricted access.
The main price drivers are:
Square footage: More rooms mean more surfaces, edges, fixtures, and floor area.
Dust severity: Sanding, grinding, demolition, and drywall work create a more demanding cleanup than a minor installation.
Finish sensitivity: Marble, natural stone, new wood, specialty glass, and delicate hardware require slower, safer methods.
Debris volume: Small residue cleanup differs from lumber, drywall, tile, and packaging removal.
Access: Stairs, tight corridors, limited parking, and occupied areas add labor.
Urgency: Same-day or after-hours scheduling can increase the quote.
A company may bill hourly, by square foot, or at a flat project rate. Hourly billing can be fair when the scope is uncertain, but a written flat-rate scope gives homeowners better control when the rooms and deliverables are clear. Ask whether disposal, consumables, HEPA filter charges, window work, appliance interiors, and return visits are included.
The research brief doesn't establish verified national or regional dollar ranges, so any company giving a universal “average” should be treated cautiously. Get itemized quotes for each tier instead of accepting a single number that hides what the crew will do.
Number of return areas, new dust, sticker residue, deadline
DIY has costs too. You'll need suitable vacuum equipment, microfiber cloths, compatible cleaners, protective gear, bags, transportation, and your own time. A homeowner can reduce a quote by having the contractor remove bulky debris, clear access, and finish all dusty trades before the cleaners arrive. Don't reduce the scope by removing HEPA vacuuming or high-surface cleaning. Those are the parts ordinary mopping misses.
For context on routine residential cleaning rather than specialized construction work, review this average cleaning service cost guide. Construction cleanup needs a separate scope because it involves residue, dust control, and handoff readiness.
Safety, Disposal, and Air Quality Considerations
Start with a pre-clean inspection. Photograph the property, note unfinished work, identify rooms affected by sanding or demolition, and ask whether any suspect materials were disturbed. Keep the contractor's product documentation, safety data sheets, disposal receipts, and any waste manifests that apply to the project.
Construction dust control requires more than a mask and an open window. HEPA-filtered vacuums capture fine particles, while sealed bags reduce the chance that collected dust will escape during removal. Workers entering a dusty area should use appropriate PPE, including respiratory protection, eye protection, and gloves. The exact protection depends on the material and exposure conditions.
Lead and asbestos require a different response
For renovation in an older home, ask whether lead-based coatings or asbestos-containing materials could be present before disturbing them. EPA's lead-safe renovation guidance for DIYers recommends thorough mopping of uncarpeted floors, HEPA vacuuming or damp cleaning of walls, HEPA vacuuming of remaining surfaces and objects, and wet wiping until disposable cloths come clean.
EPA also distinguishes cleanup from abatement. If post-renovation dust-lead testing reaches or exceeds applicable action levels, the renovation firm must re-clean until the results fall below the relevant standards, as described in EPA's post-renovation dust-lead testing guidance.
Clearance sampling shouldn't happen immediately after the final wipe. EPA and HUD materials state that sampling should occur no sooner than one hour after final cleanup so dust can settle. The listed hazard standards include 10 micrograms per square foot for floors, 100 micrograms per square foot for window sills, and 400 micrograms per square foot for window troughs (HUD clearance guidance). Check window tracks and sills before returning a renovated room to occupants.
If you suspect asbestos, don't ask a general cleaning crew to investigate by scraping or sampling. A resource on an asbestos survey in LA explains why a qualified environmental professional should assess suspect materials before disturbance. Local rules also determine how construction debris must be bagged, transported, and discarded, so confirm disposal requirements with your municipality or waste provider.
Ventilate only after dusty work is controlled. Otherwise, fans can move particles into clean rooms. Protect supply and return vents during active demolition, then clean accessible grilles and address filters or ductwork through the appropriate HVAC professional.
How to Hire and Vet the Right Cleanup Team
Don't hire from a vague “deep clean” description. Require a written scope that names rough, final, and touch-up cleaning, identifies included rooms and surfaces, and explains what causes an upcharge.
The requirements are straightforward:
Insurance: Request proof of general liability and workers' compensation coverage.
Dust training: Ask how the crew handles silica-producing dust and what controls they use.
Chemical documentation: Request a sample safety data sheet binder, especially for delicate new finishes.
Scope clarity: Confirm who removes lumber, drywall, tile, packaging, and other large debris.
References: Ask for two recent renovation-cleaning references, not only routine housekeeping clients.
Inspection process: Look for photo documentation, a walkthrough, and a defined re-clean policy.
Reviews should mention the problems you have. Look for comments about drywall dust, window residue, cabinet interiors, floor protection, and missed vents. A company with excellent recurring-cleaning reviews may still lack the equipment or scheduling model for post-construction work.
Use Hand Vetted Co.'s screening advice as a reminder to verify identity, credentials, references, and background information before allowing a crew into your home.
Aquastar Cleaning Services, LLC provides post-construction cleaning in Kennesaw and North Atlanta, with insured and bonded teams, customizable scopes, and options for dust, debris, and fine surface residue. Its stated Kennesaw-area service model uses bundled rough, final, and touch-up tiers, green-seal certified products, photo-documented walkthroughs, and a satisfaction guarantee that provides a free re-clean within a set window. Treat that as a benchmark for the level of detail a good proposal should spell out, not as a reason to skip comparison shopping.
Schedule against the contractor's punch list. The cleaning crew should arrive after dusty trades finish, but before the property sits unused long enough for residue to settle into finishes and HVAC pathways.
Bringing It All Together
The decision rule is simple. Rough cleanup protects access and air quality during the build. Final cleanup prepares the property for inspection and punch-list review. Touch-up cleanup delivers the finished space for occupancy or handoff.
Don't default to the cheapest single visit. If the project involved drywall sanding, tile demolition, concrete cutting, or cabinet refinishing, fine particulate and chemical residue require more control than ordinary household dust. Bring in a specialist when the work affects vents, delicate finishes, occupied rooms, or anyone with respiratory concerns.
Before the crew arrives, document the condition with your contractor and confirm who handles debris, residue, windows, cabinets, fixtures, and floors. After cleaning, inspect high surfaces, vent grilles, window tracks, cabinet interiors, baseboards, and floors before releasing final payment. A construction cleanup service is successful when the property no longer feels like a job site and the family can use it without carrying the renovation into daily life.
If your remodel has left drywall dust, sawdust, paint residue, window film, or cabinet debris behind, visit Aquastar Cleaning Services, LLC to request a post-construction cleaning plan for your Kennesaw or North Atlanta home. Ask for a room-by-room scope covering the appropriate rough, final, or touch-up stage, and schedule the crew after your contractor completes the dusty work.
You wipe the same splatter from the backsplash for the third time, yet the kitchen still smells faintly sour near the trash bin. The counters look presentable, but the oven door is cloudy, the grout beside the stove has darkened, and nobody can remember the last time the range hood filter came out.
That's the point where routine housekeeping stops being enough. A kitchen deep cleaning service should do more than create a temporary shine. It should remove built-up grease, reach neglected surfaces, lower contamination on food-contact and high-touch areas, and leave you with a realistic plan for keeping the kitchen under control afterward.
What a Kitchen Deep Cleaning Service Really Delivers
A quick wipe-down treats what you can see. A professional reset deals with the layers underneath, including baked-on grease, mineral scale, food residue, and contamination in damp or frequently touched areas.
A proper scope may include:
Range hood degreasing: Crews remove and clean accessible baffles, the hood exterior, and surrounding surfaces where grease settles.
Appliance interiors: The microwave, oven, refrigerator seals, shelves, and other agreed interior areas receive detailed attention.
Sink and faucet restoration: Descaling removes mineral deposits, while scrubbing targets the basin, drain area, overflow, and faucet joints.
Cabinet and touchpoint cleaning: Handles, switch plates, pull-outs, and cabinet fronts are washed and disinfected according to the material.
Floor and grout work: Tile grout receives mechanical agitation rather than a quick mop that spreads dirty water across the surface.
Waste-area sanitation: Trash pull-outs, recycling bins, and the floor behind or beneath them are cleaned instead of masked with fragrance.
The hidden areas matter because ordinary kitchens can carry substantial microbial loads even when they look normal. In one multi-household study, 67.0% of food-preparation surfaces, 87.0% of kitchen sink surfaces, and 87.5% of tap knobs showed E. coli contamination. The same research measured total aerobic bacterial counts of 3.3 log CFU/cm² on food-preparation surfaces, 3.7 log CFU/cm² on sink surfaces, and 5.1 log CFU/cm² on tap knobs (multi-household kitchen contamination study).
The places routine wiping misses
Drip pans, sink overflows, refrigerator gaskets, dishwasher door folds, sponge holders, and the underside of cabinet edges rarely receive enough attention during a normal visit. These locations collect moisture and residue, which gives grime a place to remain after the visible surface has been wiped.
Older domestic-kitchen research reached a similar practical conclusion. In a study of 46 kitchens, sink-area surfaces and cleaning cloths had the highest bacterial counts, and rinsing after detergent cleaning was considered critical for removing bacteria (domestic kitchen contamination research).
Practical rule: Ask for a written scope that names neglected areas, not just “full kitchen cleaning.” A polished countertop doesn't prove that the sink overflow, hood filter, or refrigerator gasket was addressed.
A realistic service also sets expectations about access, condition, and time. A heavily greasy kitchen with a crowded layout takes more work than a lightly used open kitchen. The crew size and session length should be confirmed before booking, rather than guessed from a generic online price.
For a clear example of the kind of room-by-room work a local provider may include, review Aquastar's kitchen cleaning services. The useful question isn't whether the kitchen will look better. It's whether the service resets the surfaces that affect food handling, touch contamination, odor, and everyday maintenance.
Routine Cleaning vs a True Kitchen Deep Cleaning Service
Routine cleaning protects the kitchen's day-to-day appearance. Deep cleaning changes the condition of surfaces that routine visits usually leave alone.
Task
Routine Cleaning
Kitchen Deep Cleaning Service
Counters and backsplash
Wipe visible crumbs and splashes
Degrease, scrub seams, and detail edges
Stovetop
Surface wipe-down
Remove grates or accessible parts, treat cooked-on residue
Oven
Exterior wipe
Clean the interior and loosen carbonized spills
Range hood
Exterior dusting or wipe
Degrease accessible filters, housing, and surrounding wall
Sink
Rinse and wipe
Descale basin, faucet, overflow, drain area, and disposal zone
Floors
Vacuum or mop
Edge detail, grease treatment, and thorough mopping
Cabinets
Spot-clean obvious marks
Wash fronts, handles, lower edges, and selected interiors
Waste bins
Empty
Wash and sanitize bins, pull-outs, and surrounding floor
Appliances
Exterior wipe
Clean agreed interior areas, gaskets, trays, and dispenser surfaces
Consider a family of four cooking dinner every night. A routine visit may remove loose crumbs and fresh splashes, but repeated frying and boiling leave a thin film on the hood, cabinet fronts, backsplash, and nearby floor. Each layer makes the next one harder to dissolve, particularly where heat has partially baked the grease onto metal or tile.
A true reset may involve pulling the stove out to clean behind it, brushing grout, descaling the faucet aerator, washing the microwave interior, emptying the toaster crumb tray, sanitizing trash and recycling bins, wiping baseboards and switch plates, and disinfecting the refrigerator water dispenser. Those tasks aren't decorative extras when food residue and frequent hand contact are involved. They're the difference between maintaining a clean kitchen and trying to recover one.
Which service fits your situation
Choose routine maintenance when the kitchen is already under control and the issue is daily dust, crumbs, fingerprints, and fresh spills. Choose a one-time deep clean when buildup has become visible, odors remain after ordinary cleaning, or neglected zones are affecting how the room feels and functions.
Many households need both. A deep clean establishes the baseline, while recurring visits prevent grease and residue from returning to the same level. A quarterly reset can make sense for a busy cooking household, but the right cadence depends on traffic, cooking habits, pets, and climate.
A useful checklist for discussing that first reset is this deep cleaning checklist. Use it to mark priority areas before requesting a quote, so the estimate reflects actual work rather than a vague promise to “clean everything.”
Step-by-Step Process Professional Crews Follow
Order matters because cleaning from the bottom upward creates rework. Loose dust falls, dirty water splashes, and degreaser needs time to work before a technician wipes it away.
A typical example is a three-hour kitchen deep clean handled by a two-person crew in a Kennesaw ranch home. The exact timing changes with condition and access, but the sequence stays consistent.
Start dry, then work downward
The crew begins with dry removal. They sweep ceiling corners, dust light fixtures, remove cobwebs, and collect loose debris before applying wet products. This prevents dry crumbs and dust from turning into muddy residue on freshly cleaned surfaces.
Next come the upper areas, including cabinet fronts, the hood exterior, the top of the refrigerator, and the microwave interior. A microwave may be cleaned before countertops because loosened crumbs and splashes can fall during the process.
The team then handles appliances. They clean the oven interior, treat the range top and drip pans, pull the stove forward when the floor and layout allow it, and wipe the refrigerator exterior and gasket. Crews should use materials suited to the appliance finish, rather than aggressive scrubbing that damages enamel, stainless steel, or rubber seals.
The sink comes later because it becomes a collection point for runoff and debris. Technicians descale the faucet, scrub the basin and overflow, and refresh the disposal area where appropriate. Counters and backsplash follow, including grout brushing between the stove and preparation area.
Control dwell time and cross-contamination
Degreasers work better when they remain wet for the product's recommended dwell time. Spraying and immediately wiping often removes the loose surface film but leaves the bonded layer behind. Mechanical agitation from a suitable brush or pad completes the job.
Trash bins are cleaned outside-in, with attention to lids, handles, rims, pull-outs, and the floor below. Floors come last, first vacuumed and edge-detailed, then mopped with an appropriate degreasing solution.
Food-contact surfaces require a defined sequence: pre-cleaning, washing, rinsing, sanitizing, and air-drying. Detergent residue can reduce chlorine sanitizer effectiveness, and one extension guideline specifies bleach sanitizers at 50 to 100 ppm for food-contact surfaces, with label-specified contact time before wiping or air-drying (food-contact sanitizing guidance).
Industry guidance also emphasizes cleaning, rinsing, disinfecting according to label directions, and sanitizing food-contact surfaces before reuse. Some foodservice sanitizers require roughly 30 seconds to 1 minute of wet contact time, so a crew that wipes every surface instantly may be moving too quickly (food hygiene cleaning standards).
Real Examples from a Busy Family Kitchen
The most revealing results often appear in four areas that receive plenty of daily use but little detailed attention. Each one can look merely “a bit dirty” until the crew works on it.
The oven usually starts with dark carbonized spills on the floor and walls. If smoke begins carrying residue into the room or adjacent cabinetry, the problem has moved beyond appearance. The crew removes racks where possible, applies a product compatible with the oven's finish, allows it to dwell, and uses non-damaging agitation to lift baked-on material.
Afterward, the oven may not look factory-new if the enamel is permanently stained, but loose carbon and greasy residue should be gone. That distinction matters. A responsible cleaner won't promise to reverse heat damage that cleaning cannot remove.
Four zones worth inspecting
The range hood filter often carries a sticky film that homeowners don't notice because it sits above eye level. A crew removes accessible filters, treats them with a suitable degreaser, rinses them thoroughly, and cleans the hood housing and nearby backsplash. The visible change is less tackiness on surrounding surfaces, and the practical benefit is less grease being redistributed during cooking.
The trash area can have a narrow drip line beneath the bin, a sticky pull-out floor, and odor around the base. Ordinary spray-and-wipe cleaning may freshen the surface without removing the residue in seams and corners. Technicians wash the bin, lid, rim, handles, pull-out frame, and floor, then dry the area before replacing the container.
Tile grout between the stove and prep counter is another common trouble spot. Food splashes darken porous joints, while mopping can smear residue rather than lift it. A grout brush, controlled product application, rinsing, and drying produce a more meaningful reset than another pass with a damp mop.
Stovetop controls and cabinet handles show how frequent touch creates a separate cleaning need. Grease transfers from hands to knobs and pulls, then attracts dust. The crew details the seams around controls, washes cabinet fronts, and sanitizes touchpoints with a product appropriate for the surface.
The best before-and-after result isn't always the brightest shine. It's the removal of residue from the places hands, food, moisture, and heat meet.
Ask the crew to point out permanent staining, damaged grout, cracked seals, or corroded metal. Deep cleaning can restore hygiene and appearance, but it can't repair a failed gasket or replace a surface that has deteriorated.
Pricing Factors and Sample Estimates
A kitchen deep cleaning quote changes with the work required, not the room's name. Square footage matters, but layout complexity, appliance access, grease level, clutter, the last professional clean, and selected interior add-ons often matter more.
For a North Atlanta kitchen measuring 180 to 220 square feet, a written estimate should separate labor, the base scope, and optional appliance work. Because providers use different pricing models, there isn't one honest universal price range to publish without a specific company, condition report, and scope.
What should move the estimate
A flat-rate provider may price by kitchen size and condition. An hourly provider may apply a minimum visit, while a tiered package may include selected appliances and charge separately for others. All three models can work if the quote states what the customer receives.
Scope Item
What's Included
Typical Price Range
Base kitchen scope
Surfaces, cabinet fronts, sink, backsplash, floors, touchpoints, and agreed accessible areas
Provider-specific written quote
Oven interior
Rack removal where possible, interior degreasing, residue removal, and wipe-down
Provider-specific add-on
Refrigerator interior
Shelves, drawers, gasket, interior walls, and dispenser area where accessible
Provider-specific add-on
Dishwasher interior
Door edges, gasket, accessible filter area, and interior wipe-down
Provider-specific add-on
Heavy grease
Extra dwell time, agitation, rinsing, and repeated passes
Condition-based surcharge
Post-renovation residue
Fine dust, adhesive, grout haze, or construction-related residue
Condition-based surcharge
The phrase “typical price range” in a quote should mean something concrete. If a company can't explain whether oven interiors, hood filters, grout, and trash pull-outs are included, compare the scope before comparing the total.
Red flags in a low estimate
An unusually low hourly rate may reflect a shorter visit, fewer technicians, no appliance interiors, or a basic wipe-down presented as deep cleaning. Ask whether degreasing products receive proper dwell time, whether food-contact surfaces are rinsed before sanitizing, and whether the crew brings separate tools for bathrooms and kitchens.
You can also use this cleaning service cost guide as a framework for the questions to ask, not as a substitute for a property-specific quote. The strongest estimate identifies exclusions, access limits, heavy-condition fees, and the process for approving extra work before it begins.
Eco-Friendly Products and When Stronger Agents Are Still Needed
Green cleaning works when the product matches the soil and the technician uses enough dwell time and mechanical action. It fails when “eco-friendly” becomes a label used to justify a quick spray and wipe.
For a household with children, pets, or allergy-sensitive residents, a crew might choose a hydrogen peroxide-based degreaser instead of a caustic lye solution. Citric acid can replace a hydrochloric acid spray for many mineral-scale problems, and microfiber systems can reduce the total chemical volume by improving soil pickup.
These swaps can help protect food-preparation surfaces, reduce harsh fumes, and limit unnecessary chemical discharge. They don't remove the need to rinse surfaces properly, follow product directions, ventilate the area, or keep wet products away from children and animals.
Match the agent to the problem
A mild product may handle fresh grease but struggle with carbonized oven residue. Mineral scale may respond to citric acid, while a heavily neglected surface may require a stronger alkaline formulation and longer controlled dwell time.
The honest limits matter:
Cutting boards: Use an appropriate food-contact sanitizer, such as an NSF-rated product, when the material and label call for it.
Severe oven carbon: Mineral spirits or an alkaline oven cleaner may be considered for extreme buildup, but only with careful compatibility, ventilation, and label compliance.
Porous grout with mold: Chlorine-based remediation may be necessary when green methods can't fully restore the porous material.
Food-contact surfaces need the correct sequence after any cleaner. Wash away soil, rinse detergent residue, apply sanitizer according to the label, and allow the required contact time before drying or reuse. A “natural” product isn't automatically a sanitizer, and a strong disinfectant isn't automatically suitable for every food-contact surface.
Homeowners who want more practical guidance on protecting cabinetry and choosing cleaning methods can browse The Cabinet Coach tag page. When interviewing a crew, ask which product categories they bring, where they use stronger agents, and how they prevent chemical residue from remaining on preparation surfaces.
Aquastar Cleaning Services, LLC offers household cleaning with biodegradable solutions available when requested, along with customizable plans and appliance add-ons. Its non-toxic house cleaning service information can help families prepare specific product questions before booking.
How to Prepare Your Kitchen Before the Crew Arrives
Use the night before the appointment to remove obstacles, not to deep-clean the room yourself. Clear countertops of small appliances, paperwork, school bags, and loose items so technicians can work continuously across the surface.
Empty the dishwasher. That gives the crew somewhere to place cleaned items and allows a full cycle if the service includes it. Pull the trash and recycling bins to the curb or another approved location, which removes odor and gives technicians access to the floor and bin area.
A simple preparation list
Leave priority items out: Keep only the objects you want cleaned inside the oven, refrigerator, microwave, or cabinets.
Write the priorities down: Tape a note to the refrigerator naming the zones that matter most, such as the oven, grout, or baseboards.
Clear upper storage: Move items from the top of the refrigerator and range hood to the dining table.
Open access: Open side gates and pet areas if the crew needs to move equipment through them.
Secure pets: Place animals in a quiet bedroom or another safe area during the visit.
Reduce interruptions: Silence smart speakers if you work from home and need a quieter appointment.
Ask whether the team needs the oven and refrigerator empty, whether the stove can be moved safely, and which items count as add-ons. Those answers prevent lost time and help the crew spend the appointment on the work you value.
Booking, Service Area, and What to Expect After
Book online or by phone with enough notice for your preferred date. During slower seasons, a 48-hour notice window may be workable, while peak periods can require three to five business days for a two-person crew, depending on local availability.
A typical local service area may cover a 25-mile radius around Kennesaw, including Marietta, Acworth, Woodstock, and parts of Smyrna. Homes outside that zone may receive a small travel surcharge, so confirm the service boundary before accepting the estimate.
The appointment experience
Expect a confirmation text on the morning of service, an arrival window, and photo identification for the technicians. A digital walkthrough before and after the job gives both sides a record of priority zones, access limitations, and the finished condition.
A provider may also offer a 48-hour satisfaction guarantee, allowing the crew to return and reclean a zone that doesn't meet the agreed standard. Read the terms carefully, especially exclusions for permanent stains, damaged materials, inaccessible areas, and tasks outside the written scope.
The deep clean should start a maintenance cadence, not end the conversation. Schedule routine visits every four to eight weeks according to household traffic, then set a calendar reminder for the next quarterly deep clean when that interval fits your cooking habits and buildup pattern. Research on kitchen surfaces also shows why timing matters: in a 2025 year-long field study across eight Chinese cities, some bacteria remained below safe thresholds for 15 to 30 hours after disinfection in winter, while that window narrowed to 3 to 6 hours in summer (kitchen-surface persistence research). A deep clean resets conditions, but cooking, touch, moisture, and temperature begin changing them again.
When you request a quote, send photos of the oven, hood, sink, grout, and refrigerator interior. Ask for the written scope, appliance add-ons, product approach, arrival process, and follow-up policy before you book.
Aquastar Cleaning Services, LLC provides recurring housekeeping, one-time kitchen deep cleaning, interior appliance add-ons, and customizable cleaning plans for Kennesaw and North Atlanta homes. Visit Aquastar Cleaning Services, LLC to request a quote and set up a kitchen reset followed by maintenance that fits your household.