


You've just mopped the kitchen, but the floor looks duller than it did before. There's a sticky feel under your socks, cloudy patches around the table, and a dark mark near the entryway that seems to resist every pass. Reaching for more cleaner usually makes the problem worse.
Cleaning linoleum floors works best when you identify the surface and the type of soil first. True linoleum, coated linoleum, and vinyl may look similar, but they don't tolerate the same chemistry, moisture, or scrubbing. The safest routine removes grit dry, uses a properly diluted neutral detergent, controls water, and dries the floor promptly.
What Linoleum Actually Is and Why It Matters
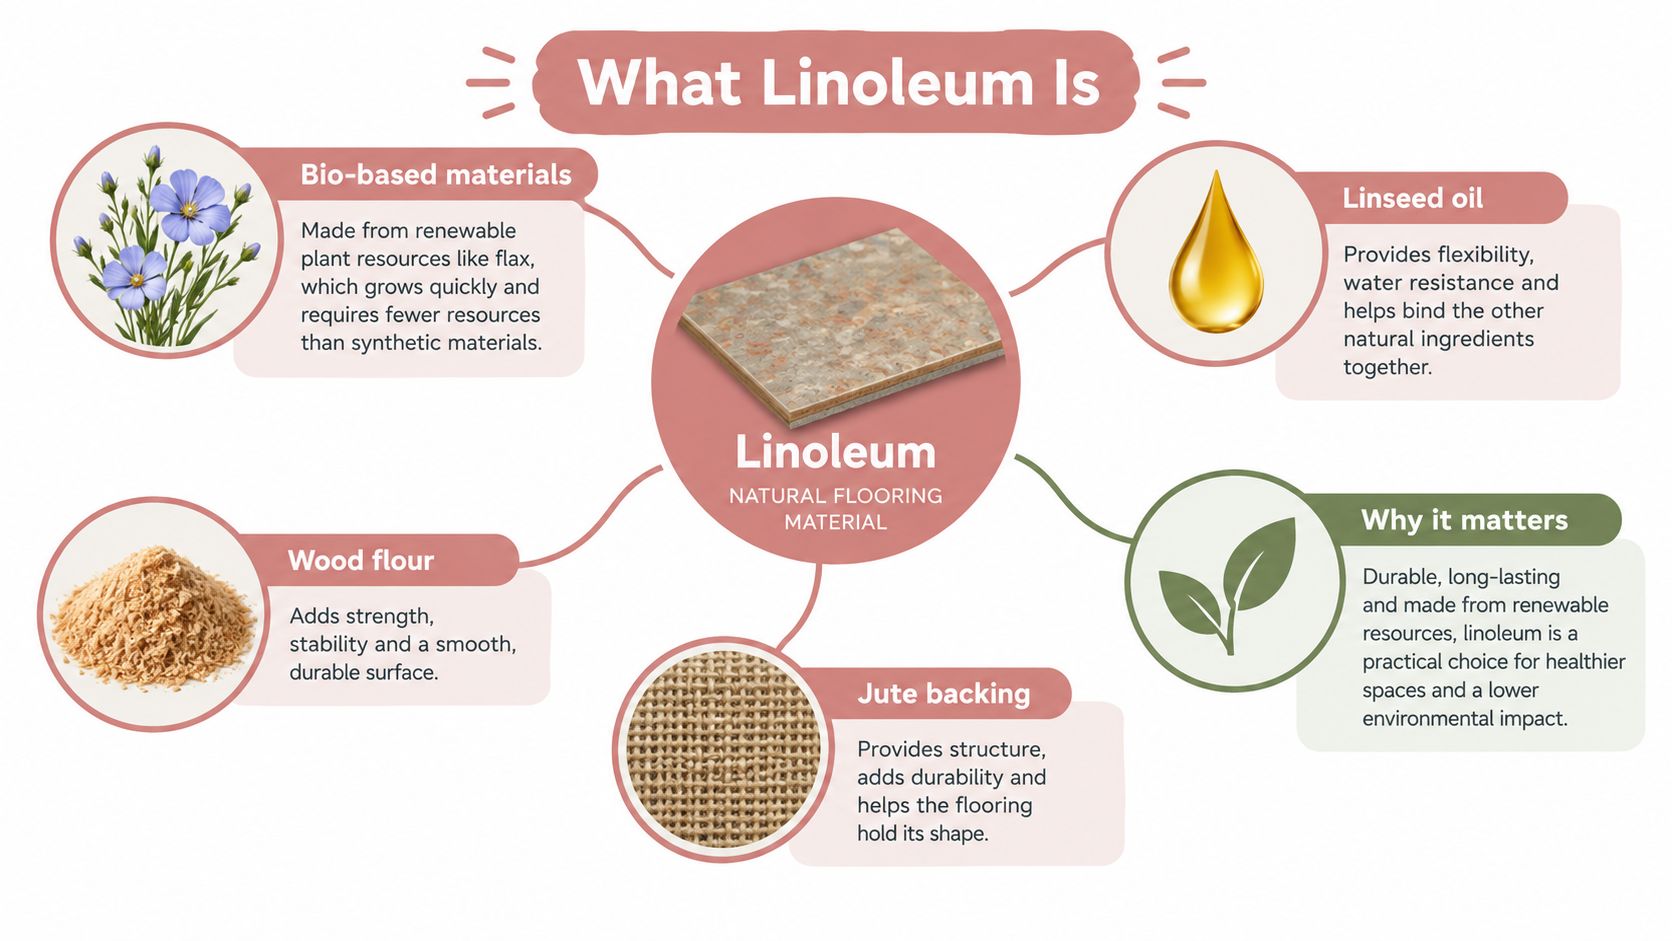
Linoleum isn't modern plastic flooring. Frederick Walton patented it in England in 1863 and began manufacturing it in the United States several years later. Its traditional formulation combines oxidized linseed oil with cork or wood flour, pigments, and organic resins, then presses the mixture onto a jute backing. That basic approach has remained broadly consistent for more than 160 years, as described in the NIST linoleum flooring formulation.
A NIST-listed formulation contains approximately 20% linseed oil, 20% limestone, 31% wood flour, 13% tall oil, 3% pine rosin, 8% jute backing, 4% pigment, and 1% acrylic lacquer by mass. The same reference lists a 2.5-millimeter-thick square meter at about 2.9 kilograms. Those materials explain why a resilient linoleum surface needs a gentler approach than ceramic tile.
Identify the surface before choosing a cleaner
Start with the flooring paperwork, a leftover box, or the manufacturer's care sheet if you have one. True linoleum often has a consistent pattern through the material, while vinyl commonly has a printed design layer over a separate backing and wear layer. A cut edge, if safely visible under a threshold, may also reveal the construction.
Coated linoleum has an added finish that changes how it responds to polish, stripping, and abrasion. Older or uncoated flooring may show wear more directly. If you can't confirm the material, treat it conservatively and test any product in an inconspicuous area.
Practical rule: If the floor changes color, becomes tacky, or loses its sheen during a test, stop. More scrubbing won't undo an incompatible chemical reaction.
The composition also explains the main risks. Excessive water can affect seams and backing, while harsh alkalis, abrasive powders, aggressive brushes, and strong solvents can discolor, crack, shrink, cloud, or soften the surface. If you're dealing with vinyl plank, use a surface-specific method such as this guide to cleaning vinyl plank flooring, rather than assuming the same care rules apply.
The Daily Routine That Keeps Linoleum Looking New
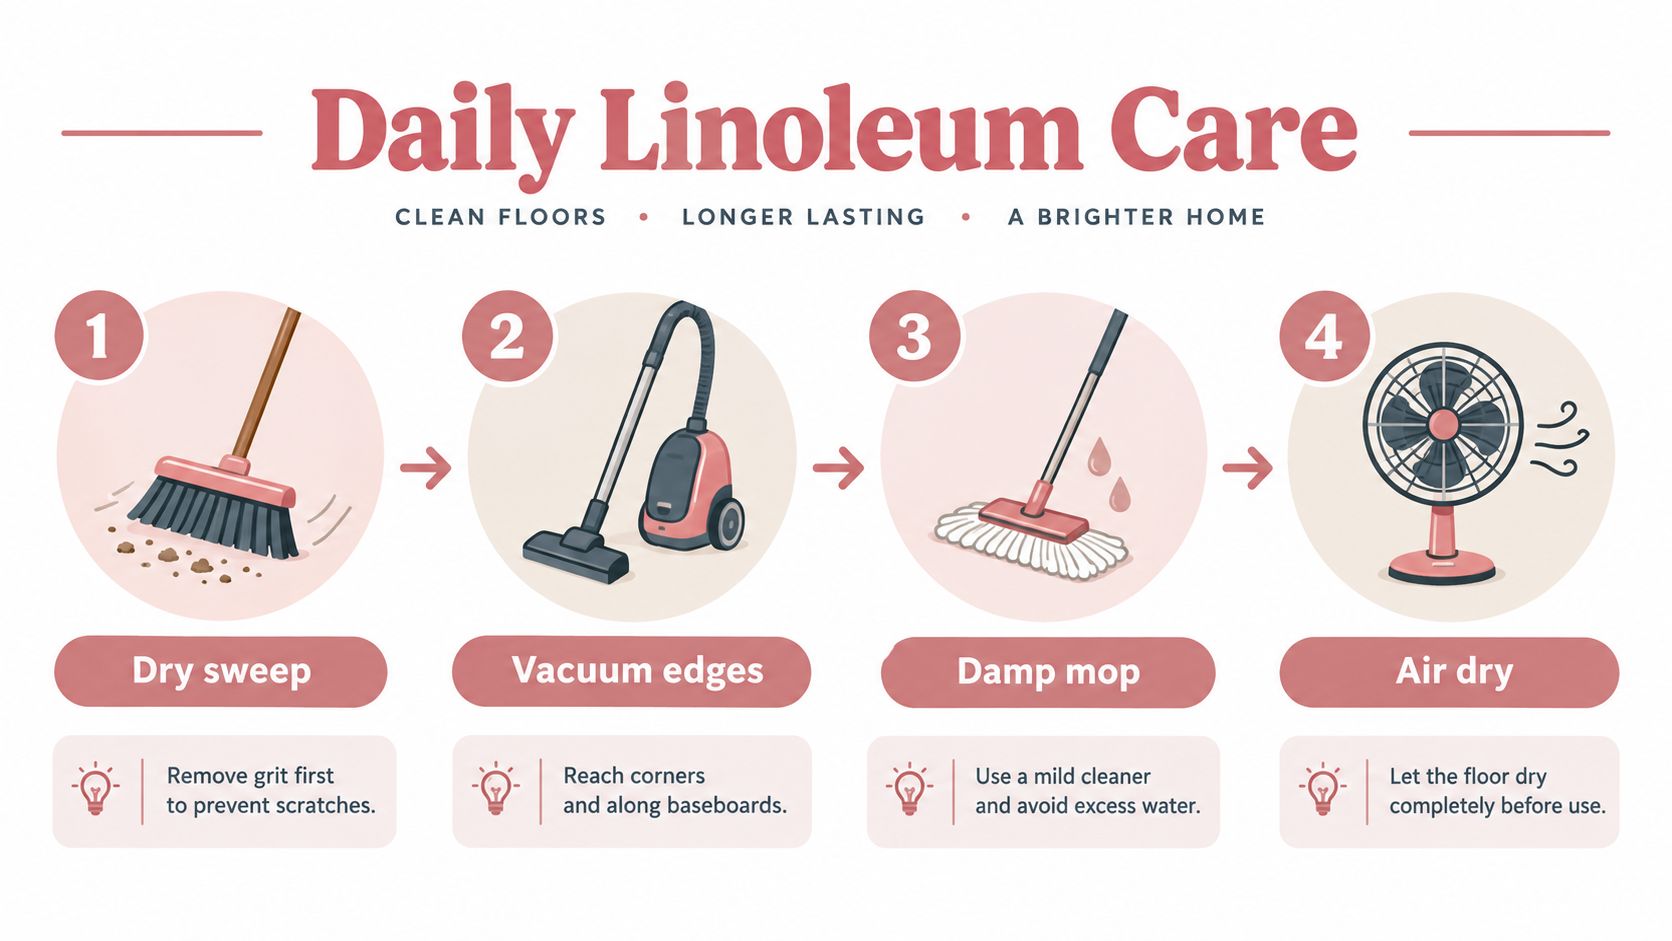
The routine is simple, but the order matters. Remove abrasive grit before introducing moisture. Sand, crumbs, and tracked soil can work like fine abrasive under foot traffic, gradually dulling the finish.
A repeatable sequence
Vacuum or sweep first. Use a hard-floor vacuum setting or a soft brush attachment. Work along entry thresholds, cabinet edges, and under the table where grit collects.
Prepare a neutral detergent. Use a manufacturer-approved, pH-neutral floor cleaner at the dilution printed on its label. Don't guess by pouring a generous amount into the bucket. Too much detergent leaves a film that feels sticky and attracts more soil.
Mop with controlled moisture. A well-wrung nylon, rayon, microfiber, or similar floor mop should leave the surface damp, not wet. Apply solution to the mop or cloth rather than flooding the floor.
Work in small areas. Clean one manageable section, then move dirty solution off the surface. A damp mop can lift soil without leaving standing water around seams or edges.
Dry promptly. Use ventilation, an exhaust fan, or clean towels where moisture lingers. The EPA says wet-process materials should be thoroughly dried, and material that isn't dry within 24 hours may need to be discarded. That 24-hour threshold is a damage-control limit, not a target drying time. The practical aim is to remove visible moisture quickly. See this broader home cleaning checklist for a way to organize recurring tasks.
For a Tuesday-night kitchen and entryway, a family with two dogs might vacuum the sand near the door, wipe paw prints with a damp cloth, damp-mop the traffic lane, and dry the threshold before putting the mop away. That targeted routine is more useful than repeatedly soaking the entire room.
When machine cleaning makes sense
For larger areas, a low-speed auto-scrubber operated at approximately 175 to 350 rpm with a red, nonabrasive pad is an established specification in manufacturer guidance. Use enough solution to clean the floor, not enough to leave puddles, and recover the dirty liquid immediately.
A red pad is appropriate for gentle mechanical soil removal on a compatible surface. It isn't a license to attack worn flooring, exposed backing, or a finish that is already failing. On a small residential kitchen, a well-wrung mop is usually easier to control.
Why Vinegar, Bleach, and Hot Water Often Make It Worse
Vinegar sounds mild because it is familiar, but familiar doesn't mean suitable for every floor finish. Bleach, concentrated degreasers, abrasive powders, solvent products, and very hot water can each create a different problem. High-pH cleaners and strippers may cause discoloration, cracking, or shrinking, while abrasive pads and brushes can wear the covering.
| Remedy | Expected Result | Real Result on Linoleum | Safer Alternative |
|---|---|---|---|
| Vinegar solution | Cut grease and restore shine | Acidity may affect the finish, especially with repeated use or an unknown coating | Use a manufacturer-approved pH-neutral detergent |
| Bleach | Disinfect and brighten | Can discolor the surface and creates dangerous fumes when mixed with other products | Use a product labeled for the floor and task |
| All-purpose cleaner | Handle every type of soil | May leave residue or contain chemistry unsuitable for resilient flooring | Check the label and test a diluted neutral product |
| Baking soda or abrasive powder | Scrub away marks | Fine particles can scratch or dull the finish | Use a soft cloth and controlled detergent |
| Plenty of hot water | Loosen grime quickly | Water can enter seams, contribute to swelling, mildew, mold, rot, or subfloor damage | Use a damp mop and dry promptly |
| Solvent-based remover | Dissolve adhesive or grease | May cloud or soften the finish | Test first and ask the flooring manufacturer about residue removal |
Manufacturers also warn against leaving water on the surface or creating a film. The damage chain often starts innocently: someone mops heavily, moisture remains beside a cabinet, and repeated wet cleaning affects a seam or edge. If a cleaner says “all-purpose” or “degreaser” but doesn't identify resilient floors as a suitable use, don't make it your default.
The EPA recommends applying products to a cloth or sponge instead of spraying them into the air, increasing outdoor-air ventilation, and using kitchen or bathroom fans that vent outdoors. Never mix products unless the label directs it, and never combine chlorine bleach with ammonia. For a useful review of common habits to avoid, read mistakes every Australian cleaner should know.
The safest decision rule is straightforward: don't choose a product because it is stronger. Choose it because the label supports the flooring, the dilution is measurable, and you can remove the residue. If you're considering a homemade formula, compare the risks with this discussion of a vinegar cleaning recipe before putting it on the floor.
Removing Scuffs, Stains, and Sticky Spots Without Damaging the Finish
A mark tells you something about its source. Black rubber near a front door needs different treatment from dried food, and adhesive residue behaves differently again. Start with the least aggressive method, test out of sight, and stop as soon as the surface changes.
A hallway scuff
A hallway full of black heel marks near the front door usually has transfer sitting on the surface, not a deep stain. Put a small amount of diluted neutral detergent on a soft microfiber cloth and rub lightly in short strokes. Wipe with a clean damp cloth, then dry the spot.
If the mark remains, use a soft melamine sponge flat against the floor with very light pressure. Don't use the corner as a scraping tool. Melamine can remove soil, but it can also alter a coating when pressed aggressively. Test beside a baseboard first and stop if the sheen changes.
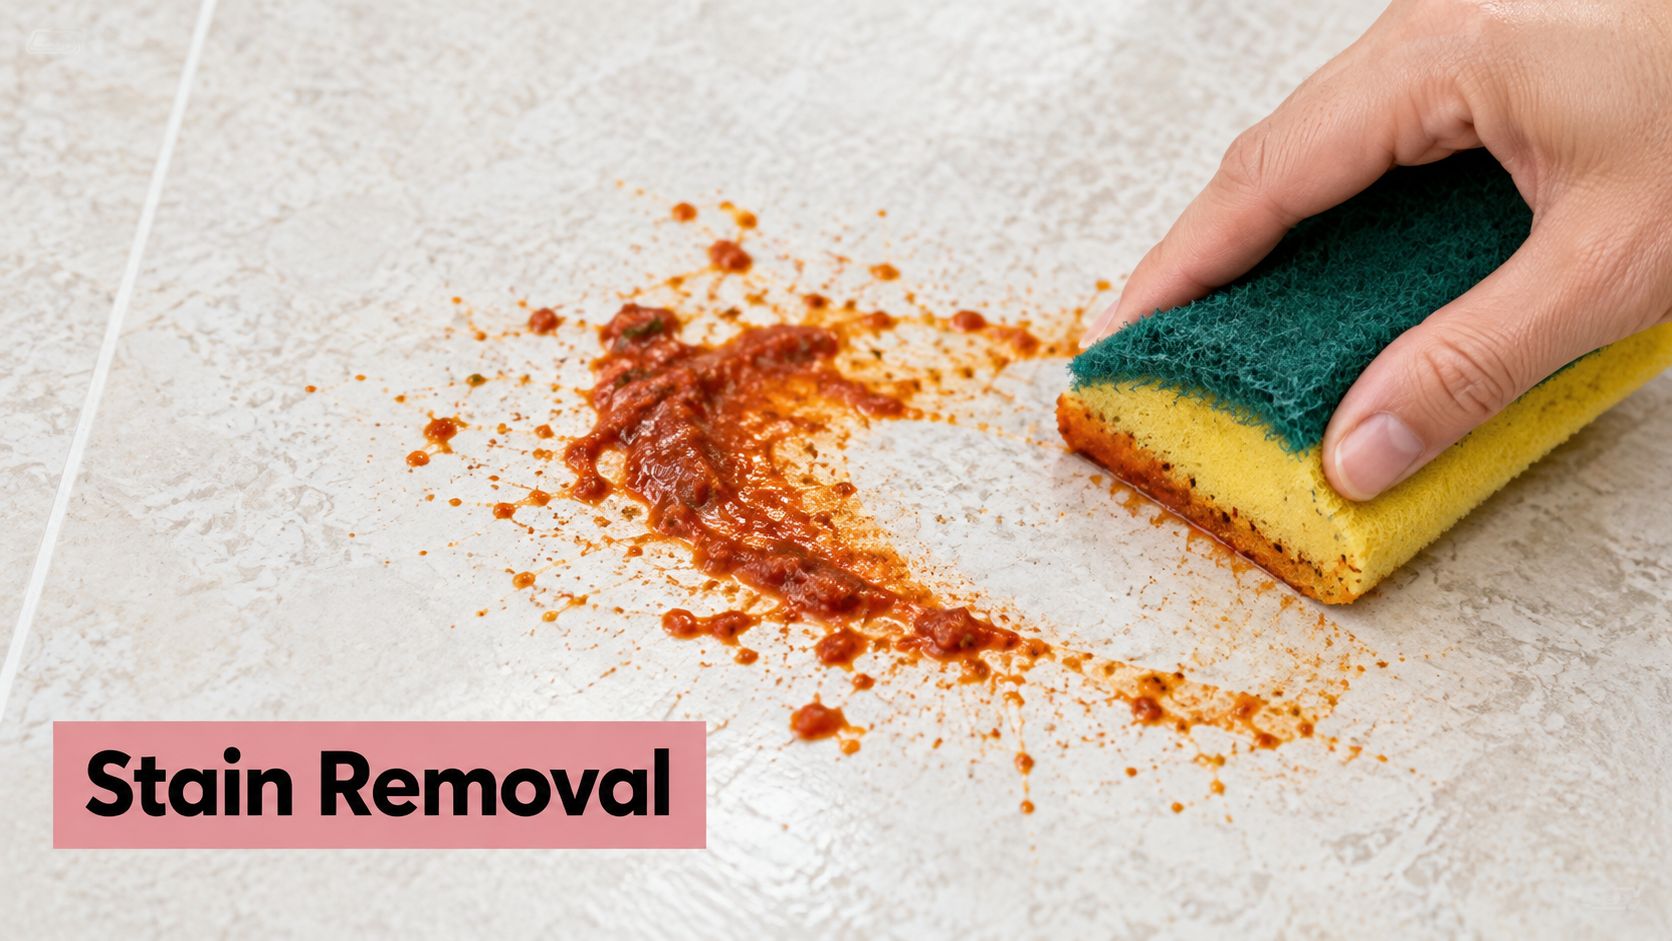
A dried tomato-sauce splatter
Two-day-old tomato sauce is mostly a dried food residue. Lay a damp cloth over the splatter briefly to soften it, then lift the residue with the cloth or a soft sponge. A short dwell time helps the moisture work on the food without turning the floor into a wet work area.
Avoid grinding the stain into the surface with a stiff brush. If a faint color remains after the residue is gone, repeat the gentle process rather than escalating immediately to bleach or a solvent. The floor's finish matters more than removing every trace in one pass.
For tape or label adhesive, begin with a dry microfiber cloth and gentle lifting. Don't reach for acetone, paint thinner, or another solvent unless the flooring manufacturer specifically approves it. Apply any approved product to the cloth, never across the floor, and test where a change won't be visible.
Use this quick flow when a spot resists cleaning:
- Identify the residue: Food, rubber, grease, adhesive, and embedded grit need different tactics.
- Start dry or barely damp: Remove what lifts without adding chemistry.
- Use neutral detergent: Keep the solution diluted and the cloth controlled.
- Increase contact time, not force: Let a damp cloth soften residue briefly.
- Stop at finish change: A lighter patch or new haze means the method is damaging the surface.
A Periodic Deep Clean Without the Harsh Chemicals
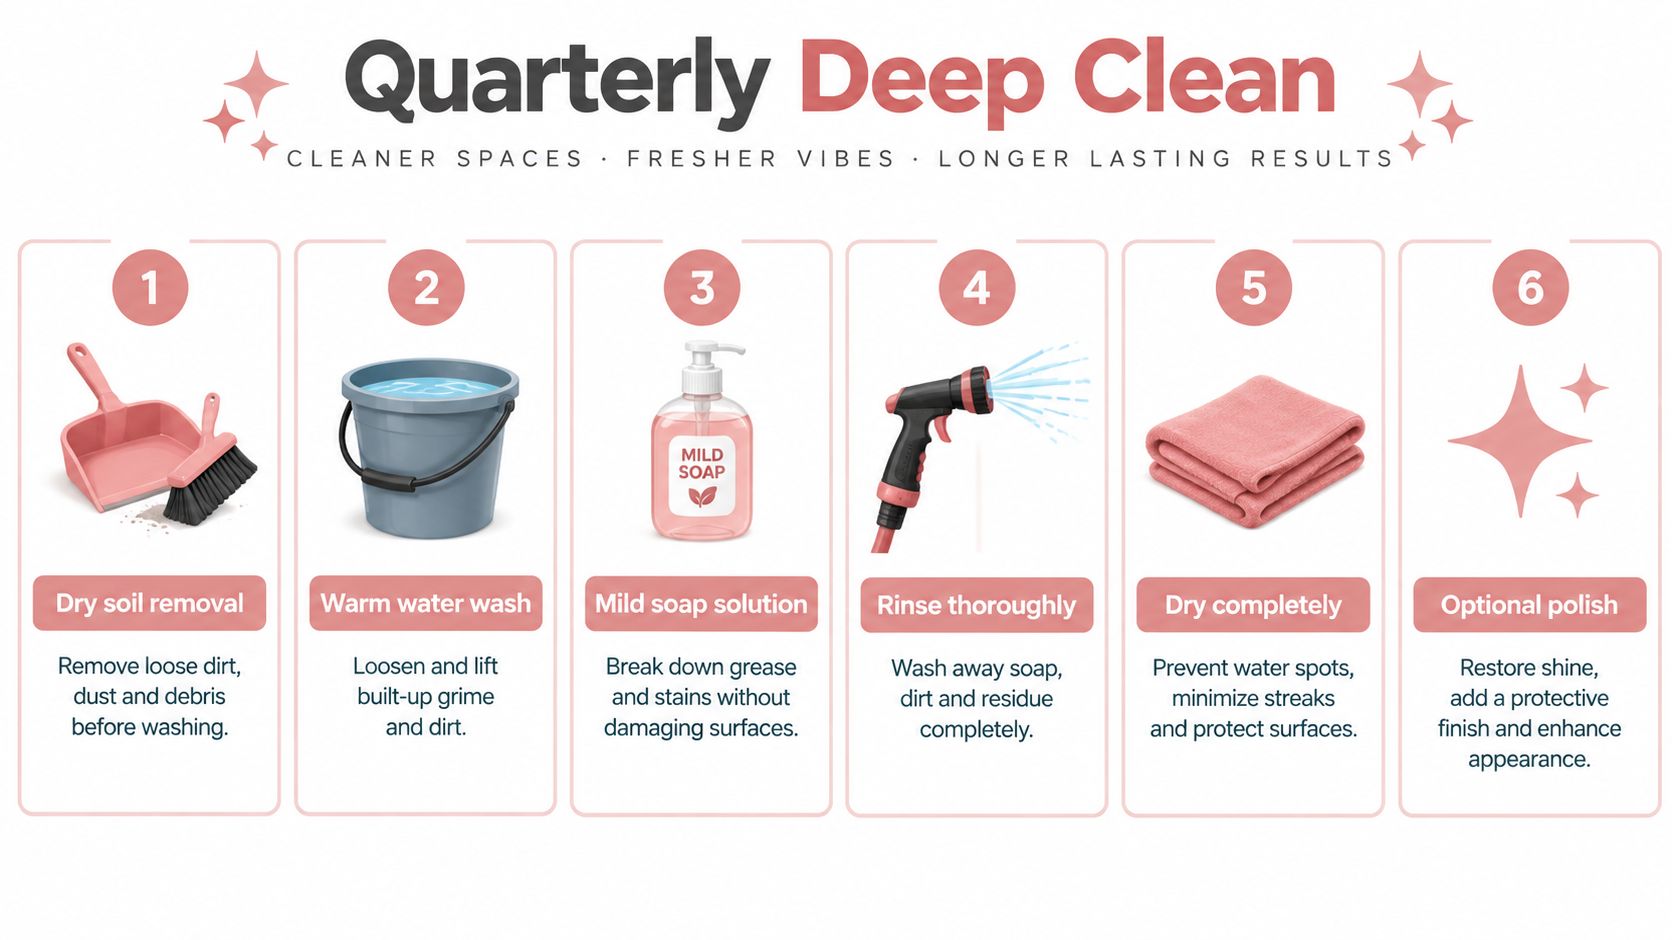
A deep clean should reset accumulated soil, not rescue a floor from an aggressive daily routine. Start with the manufacturer's care sheet, especially if the surface is coated or an old polish is present.
The controlled process
- Remove loose grit by vacuuming or sweeping.
- Apply a manufacturer-recommended neutral or slightly alkaline cleaner at its stated dilution.
- Allow a short dwell time measured in minutes, never hours.
- Agitate gently with a soft tool or a low-speed machine and red nonabrasive pad on a compatible large area.
- Recover the dirty solution immediately with a wet vacuum or well-controlled mop.
- Rinse only as needed with clean water, then dry the surface completely.
A coated linoleum floor in a busy family kitchen may need a compatible cleaner that protects the coating and removes greasy traffic film without stripping it. An older rental floor with little or no coating needs an even more conservative approach, because mechanical action can expose worn material quickly. In both cases, test a small area before treating the whole room.
A flooring-specific stripper belongs only in a genuine finish-removal situation, such as an incompatible acrylic polish that must be removed and replaced. It isn't a general-purpose deep cleaner. If the floor is uncoated, damaged, or uncertain, stripping can remove more than the polish and leave the covering discolored or vulnerable.
For gentler product-selection ideas, compare ingredients and residue concerns in this guide to an eco-friendly floor cleaner. The right deep clean leaves the floor clean and dry. It shouldn't leave a strong smell, a tacky film, or a visibly thinner finish.
Troubleshooting Dull, Sticky, or Cloudy Floors After Cleaning
A floor that looks worse after mopping needs diagnosis, not more product. The appearance usually points toward residue, incompatible chemistry, embedded soil, finish wear, or moisture intrusion.
Dull finish
Cleaner residue is a common cause, especially when someone adds extra detergent. Embedded grit can also make the surface look flat when routine mopping only moves moisture across it. Remove loose soil, perform a controlled clean with the correct dilution, and use a clean-water pass if the product instructions call for rinsing. Dry completely.
Sticky surface
Stickiness usually means too much detergent or incomplete removal. A concentrated solution can leave a film that grabs dust and feels gummy underfoot. Stop adding cleaner, use a well-wrung mop with clean water as appropriate for the product, and change the rinse water before it becomes dirty.
Cloudy patches
Cloudiness can follow incompatible products, an unsuitable polish, or chemical damage. Don't cover it with another polish. Check the care sheet, test a small area, and determine whether the haze lifts as residue or remains as a permanent finish change.
Swollen seams or lifting edges
Edges that lift, seams that swell, or damp areas along the perimeter point to chronic over-wetting or moisture entering from below. Correct the mop technique first, dry the area, and investigate leaks or moisture under appliances. Repeated saturation can affect the backing and subfloor, so this is a repair concern rather than a routine cleaning problem.
Use this decision tree next time the floor looks wrong:
- Does the surface feel sticky? Suspect detergent film.
- Does the haze lift with controlled residue removal? It may be cleaner or polish buildup.
- Is the change permanent after a test? Suspect chemical or finish damage.
- Are seams or edges changing shape? Address moisture intrusion.
- Is grit still visible after mopping? Return to dry soil removal before using more liquid.
An Eco-Friendly Routine You Can Actually Keep Up
A sustainable routine doesn't require a complicated cabinet of products. It requires less water, fewer unnecessary chemicals, reusable cloths, and a schedule that matches the household.
Sweep or vacuum tracked grit frequently, spot-clean spills and paw marks promptly, and damp-mop only when the floor needs it. Use a biodegradable, plant-based cleaner only when its label supports linoleum and its dilution is clear. Families with children or pets can keep the process manageable by assigning dry soil removal to regular housekeeping and reserving a deeper reset for visibly embedded soil.
Ventilation matters even with gentler products. The EPA recommends opening windows and doors when conditions permit, using exhaust fans that vent outdoors, avoiding aerosolizing cleaners, and spraying onto a cloth or sponge rather than into the room. Those habits make a damp-mopping routine more comfortable and reduce unnecessary airborne exposure.
Place a doormat at each exterior door, use felt pads under furniture legs, and consider a no-shoes rule for the kitchen. These small choices reduce the grit and transfer that force homeowners to clean aggressively. More practical ideas are available in these eco-friendly cleaning tips.
Maintenance protects the floor's finish and delays the need for refinishing or replacement. If dullness, stickiness, or lifting keeps returning after you correct the method, stop experimenting with stronger remedies and have the flooring assessed.
Aquastar Cleaning Services, LLC provides recurring housekeeping, deep cleaning, move-in and move-out cleaning, and post-construction cleanup for homes in Kennesaw and North Atlanta. Their trained, insured, and bonded teams can build a floor-care routine around linoleum, children, pets, and your preferred eco-friendly products. Visit Aquastar Cleaning Services, LLC to request a quote or create a cleaning plan.