


You wipe the fridge door after dinner, step back, and the streaks look worse than when you started. The fingerprints around the handle are still there, and now there's a cloudy band across the middle. That's the moment many turn to a stronger spray, vinegar, or whatever worked on the sink.
Stop there. To clean a stainless steel fridge safely, you don't start with a product. You start with your finish and your manual. A traditional stainless door and a fingerprint-resistant door can look almost identical in the store, but they don't tolerate the same cleaners. Pick for your exact model first, and the cleaning itself gets simple.
Safe Products for Each Stainless Finish
Most homes need only mild dish soap, warm water, a soft microfiber cloth, and a second dry cloth. That's your routine kit. Anything stronger is a special case, not the starting point.
The finish decides what's allowed. Traditional stainless steel is bare brushed metal, so it tolerates a few more options. Fingerprint-resistant stainless has a clear coat over the metal. Harsh products, gritty cloths, and paper towels can dull or scratch that coat, and you can't polish the damage away.
How to Tell Which Finish You Have
Check the door label and the care section of your manual first. Then look at the sheen. Traditional stainless reflects light evenly and shows a faint grain. Fingerprint-resistant doors look more matte and may feel slightly textured.
Say you find the words "fingerprint resistant" on the door sticker. That one detail changes your plan. You skip the polish under the sink and stay with mild soap only.
Manufacturer advice doesn't agree with generic recipes. GE's refrigerator care guidance allows only mild soap, warm water, and a soft cloth for refrigerator exteriors, and Maytag warns that water left to dry can discolor stainless because water may contain iron. "Natural" doesn't automatically mean finish-safe, either. Vinegar suits some surfaces, but GE and Maytag discourage it on specified finishes.
If you're sorting out other kitchen surfaces at the same time, you can compare cleaning products for tile floors the same way, by surface first and product second. Our overview of eco-friendly cleaning agents and where they fit uses that same surface-first logic.
Cleaners by use and finish safety
| Product | Best use | Exterior safe? | Watch-outs |
|---|---|---|---|
| Mild liquid dish soap in warm water | Routine fingerprints and grease | Yes | Rinse residue to prevent streaks |
| Manufacturer-labeled stainless cleaner | Polishing a traditional finish | Yes, if the label matches your model | Follow the label; some products are for one finish type only |
| Soft microfiber cloth, dry | Final buff and drying | Yes | Use a clean cloth; gritty cloths scratch |
| White vinegar, diluted | Hard-water film on some traditional finishes | Only if the manual allows | GE and Maytag discourage it on specified finishes; test first |
| Bleach solution, 1 tablespoon unscented per gallon | Interior sanitizing | No, interior only | Never mix with ammonia; replace after 24 hours |
| Baking soda paste | Light stuck-on residue | Yes, gently | Rub with the grain; never scrub hard |
| Ammonia, oven cleaner, chlorine cleaners | None | No | Can damage the finish and leave odors near food |
| Abrasive scouring pads or powders | None | No | Create scratches that dull the surface permanently |
Practical rule: Check the manual, test a hidden spot, then choose from the safest row that does the job.
Practical example: a family with two young children keeps a spray bottle of diluted dish soap under the sink and wipes the handle area weekly. A landlord turning over a rental might use an appliance-labeled cleaner on a traditional door instead. Same fridge shape, different finish, different product.
How to Clean the Exterior Step by Step
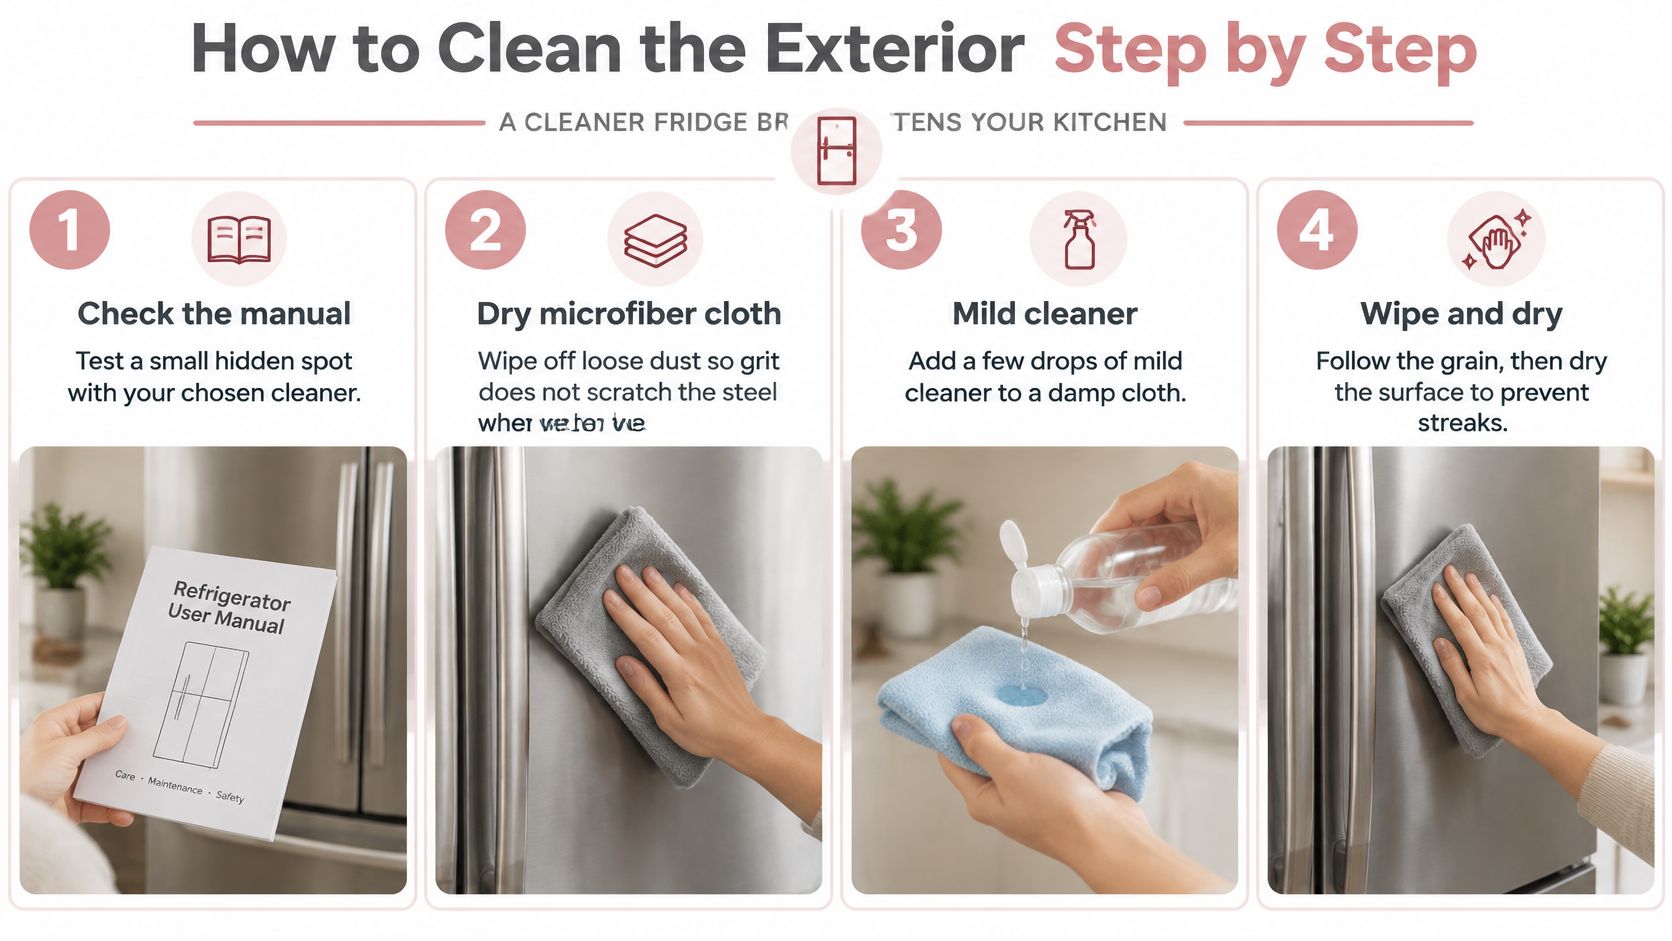
A sticky handprint near the handle and a faint cloudy band across the door usually have different causes. This seven-step routine handles both without harsh products. It takes about five minutes for a normal door, and the order matters. The rinse and dry steps work like rinsing shampoo from your hair. Any residue left behind dries into a film.
The Seven Steps
Check the manual and test a hidden spot. Put a little cleaner on the side edge or low corner and wait a moment. If the sheen changes, that product doesn't go on the front. The common slip is testing on the door center, where a bad reaction stays visible.
Wipe off loose dust with a dry microfiber cloth. Dry grit acts like fine sandpaper once you add water and pressure. Removing it first protects the grain. Skipping this because the door looks clean is how faint scratches appear.
Mix a few drops of mild dish soap in a bowl of warm water. Warm water loosens skin oil and kitchen grease better than cold water. You want a barely sudsy solution, not a sink of foam. Too much soap is the usual cause of cloudy bands later.
Wipe one section at a time, moving with the grain. Look closely and you'll see faint lines running one direction. Follow them. Wiping across the grain or in circles pushes residue into the lines and can leave cross-scratches that catch the light.
Rinse with a cloth dampened in plain water. Wipe away every trace of soap, still following the grain. Leftover detergent dries into streaks, so this step is required. If the cloth feels slick, rinse it and repeat.
Dry fully with a clean, dry microfiber cloth. Work in the same direction and keep going until no damp patches remain. A door left to air-dry almost always shows water spots, because the minerals in the water stay behind as it evaporates.
Inspect under angled light. Stand to the side and let kitchen light rake across the door. You'll spot missed fingerprints and residue that disappear when you look straight on.
A toddler's sticky handprint around the handle after lunch does not need a specialty spray. A soapy microfiber, a rinse wipe, and a dry buff, all with the grain, clear it in under five minutes.
Why This Method Works
You're removing oil, then removing the cleaner, then removing the water. Each step handles one problem. A soft microfiber cloth with mild liquid dish detergent or a cleaner labeled for appliance use works when you wipe with the grain, rinse away residue, and dry fully. Those habits prevent streaks and water spotting. Abrasives, scouring pads, and harsh chemicals can damage finishes or leave odors near food.
A finished door shows an even sheen with no fingerprints, cloudy bands, or wet patches. If you still see prints under angled light, you didn't fully degrease. If you see haze, you left cleaner behind. Neither means the steel is ruined.
Fix Streaks, Fingerprints and Rust Spots
Streaks after cleaning frustrate people most, because the door looked fine while it was wet. In most cases, streaks are leftover soap or cleaner, not damage. That distinction matters. Residue needs a clean-water rewipe. Damage needs you to stop.
Match the Symptom to the Fix
Stainless fridge symptoms, causes and fixes
| Symptom | Likely cause | Fix |
|---|---|---|
| Streaks or cloudy bands | Cleaner or soap residue left on the steel | Rewipe with clean water, then dry with microfiber |
| Water spots or chalky rings | Minerals or iron in water, drying left wet | Dry fully; buff with the grain using a dry cloth |
| Fingerprints after cleaning | Incomplete degreasing | Repeat with mild soap; inspect under angled light |
| Surface rust spot | Iron particles or a scratch trapping moisture | Rub with baking soda paste along the grain, rinse, dry |
| Deep rust or pitting | Corrosion has gone through the finish | Stop; cleaning cannot reverse pitting, so call a repair technician |
| Dull or hazy fingerprint-resistant door | Harsh product or abrasive damaged the clear coat | Stop harsh products; use mild soap only and check the manual |
| Light scratches along the grain | Gritty cloth or abrasive pad | Polish lightly with an appliance-labeled product, following the grain |
Most fixes in the top three rows take two to five minutes. You're just repeating the rinse and dry steps properly. Don't escalate to a stronger chemical when the problem is residue from the last one.
Practical example: you notice a small orange dot near the freezer door hinge. That's likely a surface rust spot, where iron particles or a tiny scratch trapped moisture against the steel. Make a thin baking soda paste with water, rub it gently along the grain with a soft cloth, rinse, and dry. The whole job takes about 15 minutes, and questions about rust chemistry are covered in our guide on whether bleach removes rust.
Pitting is different. Pitting feels rough or looks like tiny dark holes, and it means corrosion has eaten into the finish. No paste or polish reverses that. Scrubbing harder only widens the damaged area, so stop and call a repair technician.
If a mark survives two careful passes with the routine method, stop and check your product, your cloth, and your finish type before trying anything stronger.
That pause saves finishes. A hazy fingerprint-resistant door, for example, often got that way because someone kept applying harsher products to fix haze caused by the product before it. Mild soap and patience won't restore a damaged clear coat, but they'll keep you from making it worse while you check the manual.
Clean the Gasket, Handles and Seams
The flat door panel is rarely the dirty part. Handles, the door gasket, and the seams around the frame collect soil, food residue, and moisture. That's where mold and odors start, and it's the area quick wipe-downs miss.
Practical example: after a humid summer, a black line appears in the folds of the gasket on a rental fridge. The tenant wiped the door panel every week. The panel gleamed. The gasket folds stayed damp and dirty the whole time.
A Short Routine for the Hidden Areas
Brush out the gasket folds. Use a soft brush or an old soft toothbrush to lift loose crumbs from each fold. Dry debris comes out easily now and turns to paste once you add water.
Wash the gasket with warm water and mild dish soap. Work a soft cloth or brush into each fold, one section at a time. You're cleaning a flexible rubber seal, so use light pressure and don't pull it away from the door.
Wipe the handle and its mounting gaps. Skin oil and food residue build up where the handle meets the door and around the screws. Wrap your cloth around a fingertip to reach those edges.
Rinse with plain water and dry every fold. Soap residue in a fold stays damp and attracts more soil. Press a dry cloth into each fold until it comes away dry.
Test the seal with a dollar bill. Close the door on the bill and pull gently. If it slides out with almost no resistance, the seal may be worn and the fridge may be leaking cold air.
Don't put disinfectant on the gasket unless your manual allows it. Rubber seals and finish coatings react to chemicals differently than the door panel does, and residue trapped in a fold sits against the seal for weeks.
Dryness is the hygiene step here. A gasket that's washed but left wet gives mold exactly what it needs. A gasket that's washed, rinsed, and dried fold by fold stays clean far longer between sessions.
Sanitize the Interior Without Damaging the Finish
Practical example: a landlord cleaning between tenants needs the fridge food-safe and odor-free before move-in day. Wiping the shelves isn't enough. The interior needs cleaning first, then sanitizing, in that order.
The Sequence in Order
Move perishables to a cooler and discard anything questionable. If you're unsure about an item, throw it out.
Remove shelves, drawers, and ice trays. Set glass shelves aside to warm up slightly before washing, so hot water doesn't stress cold glass.
Wash removable parts and interior surfaces with hot, soapy water. Scrub dried spills and sticky rings under jars. This step does the actual cleaning.
Rinse everything to remove soap. Soap film left on a shelf ends up against food containers.
Mix your sanitizer and wipe the interior. The USDA guide to removing odors from refrigerators specifies 1 tablespoon of unscented liquid household bleach per 1 gallon of cool, clean water, applied with a clean cloth.
Air-dry or dry completely before reassembly. Put shelves back only when they're fully dry, then reload food.
Soil has to go first for a plain reason. Food particles and grease reduce sanitizer effectiveness, so sanitizer sprayed onto visible grime gives you a false sense of security. If the difference between the terms is fuzzy, our explainer on sanitizers versus disinfectants sorts out when each one applies.
Warnings That Matter
- Never use scented or gel bleach. Use plain, unscented liquid household bleach only.
- Never mix bleach with ammonia. The combination creates dangerous fumes.
- Replace the solution after 24 hours. Yesterday's mix won't sanitize reliably.
- Keep bleach solution off the exterior door. It's an interior sanitizer, not a stainless cleaner, and it can harm the finish.
Practical example: in your own home after a power outage or a forgotten leftovers spill, the same sequence applies. Empty, wash, rinse, sanitize, dry, reload. Skipping straight to step five is the mistake that makes people repeat the whole job.
Maintenance Habits That Keep Stainless Looking New
Light, regular cleaning beats occasional heavy scrubbing. Fresh grease wipes off with a damp cloth. Grease that's sat for a month needs pressure, and pressure is where scratches happen.
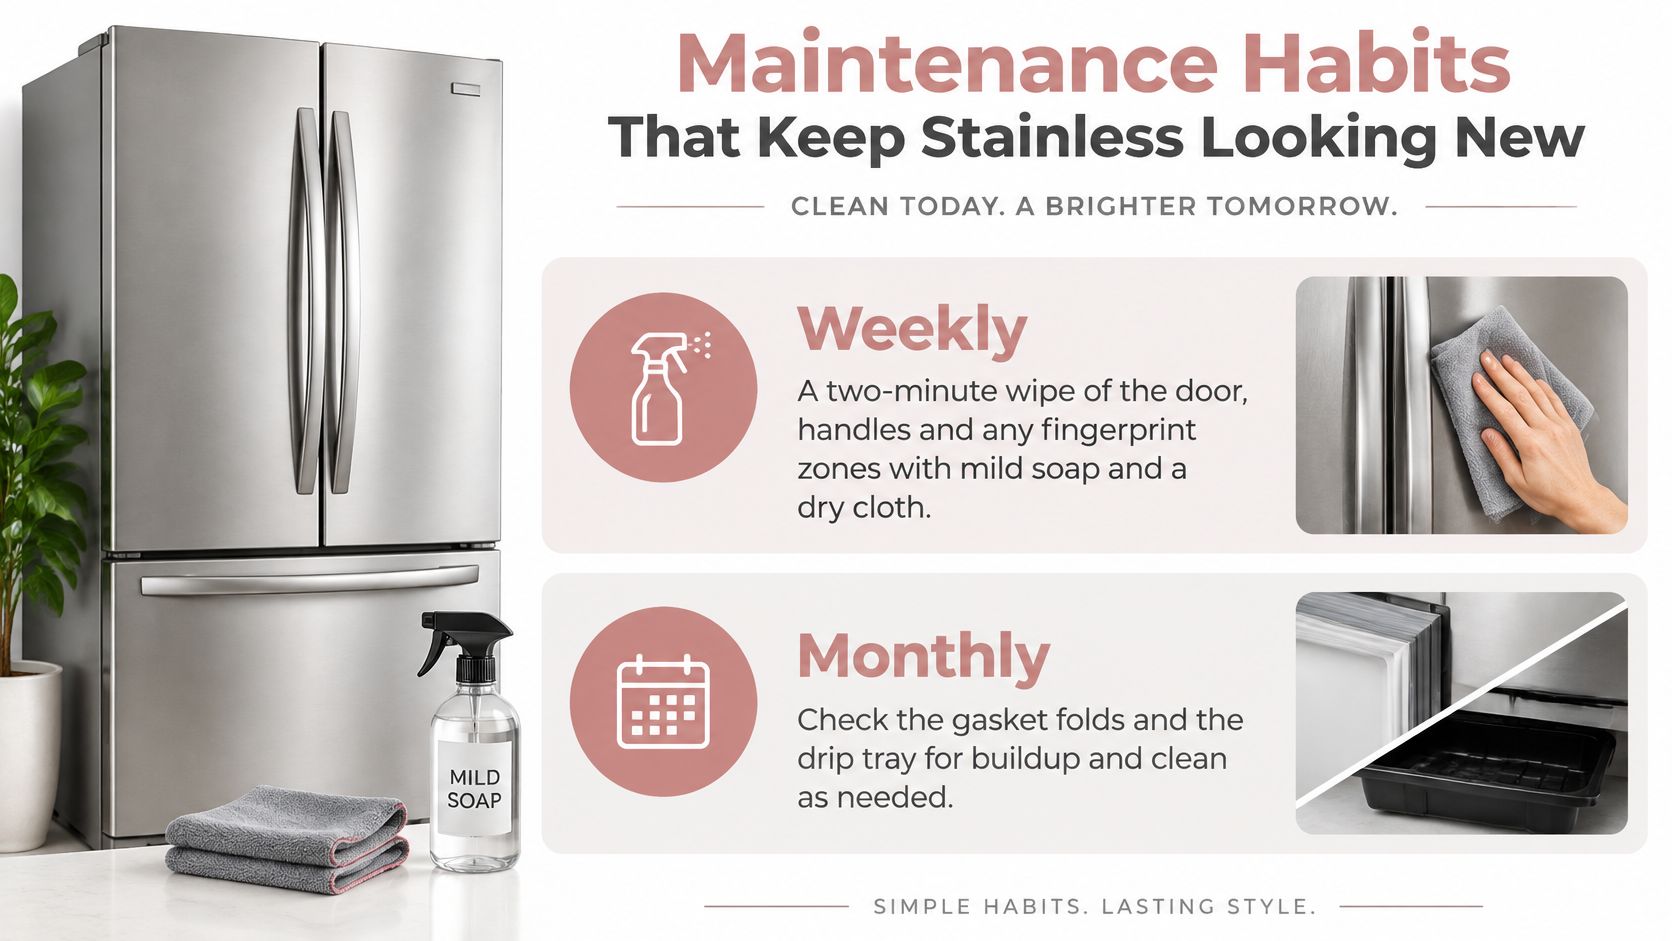
A Schedule You Can Copy
- Weekly: Give the door, handles, and fingerprint zones a two-minute wipe with mild soap, then dry with a clean cloth.
- Monthly: Check the gasket folds and drip area for crumbs or moisture, and clean them if you find any.
- Quarterly: Do the full exterior routine and look closely for rust spots near hinges and the water dispenser.
Practical example: a family with two dogs wipes the handle every Sunday while the coffee brews. It takes two minutes, and they rarely need a deep clean because paw-height smudges and nose prints never build up. The fridge care fits inside the rhythm of a regular whole-kitchen cleaning routine rather than becoming its own project.
A well-kept stainless appliance stays in service for many years, so the finish is worth protecting. Treat each routine wipe as a quick inspection, too. You'll notice early rust spots, a gasket that's starting to stay damp, or a seal that's loosening while the fix is still small and cheap.
Decide Whether to Clean It Yourself or Hire Help
Use a simple decision rule. Clean it yourself if your manual lists your products as safe, the surface shows only fingerprints and light residue, and you see no pitting. That's routine work, and the steps you've just read handle it.
Hire help if rust has pitted the steel, a fingerprint-resistant coating stays dull despite mild cleaning, grease has built up deep in the seals, or you face a move-out clean with a hard deadline. At that point you're no longer cleaning. You're assessing damage or racing a clock.
What One Mistake Costs
A ruined clear coat or a torn gasket costs more than a professional visit. So does a failed move-out inspection that sends you back to redo the kitchen. The same logic applies to anyone preparing rental homes for arriving guests, where the fridge has to look right and be food-safe on a fixed schedule.
Practical example: a Marietta renter has a dull door, a grimy gasket, and a move-out deadline on Friday. Instead of guessing with a stronger product, the renter requests a free estimate first, then decides with a real number in hand. That's the honest comparison, your time and risk against a quote.
We offer refrigerator interior cleaning as an add-on, along with oven, garage, basement, and window cleaning and move-in/move-out cleaning, and we provide free cleaning estimates. Our cleaning team is professional, trained, and insured, so you can weigh that option against the DIY steps, including a kitchen deep cleaning service when the whole room needs attention.
Check the manual, test first, and stop when the finish shows damage.
If your fridge needs more than a routine wipe, or you're facing a move-out deadline in Kennesaw or North Atlanta, we can handle the refrigerator interior as part of a deep clean or move-in/move-out visit, with a free estimate before you commit. Visit Aquastar Cleaning Services, LLC to request your estimate and let our trained, insured team take the guesswork out of your stainless finish.